Sun Requirements: What Full Sun, Part Shade, and Full Shade Actually Mean

“Full sun,” “part shade,” “full shade” — every plant tag has one of these. Here’s what they actually mean, how to measure yours, and why planting in the wrong light explains a lot of garden failures.

Every plant tag, seed packet, and plant description specifies a light requirement. “Full sun.” “Part shade.” “Dappled light.” “Tolerates full shade.”

These terms sound definitive. They are less precise than they appear, and more important than most beginners realize. A plant placed in the wrong light condition produces poor results regardless of soil, water, or fertilizer. Light is not optional. It is the energy source for everything.

Here’s what each term actually means, how to assess the light in your garden, and what happens when the match isn’t right.

☀️ Full Sun

Definition: six or more hours of direct sunlight per day.

This is the requirement for most vegetable crops and many popular annuals and perennials. Tomatoes, peppers, beans, squash, cucumbers, and basil are full-sun plants. They need the energy from six-plus hours of direct sun to fuel the photosynthesis that produces the fruit, leaves, or flowers you’re growing them for.

What happens in less light: reduced yields, leggy growth (thin, stretched, sparse-leaved stems), delayed fruiting, increased disease susceptibility. A tomato plant in partial shade produces a fraction of the fruit of one in full sun. The plant is working with less energy and allocates it accordingly.

⛅ Part Sun / Part Shade

Definition: three to six hours of direct sun per day.

Part sun and part shade technically describe the same light condition. In practice, “part sun” suggests a plant that prefers more sun within this range, while “part shade” suggests one that prefers less. For most practical purposes, treat them as equivalent.

Plants suited to this range tolerate both conditions but usually prefer one end or the other. Lettuce, spinach, and most leafy greens do well in part shade — they can actually bolt (go to seed prematurely) in too much heat and sun. Many herbs and some fruiting plants manage in part sun.

🌚 Full Shade

Definition: fewer than three hours of direct sun per day, or no direct sun at all.

Very few edible plants thrive in full shade. This is primarily the territory of ornamental shade plants — hostas, ferns, astilbe, impatiens. If your intended vegetable garden location receives less than three hours of sun, the honest answer is that it is not a vegetable garden location.

The workaround: containers that can be moved to sunnier spots. A patio or deck that receives six hours of sun can host containers even when the ground nearby is shaded.

🔍 How to Assess Your Light

The most reliable method is observation rather than assumption. Spend one full day watching the light in your intended garden area.

Note when direct sun first hits the area in the morning, when shadows from structures or trees fall across it, and when direct sun ends in the afternoon. Count the hours of direct sun exposure. That is your light condition.

Common mistakes in assessing light: assuming that a south-facing location is full sun without checking for shadows from nearby trees, fences, or buildings. Shade from a neighbor’s tall fence may shade the area precisely during peak sun hours. What looks open may not be.

Check at midsummer conditions. The sun is higher in summer than in spring or fall. An area that receives six hours in July may receive only four in May. Vegetable gardens need the summer assessment.

🛒 Tools Worth Having

  • Sun calculator / light meter — Measures cumulative light exposure over the day and reports whether a location qualifies as full sun, part shade, or shade. More precise than observation for uncertain locations.
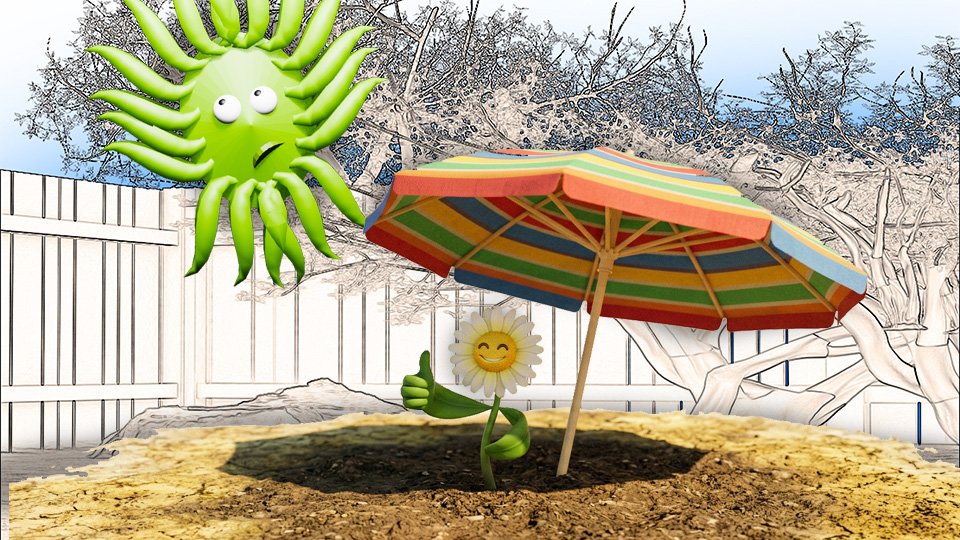
  • Shade cloth — For providing partial shade to plants that need it in unexpectedly sunny spots. Also useful for protecting heat-sensitive plants during summer.

As an Amazon affiliate, I earn from each qualifying purchase. Thank you for supporting TangleWicket.

✨ The Short Version

Full sun: six or more hours. Part sun/shade: three to six hours. Full shade: fewer than three. Vegetables need full sun. Leafy greens tolerate part shade. Almost nothing edible thrives in full shade.

Assess the actual light in your intended location rather than assuming. The observation is worth doing once correctly.

Tom Brownthumb planted tomatoes in a spot he described as “sunny enough.” It was not sunny enough. It was, in retrospect, a fern location. And the one resulting tomato was surprisingly pale.

📚 Related Reads


Tanglewicket is part of the John D Reinhart content family. Writer, illustrator, videographer, and accidental filmmaker — find the whole story at JohnDReinhart.com.

33008

©2026 John D Reinhart / tanglewicket.com/. All rights reserved.

Ground Cover Plants That Do Your Weeding For You

The best weed control strategy is a plant that outcompetes weeds for space. Ground covers do your weeding for you — permanently. Here’s which ones work and where.

The most elegant solution to weeds is not a tool or a chemical or a technique. It’s a plant.

Ground cover plants spread to fill available space, outcompete weeds for light and soil, and once established, require almost no maintenance. They are the passive income of weed management: a one-time investment that pays back indefinitely.

Here’s how ground covers work as weed management — and the specific plants worth considering for different situations.

🤔 Why Ground Covers Work

Weeds colonize bare ground. Ground cover plants occupy that bare ground permanently and densely enough that weeds cannot establish. The ground cover is playing the same game as the weed — first to occupy the space wins — but the ground cover wins by design.

The establishment period: ground covers need one to two seasons to knit together into a dense weed-suppressing mat. During this period, the ground between newly planted ground cover needs mulching and hand weeding. After establishment, maintenance drops dramatically.

This is the key patience point. A newly planted ground cover does not suppress weeds immediately. It suppresses them eventually, and permanently. The investment is upfront.

🌿 Ground Covers by Situation

  • Shady areas under trees: pachysandra, vinca minor (periwinkle), sweet woodruff, wild ginger, liriope. These are the plants that solve the “nothing grows under the tree” problem that invites weeds. Dense, low-maintenance, and suited to the dry shade that most plants dislike.
  • Sunny slopes and banks: creeping juniper, cotoneaster, crown vetch, sedum. Slopes are difficult to mulch and impossible to mow efficiently. A woody or spreading ground cover stabilizes the slope and eliminates the mowing and weeding problem simultaneously.
  • Between stepping stones and in paths: creeping thyme, creeping phlox, brass buttons, Irish moss. Low-growing plants that tolerate light foot traffic, fill gaps between pavers, and eliminate the chronic weeding that path cracks require.
  • Garden bed edges and borders: lamb’s ear, ajuga, creeping Jenny, hostas in shade. Dense edge plants crowd out weeds at the bed margin where mulch is harder to maintain and hand weeding is tedious.

🚧 The Caution: Aggressive Spreaders

Some ground covers are so effective at outcompeting weeds that they outcompete everything else too. Mint, English ivy, and vinca are notorious for spreading beyond intended areas.

The rule: check the plant’s spread rate and invasiveness for your region before planting. A plant labeled “invasive” in your area should not be planted as a ground cover regardless of how effective it would be. It will eventually become the problem it was supposed to solve.

🛒 Ground Covers Worth Planting

  • Creeping thyme plants — Fragrant, low-growing, tolerates foot traffic, flowers in summer. Excellent between pavers and in sunny path edges.
  • Pachysandra starter plants — The classic shade ground cover. Dense, evergreen, fully weed-suppressing once established.
  • Sedum groundcover mix — For sunny slopes and dry areas. Drought-tolerant, low-maintenance, attractive.
  • Ajuga starter plants — Fast-spreading, shade-tolerant, attractive foliage and spring flowers. Excellent edge plant.

As an Amazon affiliate, I earn from each qualifying purchase. Thank you for supporting TangleWicket.

✨ The Short Version

Ground covers occupy space that weeds would otherwise claim. Establish them once, maintain during the establishment period, and let them suppress weeds permanently without further intervention.

Match the plant to the situation: shade, sun, slope, or path. Check invasiveness before planting.

Tom Brownthumb planted creeping thyme between his stepping stones. Three years later he has fragrant path edges, no weeds in the cracks, and occasional visitors who ask what smells so good.

📚 Related Reads


34007

Tanglewicket is part of the John D Reinhart content family. Writer, illustrator, videographer, and accidental filmmaker — find the whole story at JohnDReinhart.com.

©2026 John D Reinhart / tanglewicket.com/. All rights reserved.

Mulch: The Weed’s Worst Enemy

Mulch is the most passive and most effective weed control strategy available. It works while you’re doing something else. Here’s how it works and what to use

Most weed control strategies require effort: pulling, hoeing, spraying, digging. Mulch requires you to put material on the ground once and then do something more enjoyable with your time while the mulch does the work.

Mulch is not the most exciting gardening topic. It just happens to be one of the most effective ones. A properly mulched garden has significantly fewer weeds than an unmulched garden, retains moisture, regulates soil temperature, and improves soil structure as it decomposes.

Here’s why mulch works, what to use, and how to apply it correctly — because doing it wrong is surprisingly common and remarkably easy to avoid.

🤔 Why Mulch Stops Weeds

Weed seeds need light to germinate. Most weed seeds in the soil are waiting for exposure to light before they activate. A layer of mulch blocks that light.

The mechanism: two to three inches of mulch prevents the majority of weed seeds from receiving the light trigger they need. Seeds that do germinate under mulch run out of energy before reaching the surface. The mulch layer is a darkness barrier that the seed bank cannot penetrate.

What mulch cannot do: stop established weeds that were already in the ground before mulching, or weeds that blow in from outside and land on top of the mulch. It prevents germination from the soil seed bank, not from above-ground seed arrival.

🌿 What to Use

  • Straw. Lightweight, easy to apply, cheap, decomposes in one season and improves soil. Excellent for vegetable gardens. Make sure it’s straw (hollow stems from grain crops) not hay (contains seeds) — hay mulch introduces exactly the weed problem you’re trying to prevent.
  • Wood chips. Longer-lasting than straw, excellent for paths and permanent beds, attractive. Use only composted or aged chips in vegetable beds — fresh wood chips can tie up soil nitrogen as they decompose. For ornamental beds and paths, fresh chips are fine.
  • Shredded leaves. Free if you have trees. Excellent mulch material that decomposes to add organic matter to the soil. Shred before using — whole leaves can mat together and repel water.
  • Compost. Doubles as mulch and soil amendment. Apply two to three inches over beds in spring. As it works into the soil it feeds the plants it’s protecting from weeds.
  • Newspaper or cardboard. The kill mulch for starting new beds or suppressing persistent weeds. Lay several layers, wet thoroughly, cover with another mulch material. Blocks light completely and smothers established weeds as it decomposes.

🚧 What Not to Use

  • Hay. Full of seeds. Mulching with hay is planting next year’s weeds.
  • Rubber mulch. Made from recycled tires. Does not decompose, does not improve soil, can leach chemicals. Appropriate for playgrounds. Not for gardens.
  • Fresh wood chips directly against plant stems. Creates humid conditions that encourage rot and disease at the soil line. Keep mulch a few inches away from plant stems and tree trunks.

📏 How Much to Apply

Two to three inches is the effective depth for weed suppression. Less than two inches and light penetrates. More than three inches in vegetable beds and moisture and air exchange to roots can be affected.

Apply around plants, not touching the stems. Leave a gap of a few inches around each plant base. Replenish as the mulch decomposes — once per season in most cases.

🛒 Mulch Worth Having

  • Straw bale for garden mulch — The ideal vegetable garden mulch. Easy to spread, decomposes to improve soil, effective weed suppression.
  • Shredded hardwood mulch — For ornamental beds and paths. Longer-lasting than straw, attractive, effective.
  • Cardboard for kill mulching — For smothering established weeds or starting new beds. Layer under other mulch for complete light blocking.

As an Amazon affiliate, I earn from each qualifying purchase. Thank you for supporting TangleWicket.

✨ The Short Version

Mulch blocks light. No light means no germination. Two to three inches of the right material suppresses the majority of weeds from the soil seed bank while retaining moisture and improving soil.

Use straw in vegetable beds. Wood chips in ornamental beds and paths. Cardboard under everything for kill mulching problem areas.

Tom Brownthumb mulched his beds for the first time in year three. His weeding time in year four dropped by roughly eighty percent. He uses a lot of straw now.

📚 Related Reads


Tanglewicket is part of the John D Reinhart content family. Writer, illustrator, videographer, and accidental filmmaker — find the whole story at JohnDReinhart.com.

34005

©2026 John D Reinhart / tanglewicket.com/. All rights reserved.

Why Weeds Grow Back in the Same Spot

The same weed keeps coming back in the same spot. This feels personal. It isn’t. Here’s the biology behind the repeat appearance — and how to break the cycle.

There is a weed in your garden. You remove it. Two weeks later, it is back in the same spot. You remove it again. It comes back again. You begin to suspect the weed has opinions about you specifically.

It doesn’t. It has a root system.

Here’s exactly why certain weeds return to the same location repeatedly — and what you need to do differently to actually stop them.

🌱 Reason One: You Left the Root

The most common reason. Perennial weeds — dandelions, dock, bindweed, creeping Charlie, thistle — store energy and regenerative capacity in their roots. When you remove the above-ground portion and leave the root, you’ve done the horticultural equivalent of cutting your hair. The root regenerates the plant from exactly the same spot.

Dandelions: have a taproot that can extend twelve inches or more into the soil. Remove the top two inches and the remaining ten inches regenerate the plant. The new dandelion appears in the same location because the same root is still there.

Bindweed and creeping Charlie: spread through horizontal underground rhizomes – roots that grow sideways. Each node on the rhizome is a potential new plant. Cut the above-ground growth and each node below ground produces a new shoot in the same area.

The fix: complete root removal with the right tool. For taproots, a dandelion digger that extracts the full depth. For spreading rhizomes, repeated cutting at the surface over several seasons to exhaust the root reserves, or targeted herbicide.

🌱 Reason Two: Self-Seeding from the Parent Plant

Annual weeds that set seed before removal produce seeds that fall at the base of the parent plant — right back in the same spot. The parent plant is gone but the next generation is already in the soil underneath where it stood.

The fix: remove before flowering. An annual weed pulled before it produces seed breaks the cycle at the same location. An annual weed pulled after seeding guarantees the same weed in the same spot next season.

🌱 Reason Three: Favorable Conditions in That Spot

Some spots in a garden have characteristics that favor specific weeds. A low spot that holds moisture favors moisture-loving weeds. A compacted path edge favors plantain, which thrives in compacted soil. An area of disturbed soil repeatedly favors annual weeds whose seeds are abundant in your soil seed bank.

The fix: identify why that spot is favorable and change the condition where possible. Compaction favors certain weeds — aerating and amending the soil changes the competitive advantage. Low wet spots — improve drainage or plant something that genuinely wants wet conditions.

🌱 Reason Four: Seed Rain from a Nearby Source

A neighbor’s dandelion sends seeds onto your property. A mature thistle in the alley deposits seeds in the adjacent bed. A wind-blown seed lands in the same spot several seasons in a row because the conditions there are consistently favorable.

The fix: mulch to prevent germination and remove weeds before they seed to reduce the local seed load. You can’t control your neighbor’s weeds. You can control the conditions in your own garden.

🛒 The Tools That Solve the Root Problem

As an Amazon affiliate, I earn from each qualifying purchase. Thank you for supporting TangleWicket.

✨ The Short Version

Weeds grow back in the same spot because the root is still there, the seeds from the parent plant landed there, that spot has favorable conditions, or new seeds are arriving from nearby sources.

Remove the complete root. Remove before seeding. Mulch to prevent germination. Fix the conditions that make specific spots weed-friendly.

Tom Brownthumb had a dandelion return in the same spot fourteen times. He counted. On the fifteenth attempt he used a taproot weeder. It has not returned.

📚 Related Reads


Tanglewicket is part of the John D Reinhart content family. Writer, illustrator, videographer, and accidental filmmaker — find the whole story at JohnDReinhart.com.

34008

©2026 John D Reinhart / tanglewicket.com/. All rights reserved.

Why Pulling Weeds Makes More Weeds

Pulling weeds sometimes makes more weeds. This sounds impossible and is completely true. Here’s the biology behind it — and how to weed in ways that don’t backfire.

You spent a Saturday pulling weeds. The garden looked excellent. Two weeks later it looked worse than before you started. You are confused and demoralized and wondering why you bothered.

What you may have done, without knowing it, is made the problem worse. Not through any failing on your part. Through a combination of weed biology and the unintended consequences of the most natural garden action there is.

Here’s what actually happened — and how to weed in ways that reduce the population rather than stimulating it.

🌱 Mechanism One: Root Fragmentation

Perennial weeds — dandelions, bindweed, creeping Charlie, quackgrass — regenerate from root fragments. This is their survival mechanism. A dandelion taproot broken off two inches below the surface produces two plants where there was one. Bindweed rhizomes (root-like stems that travel sideways just below the soil surface, sprouting new plants as they go) snapped into four pieces produce four plants.

What happened: you pulled enthusiastically. The roots broke. The breaks are in the ground. Each fragment is now a new plant. You didn’t remove the weeds. You propagated them.

The fix: for taprooted weeds, use a weeding tool that goes deep enough to extract the full root. For spreading rhizome weeds, repeated cutting at the surface exhausts the root reserves over time — this takes multiple sessions, not one. Patience is the tool.

🌱 Mechanism Two: Soil Disturbance and Seed Activation

Your garden soil contains a seed bank of dormant weed seeds that can remain viable for years. These seeds need two things to germinate: light and warmth. They are waiting at various depths, and most of them are in the dark.

What happened: pulling weeds disturbs the soil. Disturbed soil brings dormant seeds from below the surface into the top inch of soil where light reaches. You didn’t just pull weeds. You planted the next generation.

The fix: disturb the soil as little as possible when weeding. A hoe that cuts at soil level without turning the soil activates far fewer dormant seeds than hand-pulling with soil disturbance. After weeding, cover the bare ground with mulch immediately to block light from reaching any seeds you did bring up.

🌱 Mechanism Three: Pulling Too Late

An annual weed that has already flowered has already made its seeds. Pulling it at this stage removes the plant but seeds may have already dispersed, or they may be present on the plant and dispersed during the pulling process.

What happened: you pulled a plant that had already seeded, or you shook ripe seeds loose during removal. The plant is gone. The seeds are in the soil.

The fix: weed before flowering. An annual weed caught before it flowers is fully neutralized. An annual weed pulled after seeding is a partial win at best.

✅ How to Weed Without Backfiring

  • Hoe rather than pull when possible. Hoeing cuts weeds at the surface with minimal soil disturbance. Fewer dormant seeds activated.
  • Pull perennials with a tool designed for root extraction. Not your hands, which can’t compete with a well-anchored taproot without breaking it.
  • Mulch immediately after weeding. Cover any disturbed soil before new seeds can germinate in the opening you created.
  • Weed when the soil is moist. Wet soil releases roots more completely than dry soil, reducing fragmentation of perennial roots.
  • Time it right. Annual weeds before flowering. Perennial weeds any time — but with the right tool and complete root removal as the goal.

🛒 Tools That Weed Without Backfiring

  • Stirrup hoe — Minimal soil disturbance, effective on seedling-stage annual weeds. The correct tool for the most common weeding situation.
  • CobraHead weeder — A curved blade that gets under roots and lifts them with minimal surrounding soil disturbance.
  • Dandelion digger — Deep extraction tool for taprooted perennials. Gets the whole root without the fragment problem.

As an Amazon affiliate, I earn from qualifying purchases. Thank you for supporting TangleWicket.

✨ The Short Version

Pulling weeds makes more weeds when it fragments perennial roots, when it disturbs soil and activates dormant seeds, or when the plant has already seeded.

Hoe instead of pulling when possible. Extract the full root on perennials. Mulch bare ground immediately. Weed before flowering.

Tom Brownthumb once tilled a bed to remove weeds. The following week it looked like a weed nursery. He now hoes. Gently.

📚 Related Reads


Tanglewicket is part of the John D Reinhart content family. Writer, illustrator, videographer, and accidental filmmaker — find the whole story at JohnDReinhart.com.

34003

©2026 John D Reinhart / tanglewicket.com/. All rights reserved.

Annual vs. Perennial Weeds: The Difference That Changes Everything

Annual weeds and perennial weeds need completely different treatment. Pull the wrong one the wrong way and you make it worse. Here’s the distinction that changes everything.

Not all weeds are the same problem. Some complete their entire life cycle in one season, die, and leave only seeds behind. Others have root systems specifically engineered to survive any removal attempt you make and come back stronger.

Treating these two categories the same way is why some gardeners feel like weeding is pointless. They’re applying the right approach to the wrong weed, or the wrong approach to the right weed, and getting discouraging results either way.

Here’s the distinction — what makes each type different, how to identify which you have, and why the treatment that works for one actively makes the other worse.

🌟 Annual Weeds: The Seed Factories

Annual weeds germinate, grow, flower, set seed, and die in a single season. They have no persistent root system. Their entire survival strategy is in their seeds.

Common annuals: lamb’s quarter, chickweed, purslane, crabgrass, annual bluegrass, pigweed, groundsel. Most of the weeds that appear after you turn over soil are annuals — you’ve brought dormant seeds to the surface.

The right approach: remove before they flower and seed. The root system is shallow and dies with the plant. An annual weed pulled or hoed before it sets seed contributes zero seeds to next year’s problem. An annual weed allowed to seed can contribute tens of thousands.

The most important rule for annuals: timing is everything. The plant itself is easily killed. The seed it produces is the problem. Remove it before it flowers and you have broken the cycle.

🔄 Perennial Weeds: The Survivors

Perennial weeds die back in winter and return from their roots in spring. They invest their survival strategy in the root system rather than (or in addition to) seeds.

Common perennials: dandelion, bindweed, creeping Charlie, quackgrass, thistle, dock, plantain, ground elder. These are the weeds that come back no matter how many times you pull them.

Why pulling makes them worse: perennial weeds are designed to regenerate from root fragments. A dandelion taproot broken and left in the soil produces two plants. Bindweed rhizomes (root-like stems that travel sideways just below the soil surface, sprouting new plants as they go) chopped into pieces by a tiller produce a plant from every piece. Aggressive removal without complete extraction multiplies the problem.

The right approach: complete root removal, repeated intervention to exhaust the root, or targeted herbicide on persistent species. Patience. Perennial weeds are not a one-session problem.

🔍 How to Tell Them Apart

  • Pull a small one and examine the root. Annual weeds have thin, shallow root systems that pull out cleanly. Perennials have thick, deep, or horizontal roots that resist pulling or break off.
  • Does it come back from the same spot? Annual weeds that come back are coming from new seeds. Perennial weeds come back from the same root system, in the same spot, from the same plant.
  • Is it there early in spring before you’ve disturbed the soil? Established perennials emerge early from overwintered roots. Annual weeds typically appear after soil disturbance or warming.

🚜 Treatment Summary

  • For annuals: hoe or pull before flowering. Timing is the whole battle.
  • For perennials: remove the complete root system. If you can’t, cut back repeatedly to exhaust root reserves. Mulch heavily to prevent regrowth. Consider targeted herbicide for persistent infestations.

🛒 Tools for Each

  • Stirrup hoe for annuals — The ideal tool for dispatching annual weeds at seedling stage. Fast, efficient, doesn’t disturb the soil significantly.
  • Taproot weeder for dandelions — For removing the full taproot of dandelions and other taprooted perennials without breaking it.
  • Long-handled weeder for deep roots — For perennials with deep or spreading root systems. More leverage than a trowel, less back strain than kneeling.

As an Amazon affiliate, I earn from each qualifying purchase. Thank you for supporting TangleWicket.

✨ The Short Version

Annual weeds die each season. Kill them before they seed and you break the cycle. Perennial weeds live in the root and return from it. Remove the complete root or exhaust it through repeated cutting.

Same symptom, completely different biology, completely different treatment.

Tom Brownthumb spent three seasons pulling dandelion tops and leaving the roots. He had magnificent dandelion roots. And magnificent dandelions.

📚 Related Reads


Tanglewicket is part of the John D Reinhart content family. Writer, illustrator, videographer, and accidental filmmaker — find the whole story at JohnDReinhart.com.

34002

©2026 John D Reinhart / tanglewicket.com/. All rights reserved.

Why Weeds Win — and How to Actually Stop Them

Weeds are not a moral failing. They are a biological system doing exactly what it evolved to do. Here’s how that system works — and the approach that actually stops it.

Weeds are not lazy gardeners’ punishment. They are not a sign that you’re doing it wrong. They are one of the most successful biological strategies in the history of plant life, and they have been refining that strategy for considerably longer than you have been trying to stop them.

Understanding why weeds are so relentlessly effective is the first step toward managing them efficiently. Fighting a system you don’t understand is how people spend entire weekends pulling dandelions and find more dandelions the following Saturday.

Here’s how weeds work, why they always seem to come back, and the approach that actually reduces them over time rather than just rearranging them.

🤔 Why Weeds Are So Good at This

  • Prolific seed production. A single dandelion produces up to 15,000 seeds per year. A lamb’s quarter plant can produce 75,000. A pigweed: 100,000 or more. These are not typos. Each seed is viable and mobile — carried by wind, water, birds, and soil movement. The weed population in your garden soil right now, waiting for the right conditions, is enormous.
  • Seeds that wait. Weed seeds can remain dormant in soil for years — sometimes decades — waiting for the conditions that trigger germination. Disturb the soil and you bring dormant seeds to the surface where light and warmth activate them. This is why tilling a garden reliably produces a flush of weeds: you’ve promoted the seed bank.
  • Fast germination and growth. Most weeds germinate and establish faster than garden plants. They are optimized for colonizing disturbed ground quickly before anything else can claim it. This is their evolutionary purpose — bare soil is temporary in nature, and weeds are the first response.
  • Tough root systems. Perennial weeds develop root systems specifically designed to survive removal. Dandelions have a long taproot. Bindweed spreads through horizontal underground rhizomes (root-like stems that travel sideways just below the soil surface, sprouting new plants as they go). Creeping Charlie roots at every node. Break the root and leave a piece in the ground, and the piece grows back.

🚫 The Three Weed Management Principles

Principle One: Don’t feed the problem. Every weed that goes to seed in your garden deposits hundreds or thousands of new seeds in your soil. The single most impactful weed management habit is removing weeds before they flower and seed. A weed that never seeds cannot add to the soil’s seed bank.

Principle Two: Don’t disturb the soil more than necessary. Every time you till or deeply cultivate, you bring dormant seeds to the surface. No-till or minimal-till approaches, combined with mulch, dramatically reduce weed germination. The soil’s seed bank is deep; surface disturbance is what activates it.

Principle Three: Cover the ground. Bare soil is an invitation. Weeds evolved to colonize it. A garden where the ground is covered — by mulch, by dense planting, by ground covers — leaves no vacancy for weeds. Cover the ground and weeds have nowhere to establish.

🕒 The Timing Advantage

Weeds are easiest to kill when they are small. A weed seedling severed just below the soil surface by a hoe dies in minutes. A weed with an established root system fights back.

Hoe regularly, before weeds establish. A stirrup hoe run through the bed every week or two, when weeds are at the seedling stage, takes twenty minutes and prevents the problem entirely. The same task done after weeds have established takes two hours and produces less complete results.

The best weed management is not reactive. It is consistent, early, and timed to the weed’s life cycle. Remove before flowering. Hoe before establishing. Cover before germinating.

🛒 The Weed Management Kit

  • Stirrup hoe — The primary prevention tool. Cuts weeds at seedling stage before they establish. Cuts on both push and pull stroke. The most efficient weeding tool available.
  • Garden mulch — Applied two to three inches deep, blocks light from reaching weed seeds and prevents the majority from germinating. The passive prevention strategy that works while you do other things.
  • Dandelion weeder / taproot tool — For removing established taprooted weeds without leaving root fragments that regrow.
  • Landscape fabric for paths — For permanent weed suppression in paths and non-planting areas. Covers ground where weeds would otherwise establish.

As an Amazon affiliate, I earn from each qualifying purchase. Thank you for supporting TangleWicket.

✨ The Short Version

Weeds win because they produce enormous numbers of seeds, those seeds wait patiently in your soil, and weeds germinate faster than garden plants. They are not beatable. They are manageable.

Remove before seeding. Hoe before establishing. Mulch to prevent germination. Disturb the soil as little as possible.

Tom Brownthumb once let a patch of lamb’s quarter go to seed in August. He is still finding lamb’s quarter in April three years later. The math on 75,000 seeds per plant is not theoretical.

📚 Related Reads


Tanglewicket is part of the John D Reinhart content family. Writer, illustrator, videographer, and accidental filmmaker — find the whole story at JohnDReinhart.com.

34001

©2026 John D Reinhart / tanglewicket.com/. All rights reserved.

How to Keep Garden Tools From Rusting (One Easy Step)

Garden tools rust because of one thing: moisture left on metal. Here’s how to prevent it in about thirty seconds per tool — and how to reverse it when it’s already happened.

Garden tools rust. This is not a mystery. Metal plus moisture plus oxygen equals rust, and garden tools spend their lives around all three. The question is not whether it will happen but how fast, and the answer to that is largely within your control.

The good news: preventing rust requires about thirty seconds per tool after each use. The even better news: rust that has already formed can usually be reversed with a bit more effort. The bad news: most people skip the thirty seconds until the damage is done.

Here’s the system. It takes almost no time and keeps tools working for decades instead of seasons.

💧 Why Tools Rust

Rust forms when iron (in steel) reacts with oxygen in the presence of moisture. Wet soil, rain, dew, and humidity are all sufficient moisture sources. A tool left with soil on the blade, or a tool stored in a damp shed, is rusting right now.

The specific culprit in most cases: dirty tools. Soil holds moisture against the metal surface long after the visible wetness has dried. A tool cleaned after every use dries fully. A tool put away dirty stays damp.

✅ The Prevention System

After every use, do three things:

  • Clean the blade. Remove soil with a stiff brush, a rag, or a plunge into a bucket of coarse sand kept near the garden. The goal is bare metal, not decorative cleanliness.
  • Dry completely. Wipe the blade dry with a rag. If the tool is wet from rain or morning dew, let it air dry before storing rather than putting it away damp.
  • Apply a thin oil coat. A quick wipe with an oily rag — linseed oil, motor oil, WD-40 — creates a barrier between the metal and the moisture in the air. A very thin coat is all that’s needed. You’re not lubricating machinery. You’re sealing metal from air.

That’s it. Thirty seconds. Tools treated this way after every use will still be sharp and clean after twenty years.

🩶 The Sand Bucket Method

Keep a five-gallon bucket filled with coarse builder’s sand mixed with a cup of motor oil near where you store your tools. After use, plunge the metal blade into the sand several times.

The sand cleans soil off the blade. The oil coats the metal. In one motion, you’ve cleaned and oiled the tool. It’s faster than wiping and more thorough. Many experienced gardeners swear by this method.

🔧 Reversing Existing Rust

Light surface rust — a reddish discoloration without pitting — is completely reversible.

  • Steel wool or sandpaper. Rub the rust off with medium-grit sandpaper or steel wool. Work with the grain of the metal. Remove all visible rust, then apply oil immediately to the freshly exposed metal.
  • White vinegar soak. For tools with significant rust, soak in white vinegar for several hours or overnight. The acid dissolves rust. Rinse, dry thoroughly, and oil immediately.
  • Commercial rust remover. For serious cases. Follow the product directions, rinse, dry, oil.

Deep pitting is harder to reverse. A pitted blade can be cleaned and oiled but the structural damage is done. Prevention is genuinely easier than restoration once rust has penetrated the metal surface.

🛒 What to Have on Hand

As an Amazon affiliate, I earn from each qualifying purchase. Thank you for supporting TangleWicket.

✨ The Short Version

Clean after every use. Dry completely. Apply a thin oil coat. Thirty seconds. Twenty more years.

The sand bucket method does all three in one motion and is faster than any alternative.

Tom Brownthumb left a trowel outside for an entire winter. Tom Brownthumb now cleans his tools every single time.

📚 Related Reads


Tanglewicket is part of the John D Reinhart content family. Writer, illustrator, videographer, and accidental filmmaker — find the whole story at JohnDReinhart.com.

31005

©2026 John D Reinhart / tanglewicket.com/. All rights reserved.

How to Store Garden Tools So They Last

Good garden tools can last decades. Most don’t, because of how they’re stored. Here’s the simple system that keeps every tool in your shed working season after season.

Garden tools are an investment. Not a dramatic investment — we’re not talking about jewelry — but a set of quality tools represents real money and represents more real money when you have to replace them every few years because they rusted, warped, or deteriorated in storage.

The good news about tool storage is that doing it correctly is almost embarrassingly simple. The bad news is that most people don’t do it, which is why most sheds contain at least one tool that has seen better decades.

Here’s the complete system — for hanging, organizing, cleaning, and maintaining tools so they’re ready when you need them and last as long as they should.

❌ What Destroys Tools

  • Moisture. The primary enemy. Metal rusts. Wood rots. Tools left on damp ground, stored in a wet shed, or put away with soil still on the blade deteriorate from the inside out. Moisture is the reason tools fail prematurely more than any other factor.
  • UV exposure. Handles left in direct sun dry out and crack. Plastic components become brittle. A tool stored in the sun or leaned against an outside wall ages faster than one stored inside.
  • Physical damage. Tools leaned against walls fall over. Falling tools bend tines, chip blades, and crack handles. Tools thrown in a pile damage each other at contact points. How tools are stored physically affects how long they last.
  • Neglect between uses. Soil left on blades. Wooden handles never oiled. Springs never lubricated. Small maintenance steps skipped indefinitely produce tools that fail at inconvenient moments.

✅ The Storage System

🪝 Step One: Hang Everything

Tools hung off the ground on hooks or a rack stay dry, stay accessible, and don’t damage each other. A wall-mounted tool rack — either a commercial product or hooks screwed into a board — is the single most impactful storage improvement.

Long-handled tools (spades, forks, hoes, rakes) hang from hooks by the handle or sit in a floor-standing rack that holds them upright. Neither method has them touching the floor or leaning against walls where they can fall.

Hand tools (trowels, shears, hand forks) hang from hooks by a hole drilled in the handle, or sit in a bucket of clean dry sand. The bucket method keeps them upright, accessible, and slightly protected against rust.

🚧 Step Two: Clean Before Storing

Every tool that comes in from the garden gets cleaned before storage. Remove soil from metal surfaces. Wipe dry. Apply a thin coat of oil to metal parts. This takes thirty seconds per tool and prevents the majority of rust formation.

Wooden handles benefit from an annual application of linseed oil, which penetrates the grain and prevents drying and cracking. Do this at the end of the season before winter storage. It takes five minutes for an entire shed’s worth of handles.

🏛️ Step Three: Environment Matters

A dry shed or garage is the right storage environment. A damp basement is not. A tool storage area with good airflow stays drier than a sealed space.

For small spaces without a shed: a lidded outdoor storage box in a sheltered location works. Look for one with ventilation to prevent condensation buildup inside. It’s not ideal but it’s better than leaning tools against the house and hoping for the best.

📋 Step Four: End of Season Deep Maintenance

Once a year — the end of the growing season is the natural moment — go through the entire tool collection.

  • Sharpen cutting edges. Spade blades, hoe blades, pruning shears, loppers. A sharp tool does better work and requires less effort. A file or sharpening stone on each cutting edge, following the existing bevel angle.
  • Check handles. Cracks, splinters, or wobble in the handle-to-blade connection mean the handle needs replacement or reinforcement. A loose handle on a sharp-bladed tool is a safety issue.
  • Oil everything. Linseed oil on wooden handles. Light machine oil on springs and pivot points of shears and loppers. Thin protective coat on metal blades.
  • Replace what can’t be saved. A tool with a cracked blade or badly rusted metal beyond recovery is a hazard and a liability. Replace it rather than carrying it into another season.

🛒 Storage Solutions Worth Having

As an Amazon affiliate, I earn from each qualifying purchase. Thank you for supporting TangleWicket.

✨ The Short Version

Hang tools off the ground. Clean them before storing. Keep them in a dry environment. Oil the metal and the handles. Do a deep maintenance pass at the end of the season.

Five habits. Decades of useful tools.

Tom Brownthumb once found a spade in his garden that had been there since the previous owner. It had been there for seven years. He used it as a cautionary tale and a garden border.

📚 Related Reads


Tanglewicket is part of the John D Reinhart content family. Writer, illustrator, videographer, and accidental filmmaker — find the whole story at JohnDReinhart.com.

31010

©2026 John D Reinhart / tanglewicket.com/. All rights reserved.

Why Your Cheap Garden Gloves Are Lying to You

Cheap garden gloves fall apart, slip off, and fail you at the exact moment something sharp happens. Here’s what actually separates a useful glove from one that just looks the part.

The garden center sells garden gloves for three dollars a pair. They come in cheerful colors. They have pictures of flowers on them. They suggest, visually, that gardening is a gentle and pleasant activity for which thin cotton protection is entirely sufficient.

The garden center is not wrong that gardening is pleasant. It is just wrong about the gloves.

Cheap gloves fail in three specific ways — and they always fail at the worst possible moment, which is when you’re elbow-deep in a rosebush or moving a pile of something composted.

❌ How Cheap Gloves Fail

  • They don’t protect. Thin cotton or cheap fabric is not a barrier against thorns, sharp stems, splinters, or the edge of a terracotta pot. It is approximately the same protection as bare skin with a sense of false confidence.
  • They don’t fit. One-size gloves fit no hands well. A loose glove is worse than no glove because it reduces dexterity while providing minimal protection. You end up removing it to do anything precise, which defeats the entire purpose.
  • They don’t last. Cheap fabric tears on the first thorny encounter. The fingertips go first, then the palm. Three dollars buys approximately one season of light use if you’re careful, which defeats the economics.

✅ What Good Gloves Actually Do

A properly made garden glove does three things: protects, fits, and breathes.

  • Leather palm and fingers. Leather is the material that handles thorns, rough edges, and repeated contact with abrasive surfaces. The palm takes most of the abuse in gardening — that’s where the leather should be.
  • Breathable back. Hands sweat. A glove with a fabric or mesh back allows airflow. All-leather gloves are protective but hot for extended wear. The hybrid — leather where you need protection, breathable material where you need comfort — is the right design.
  • Proper fit. Snug enough to retain dexterity, loose enough to remove easily when needed. Women’s-specific gloves exist and are worth buying over men’s gloves resized downward — the proportions are different.

🌹 Specialty Gloves Worth Knowing About

  • Rose and thorn gloves (gauntlets). Extended cuffs that protect the forearm. Essential for working around anything seriously spiky. If you grow roses, brambles, or barberries, these are not optional.
  • Nitrile-coated gloves. For fine work — transplanting, seeding, detailed pruning. The nitrile coating provides grip and light protection without sacrificing the dexterity you need for delicate tasks.
  • Waterproof gloves. For wet work — planting in rain, working with wet soil for extended periods. Regular leather gloves become uncomfortable and eventually deteriorate when soaked repeatedly.

🧹 Glove Care

Leather gloves last for years with minimal maintenance. Let them dry naturally after use — not near a heat source, which cracks the leather. A light application of leather conditioner once or twice a season keeps them supple.

Fabric and nitrile gloves can usually be rinsed clean and air-dried. Check the packaging — some are machine washable.

🛒 The Gloves Worth Having

As an Amazon affiliate, I earn from each qualifying purchase. Thank you for supporting TangleWicket.

✨ The Short Version

Cheap gloves protect nothing and last one season. Good gloves protect your hands, fit properly, and last for years. The economics favor quality from the first purchase.

Leather palm for protection. Breathable back for comfort. Proper fit for dexterity.

Tom Brownthumb gardened bare-handed for three seasons. Tom Brownthumb has some interesting scars.

📚 Related Reads


Tanglewicket is part of the John D Reinhart content family. Writer, illustrator, videographer, and accidental filmmaker — find the whole story at JohnDReinhart.com.

31004

©2026 John D Reinhart / tanglewicket.com/. All rights reserved.