
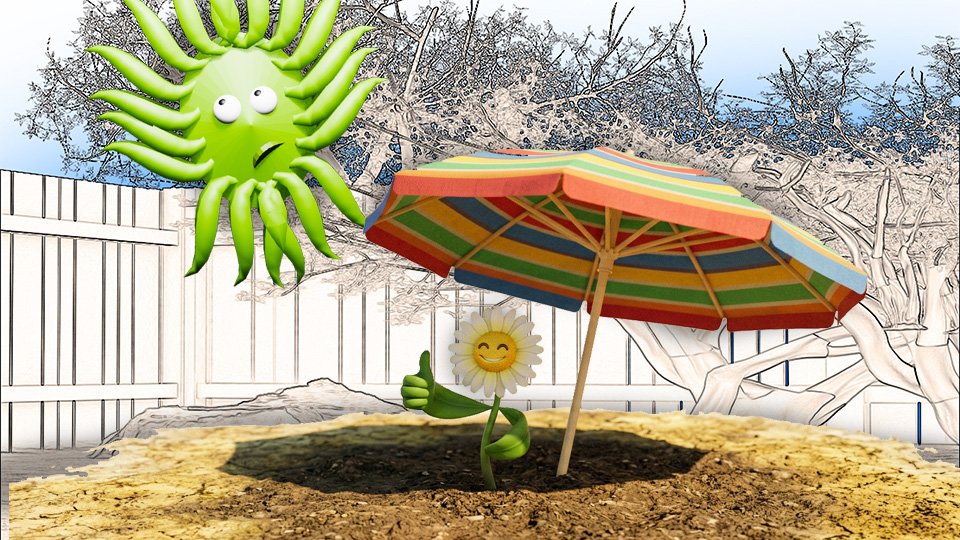
Sun Requirements: What Full Sun, Part Shade, and Full Shade Actually Mean

“Full sun,” “part shade,” “full shade” — every plant tag has one of these. Here’s what they actually mean, how to measure yours, and why planting in the wrong light explains a lot of garden failures.

Every plant tag, seed packet, and plant description specifies a light requirement. “Full sun.” “Part shade.” “Dappled light.” “Tolerates full shade.”

These terms sound definitive. They are less precise than they appear, and more important than most beginners realize. A plant placed in the wrong light condition produces poor results regardless of soil, water, or fertilizer. Light is not optional. It is the energy source for everything.

Here’s what each term actually means, how to assess the light in your garden, and what happens when the match isn’t right.

☀️ Full Sun

Definition: six or more hours of direct sunlight per day.

This is the requirement for most vegetable crops and many popular annuals and perennials. Tomatoes, peppers, beans, squash, cucumbers, and basil are full-sun plants. They need the energy from six-plus hours of direct sun to fuel the photosynthesis that produces the fruit, leaves, or flowers you’re growing them for.

What happens in less light: reduced yields, leggy growth (thin, stretched, sparse-leaved stems), delayed fruiting, increased disease susceptibility. A tomato plant in partial shade produces a fraction of the fruit of one in full sun. The plant is working with less energy and allocates it accordingly.

⛅ Part Sun / Part Shade

Definition: three to six hours of direct sun per day.

Part sun and part shade technically describe the same light condition. In practice, “part sun” suggests a plant that prefers more sun within this range, while “part shade” suggests one that prefers less. For most practical purposes, treat them as equivalent.

Plants suited to this range tolerate both conditions but usually prefer one end or the other. Lettuce, spinach, and most leafy greens do well in part shade — they can actually bolt (go to seed prematurely) in too much heat and sun. Many herbs and some fruiting plants manage in part sun.

🌚 Full Shade

Definition: fewer than three hours of direct sun per day, or no direct sun at all.

Very few edible plants thrive in full shade. This is primarily the territory of ornamental shade plants — hostas, ferns, astilbe, impatiens. If your intended vegetable garden location receives less than three hours of sun, the honest answer is that it is not a vegetable garden location.

The workaround: containers that can be moved to sunnier spots. A patio or deck that receives six hours of sun can host containers even when the ground nearby is shaded.

🔍 How to Assess Your Light

The most reliable method is observation rather than assumption. Spend one full day watching the light in your intended garden area.

Note when direct sun first hits the area in the morning, when shadows from structures or trees fall across it, and when direct sun ends in the afternoon. Count the hours of direct sun exposure. That is your light condition.

Common mistakes in assessing light: assuming that a south-facing location is full sun without checking for shadows from nearby trees, fences, or buildings. Shade from a neighbor’s tall fence may shade the area precisely during peak sun hours. What looks open may not be.

Check at midsummer conditions. The sun is higher in summer than in spring or fall. An area that receives six hours in July may receive only four in May. Vegetable gardens need the summer assessment.

🛒 Tools Worth Having

  • Sun calculator / light meter — Measures cumulative light exposure over the day and reports whether a location qualifies as full sun, part shade, or shade. More precise than observation for uncertain locations.
  • Shade cloth — For providing partial shade to plants that need it in unexpectedly sunny spots. Also useful for protecting heat-sensitive plants during summer.

As an Amazon affiliate, I earn from each qualifying purchase. Thank you for supporting TangleWicket.

✨ The Short Version

Full sun: six or more hours. Part sun/shade: three to six hours. Full shade: fewer than three. Vegetables need full sun. Leafy greens tolerate part shade. Almost nothing edible thrives in full shade.

Assess the actual light in your intended location rather than assuming. The observation is worth doing once correctly.

Tom Brownthumb planted tomatoes in a spot he described as “sunny enough.” It was not sunny enough. It was, in retrospect, a fern location. And the one resulting tomato was surprisingly pale.

📚 Related Reads


TangleWicket is part of the WhistleBump group – find the rest of the family at WhistleBump.com.

33008

©2026 John D Reinhart/Tanglewicket.com – all rights reserved

Why Raised Beds Are Worth Every Penny

Raised beds cost more to set up than in-ground gardens. They also produce better results, require less work over time, and solve most of the problems that frustrate beginner gardeners.

The upfront cost of a raised bed — the lumber or kit, the soil to fill it, the setup time — stops a lot of beginners from choosing this approach. They’re not wrong that it costs more than digging up a patch of ground.

What they’re missing is the long list of problems they’re also not buying.

Here’s what a raised bed actually provides — the honest case for why most serious vegetable gardeners eventually end up with them.

✅ You Control the Soil Completely

The most important advantage. In an in-ground bed, you work with whatever soil your yard has — clay, sand, compacted, depleted, possibly contaminated. Improving it takes seasons of amendment work.

In a raised bed, you build the soil from scratch. A quality mix of topsoil, compost, and coarse material goes in on day one. You start with ideal growing conditions rather than spending years working toward them. For beginners, this eliminates the most common source of garden failure before it starts.

✅ Drainage Is Built In

A raised bed drains by design. Excess water flows out the bottom and sides. Roots are never sitting in waterlogged soil regardless of how much it rains.

For gardeners in clay-heavy areas where drainage is a chronic problem, a raised bed is the solution. The clay soil beneath the bed is irrelevant to the plants growing in the controlled environment above it.

✅ Fewer Weeds

Weed pressure is dramatically lower in a raised bed. You’re not fighting the established weed seed bank in your native soil. A bed filled with quality purchased mix starts nearly weed-free.

Weeds that do appear are easier to remove because the loose, well-structured raised bed soil releases roots with minimal resistance. A weed in raised bed soil comes out cleanly. A weed in compacted clay comes out with a fight and often without its root.

✅ Warmer Soil Earlier

Raised beds warm up faster than ground soil in spring because they’re elevated and exposed to air on all sides. This extends the growing season at the front end, allowing earlier planting of cold-tolerant crops.

The flip side — raised beds also cool faster in fall — is partially mitigated by adding row covers, cold frames, or low tunnels to extend the back end of the season.

✅ Easier on Your Back

A standard raised bed is twelve to eighteen inches high. That’s twelve to eighteen inches less bending than ground-level gardening. A taller raised bed — twenty-four to thirty-six inches — can be worked almost entirely without bending.

This is not a minor consideration. It is the reason many gardeners continue gardening comfortably well into their later years when ground-level work has become impractical.

🚧 The Honest Tradeoffs

  • Upfront cost. The materials and soil for a 4×8 raised bed run $100-$300 depending on lumber quality and soil source. This is real money.
  • More frequent watering. Raised beds dry faster than ground soil. See our watering posts for management strategies.
  • Annual soil topping. Raised bed soil settles and compacts over time. Adding a few inches of compost each season maintains the soil level and fertility.

🛒 Getting Started

  • Cedar raised bed kit 4×8 — Cedar resists rot naturally. A 4×8 bed is the standard starting size — large enough to be productive, small enough to reach the center from either side.
  • Raised bed soil mix — Purpose-formulated for raised beds. Good drainage, good water retention, ready to plant.
  • Landscape fabric for bed liner — Lines the bottom of the bed to suppress weeds growing up from below while allowing drainage.
  • Compost for annual top-dressing — Added each season to maintain soil level and fertility. The maintenance step that keeps a raised bed productive year after year.

As an Amazon affiliate, I earn from qualifying purchases. Thank you for supporting TangleWicket.

✨ The Short Version

Raised beds give you control over soil quality, drainage, and weed pressure that ground gardening cannot match. They warm faster, are easier on your body, and produce better results with less frustration for beginners.

The upfront cost is real. So is the long-term return.

Tom Brownthumb spent two seasons fighting his clay soil before building a raised bed. He has not looked back. His carrots have not either.

📚 Related Reads


TangleWicket is part of the WhistleBump group – find the rest of the family at WhistleBump.com.

33006

©2026 John D Reinhart/Tanglewicket.com – all rights reserved

Composting for People Who Think It’s Complicated (It Isn’t)

Composting is just controlled decomposition. You pile organic matter, it rots, and the result is the best soil amendment available — for free. Here’s the whole uncomplicated picture.

Composting has a reputation for complexity that it doesn’t entirely deserve. There are people who maintain compost with the precision of a science experiment — measuring carbon-to-nitrogen ratios, monitoring temperature, turning on a strict schedule — and their compost is excellent.

There are also people who throw kitchen scraps and garden waste into a pile in the back corner and check on it occasionally, and after a year or two they have excellent compost too. The elaborate version is faster. The casual version requires no effort.

Here’s the honest guide to composting — from the lazy version to the efficient version, with everything in between.

🤔 What Composting Actually Is

Decomposition. Organic matter — food scraps, garden waste, leaves, grass clippings — breaks down through the action of bacteria, fungi, worms, and other organisms. The end product is humus: dark, crumbly, nutrient-rich material that improves any soil it’s added to (not hummus, the paste made from chickpeas).

The process needs four things: organic matter, moisture, oxygen, and time. Everything else is optimization.

🟢 Browns and Greens

The classic compost framework divides materials into two categories:

  • Greens (nitrogen-rich): fresh grass clippings, fruit and vegetable scraps, coffee grounds, fresh plant trimmings. These are high in nitrogen and decompose quickly. Too many greens without browns produces a wet, smelly pile.
  • Browns (carbon-rich): dry leaves, straw, cardboard, paper, wood chips. These are high in carbon and decompose slowly. They provide structure and prevent the pile from compacting into an airless mat.

The rough ratio: two to three parts browns for every one part greens. You don’t need to measure. A pile that smells bad has too many greens. A pile that’s dry and not decomposing has too many browns and needs moisture and green material.

❌ What Not to Compost

  • Meat, fish, bones, and dairy. These decompose and produce compost fine in an enclosed system, but in a backyard pile they attract pests and smell unpleasant. Skip them.
  • Diseased plant material. Disease pathogens can survive in compost that doesn’t reach sufficient temperature. Don’t compost plants that died from a known disease.
  • Dog or cat waste. May contain pathogens harmful to humans. Not appropriate for vegetable garden compost.
  • Weeds that have gone to seed. Unless your pile gets hot enough to kill weed seeds, composting them produces a seed bank you’ll distribute through your garden. When in doubt, dispose of seedy weeds separately.

🔥 Hot vs. Cold Composting

  • Cold composting: pile it and wait. Twelve to twenty-four months for finished compost. No turning, no monitoring, minimal effort. The lazy version that actually works.
  • Hot composting: managed piles that reach 130-160°F through active decomposition. Kills weed seeds and pathogens. Produces finished compost in two to three months. Requires turning every few days and attention to moisture and green/brown balance.

For most beginner gardeners, cold composting is the entry point. Start a pile this season. Use the results next season or the one after. The process requires almost nothing from you.

🛒 The Composting Kit

  • Compost bin with lid — Keeps the pile contained and reduces pest access. A lid maintains moisture during dry weather.
  • Compost tumbler — For faster hot composting with less effort. Tumble to turn rather than pitchfork. Produces finished compost in weeks.
  • Compost thermometer — For hot composting practitioners who want to know when the pile is cooking and when it’s done.
  • Kitchen compost collector with lid — For gathering kitchen scraps before adding them to the outdoor pile. Reduces trips to the compost bin.

As an Amazon affiliate, I earn from each qualified purchase. Thank you for supporting TangleWicket.

✨ The Short Version

Pile organic matter. Keep it moist but not soaked. Add roughly three parts brown material to one part green. Turn occasionally if you want it faster. Wait.

The result is free soil amendment that costs nothing, diverts waste from the trash, and improves your garden more than any product you can buy.

Tom Brownthumb started a compost pile and forgot about it for eighteen months. When he remembered, he had a cubic yard of excellent compost. Negligence, it turned out, was a valid composting strategy.

📚 Related Reads


TangleWicket is part of the WhistleBump group – find the rest of the family at WhistleBump.com.

33007

©2026 John D Reinhart/Tanglewicket.com – all rights reserved
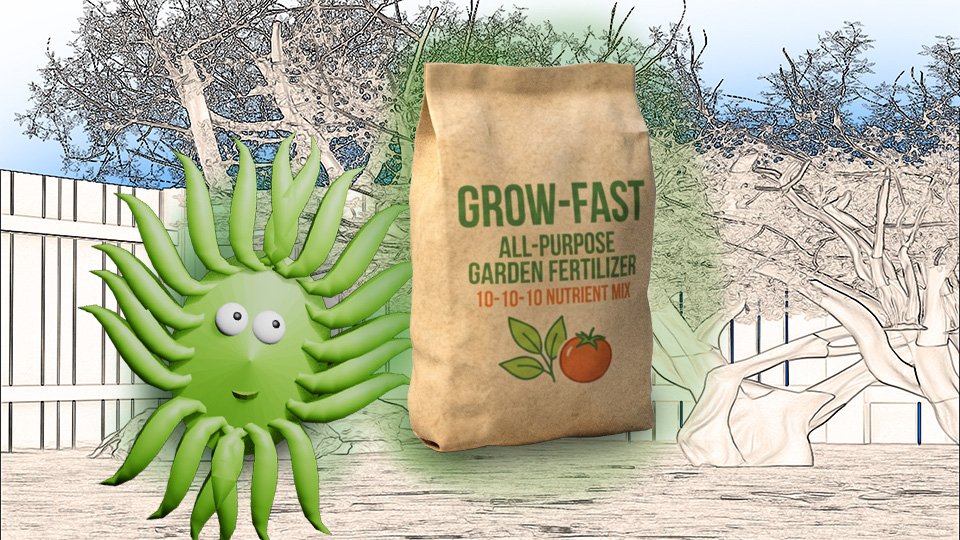
Fertilizer Basics: What N-P-K Actually Means

Every fertilizer bag has three numbers on it. Those numbers tell you exactly what’s in the bag and what it’s for. Here’s how to read them without a chemistry degree.

Pick up a bag of fertilizer and you will see three numbers separated by dashes: 10-10-10, or 5-10-5, or 21-0-0. These numbers are on every fertilizer product. They are also never explained.

They are, in fact, not complicated. Once you know what each number represents, you can read a fertilizer label as easily as reading a recipe — you know what’s in there and what it does.

🔢 The Three Numbers: 10-15-20

N — Nitrogen. The first number (10 in the example above). Nitrogen drives vegetative growth — leaves, stems, and the overall green bulk of the plant. A high first number means the fertilizer is heavy on nitrogen. Nitrogen is what lawn fertilizers are typically high in, and why applying lawn fertilizer to vegetables produces enormous plants that fruit poorly.

P — Phosphorus. The second number (15 in the example above). Phosphorus supports root development and flower and fruit production. A high middle number is appropriate when starting transplants (root establishment), encouraging flowering, or supporting fruiting crops.

K — Potassium. The third number (20 in the example above). Potassium supports overall plant health, disease resistance, and water regulation. It’s the maintenance nutrient — plants need it consistently but not in the dramatic spikes that nitrogen and phosphorus sometimes require.

The numbers represent percentages by weight. A 10-10-10 fertilizer is 10% nitrogen, 10% phosphorus, and 10% potassium. The remaining 70% is filler material that helps distribute the nutrients evenly.

🤔 What to Use When

  • Starting seedlings and transplants: higher phosphorus (middle number). Phosphorus supports root development, which is exactly what a new transplant needs. A starter fertilizer like 10-52-10 is designed for this purpose.
  • Leafy vegetables (lettuce, spinach, kale): higher nitrogen. These crops are all leaf and no fruit. Nitrogen drives exactly the growth you want.
  • Fruiting vegetables (tomatoes, peppers, squash): balanced or higher phosphorus and potassium once flowering begins. Too much nitrogen on a tomato produces a spectacular plant with minimal fruit. The plant is growing leaves when it should be growing tomatoes.
  • General garden maintenance: balanced fertilizer (equal or near-equal numbers) applied once or twice per season covers the bases without over-emphasizing any single nutrient.

🌱 Organic vs. Synthetic Fertilizer

Both deliver N-P-K to plants. The difference is in how quickly and how.

Synthetic fertilizers are immediately available to plants. Quick green-up, fast results, but can burn plants if over-applied, and don’t build soil health.

Organic fertilizers (compost, fish emulsion, blood meal, bone meal) release nutrients slowly as soil organisms break them down. Slower results, but they also feed soil biology and build long-term soil health. Harder to over-apply.

For most home gardeners, a combination works well: organic amendments (compost, well-rotted manure) worked into beds each season build soil health, supplemented with balanced granular fertilizer during the growing season for quick plant nutrition.

🚧 The Most Common Fertilizer Mistake

More is not better. Over-fertilizing — particularly with nitrogen — produces problems: burned roots, excessive leafy growth at the expense of fruit, increased pest attraction, and nutrient runoff into groundwater. The label rate is a maximum, not a minimum.

Soil that has been amended with compost annually needs less supplemental fertilizer than depleted soil. Test your soil before defaulting to heavy fertilizer programs.

🛒 Fertilizer Worth Having

  • Balanced granular fertilizer 10-10-10 — The all-purpose starting point. Covers the basic nutritional needs of most vegetables.
  • Tomato and vegetable fertilizer — Formulated for fruiting crops. Higher phosphorus and potassium ratio supports fruit production.
  • Fish emulsion liquid fertilizer — Organic, fast-acting, and a broad nutrient profile. Smells exactly as you would expect. The plants don’t mind.
  • Soil test kit — Before fertilizing heavily, know what your soil actually needs. Over-fertilizing a nutrient-sufficient soil is wasteful and potentially harmful.

As an Amazon affiliate, I earn from each qualifying purchase. Thank you for supporting TangleWicket.

✨ The Short Version

N is for leaves. P is for roots and flowers. K is for overall health. The three numbers are percentages. Match the fertilizer to the crop and the growth stage.

Compost builds soil. Fertilizer supplements it. Both have a role.

Tom Brownthumb once applied lawn fertilizer to his tomatoes. He grew the finest collection of tomato leaves anyone had ever not eaten.

📚 Related Reads


TangleWicket is part of the WhistleBump group – find the rest of the family at WhistleBump.com.

33003

©2026 John D Reinhart/Tanglewicket.com – all rights reserved
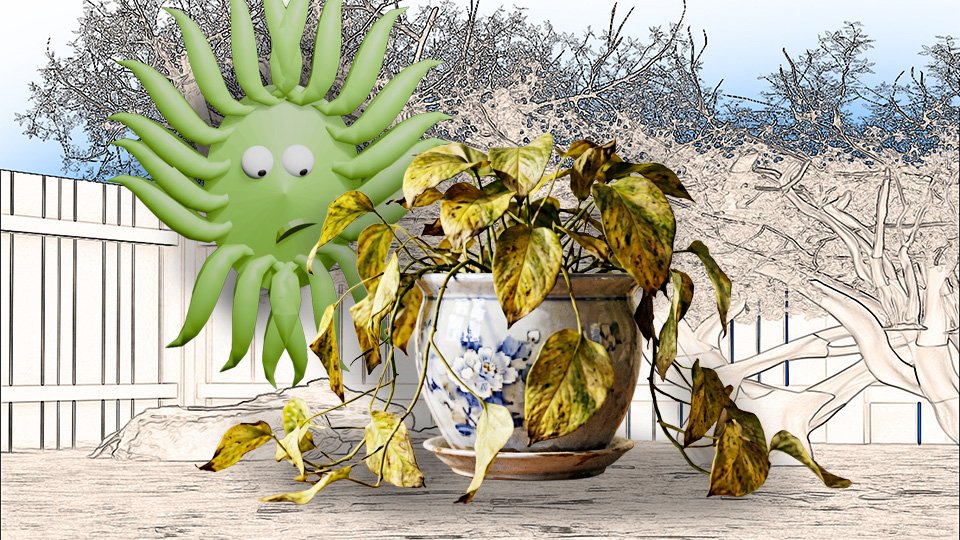
Why Your Plant Is Yellowing (And What Color Tells You)

A yellowing plant is telling you something. The color, the pattern, and the location of the yellowing are the clues. Here’s how to read them — and what to do once you have the diagnosis.

A yellow plant is a plant with a complaint. The challenge is that yellow is a symptom with many possible causes, and treating the wrong cause wastes time and occasionally makes things worse.

The good news: the pattern of yellowing — which leaves, what color exactly, where on the plant, how fast — contains the diagnosis. Plants are not subtle about what they need. They just speak a language that takes a little learning.

Here’s the guide to reading that language. From the most common causes to the less common ones, with what to look for and what to do.

🟡 Cause One: Nitrogen Deficiency

The most common reason garden plants turn yellow. Nitrogen is the primary nutrient plants use for leaf and stem growth. When it’s deficient, the plant pulls nitrogen from older leaves to support new growth.

The pattern: yellowing starts on the oldest leaves — the lower, inner leaves — and moves upward. The yellowing is uniform across the leaf, not in patches. Upper leaves remain green while lower leaves yellow and eventually drop.

What to do: feed with a nitrogen-rich fertilizer. A balanced granular fertilizer, fish emulsion, or blood meal applied to the soil will show visible improvement within a week or two. Consistent fertilizing prevents recurrence.

🟡 Cause Two: Overwatering

Overwatered roots cannot deliver nutrients to leaves even when nutrients are present in the soil. The result looks like nutrient deficiency but is actually oxygen deprivation.

The pattern: yellowing across multiple leaves, both old and new. Soil is wet or consistently moist. The plant may also show soft stems or wilting despite wet soil.

What to do: stop watering. Allow the soil to dry out significantly before resuming. Check drainage — if water cannot exit the container or bed, improve it. See our overwatering post for the full picture.

🟡 Cause Three: Iron Deficiency (Chlorosis)

Iron chlorosis produces a distinctive pattern that distinguishes it from nitrogen deficiency. The plant cannot move iron efficiently — often because soil pH is too high — and leaves lose their green color while the veins remain green.

The pattern: new growth at the top of the plant turns yellow first, while the veins stay green. This interveinal yellowing — yellow leaf, green veins — is the diagnostic signature of iron chlorosis.

What to do: test soil pH. Iron chlorosis is typically a pH problem rather than a true iron shortage — the iron is present but unavailable at high pH. Acidifying the soil with sulfur or an acidifying fertilizer makes iron available again. Chelated iron products provide immediate temporary relief.

🟡 Cause Four: Natural Aging

Not all yellowing is a problem. Lower leaves on established plants yellow and drop as part of normal aging. The plant is reallocating resources from old leaves to new growth.

The pattern: occasional lower leaves yellowing on otherwise healthy, actively growing plants. New growth is green and vigorous. No spreading pattern.

What to do: remove the yellow leaves for aesthetics and airflow. Nothing else required.

🟡 Cause Five: Pest or Disease Damage

Spider mites, thrips, and certain fungal diseases produce yellowing as a symptom. These are usually distinguishable by accompanying signs — stippling, spots, webbing, or powdery coating on the affected leaves.

The pattern: irregular yellowing that doesn’t follow the uniform lower-to-upper or interveinal pattern of nutrient deficiency. Often accompanied by visible damage, spots, or insects on the leaf surface or underside.

What to do: identify the pest or disease first. Treatment varies widely. A magnifying glass and a look at the underside of leaves reveals most common culprits. See our BUGS category for identification and treatment guides.

🟡 Cause Six: Too Little Light

Plants in insufficient light cannot photosynthesize efficiently. Leaves lose their green color and the plant becomes leggy, weak, and pale.

The pattern: general paleness and legginess across the whole plant. Often accompanied by stretched stems reaching toward the nearest light source.

What to do: move the plant to a sunnier location if possible. Review the light requirements for the specific plant. A sun requirement mismatch is a siting problem, not a soil problem.

🛒 Tools for Diagnosing and Treating

  • Soil pH test kit — For identifying iron chlorosis caused by high pH. Inexpensive and gives an immediate reading.
  • Balanced granular fertilizer — The first treatment for suspected nitrogen deficiency. Covers multiple nutrient bases in one application.
  • Chelated iron supplement — For interveinal yellowing caused by iron chlorosis. Provides immediately available iron while the pH issue is addressed longer-term.
  • Magnifying glass for pest inspection — For identifying spider mites, thrips, and other small pests on leaf surfaces and undersides.

As an Amazon affiliate, I earn from each qualifying purchase. Thank you for supporting TangleWicket.

✨ The Short Version

Yellow starting on lower leaves: nitrogen deficiency. Yellow with green veins on new growth: iron chlorosis, check pH. Yellow across multiple leaves with wet soil: overwatering. Isolated lower leaves yellowing on healthy plant: normal aging. Yellow with visible damage or insects: pest or disease.

The pattern tells the story. Read the pattern before reaching for a solution.

Tom Brownthumb once treated nitrogen deficiency with more water. The plant had opinions. They were not good opinions.

📚 Related Reads


TangleWicket is part of the WhistleBump group – find the rest of the family at WhistleBump.com.

33001

©2026 John D Reinhart/Tanglewicket.com – all rights reserved
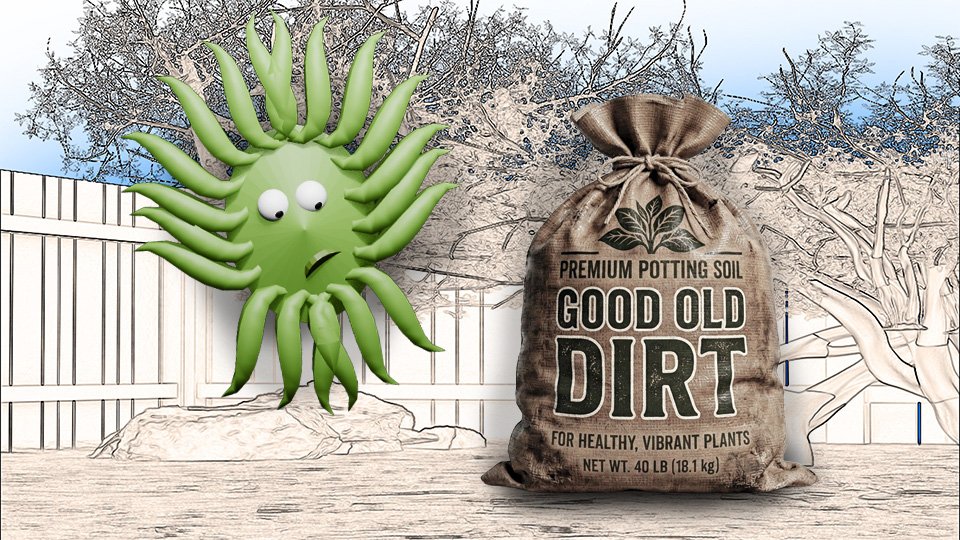
Soil: The Thing Beginners Ignore and Experts Obsess Over

Soil is the thing beginners skip and experts obsess over — and the gap between a good garden and a great one is almost always underground. Here’s what soil actually does and how to improve it.

Beginners buy seeds, plants, fertilizer, tools, and garden decorations. They spend on everything visible and ignore the one thing that determines whether any of it works.

The soil.

Poor soil produces poor plants regardless of how carefully they’re watered, fertilized, or tended. Good soil produces good plants almost regardless of everything else. The difference between a garden that struggles and a garden that thrives is, more often than not, what’s happening six inches underground.

Here’s what soil actually is, what makes it good or bad, and what you can do about it — because this is the investment that pays off more than any other.

🤔 What Soil Actually Does

Soil does four things for plants: provides physical support, delivers water, delivers nutrients, and provides oxygen to roots. Most people think of soil as dirt that holds plants up. It is actually a complex living system that makes plant growth possible.

  • Physical support. Roots anchor in soil and hold the plant upright. This requires structure — soil that compacts into concrete-like hardness can’t be penetrated by roots.
  • Water delivery. Soil holds water and releases it gradually to roots. Too much sand and water drains away before roots can use it. Too much clay and water sits so long that roots suffocate.
  • Nutrient delivery. Plants take up nutrients dissolved in soil water. The nutrient content of soil depends on its organic matter content and pH, which affects which nutrients are available at all.
  • Oxygen. Roots need oxygen. Healthy soil has pore spaces filled with air. Compacted or waterlogged soil has no air spaces. Roots in airless soil suffocate and die.

🌍 Soil Types

  • Sandy soil. Feels gritty. Drains fast, often too fast. Nutrients wash through before roots can absorb them. Warms quickly in spring. Improves with generous compost addition.
  • Clay soil. Feels sticky when wet, brick-hard when dry. Holds water and nutrients well but drains poorly. Compacts easily. Improves dramatically with compost and coarse organic matter over several seasons.
  • Loamy soil. The goal. A balanced mix of sand, silt, and clay with good organic matter content. Drains well without drying too fast, holds nutrients, easy to work, supports strong root growth. Most gardens are not naturally loamy. This is what you build toward.

🌿 The Role of Organic Matter

Compost is the universal soil improver. Added to sandy soil, it retains moisture and nutrients. Added to clay soil, it improves drainage and structure. Added to any soil, it feeds the microbial life that makes nutrients available to plants.

The microbial ecosystem in healthy soil — bacteria, fungi, earthworms, and countless organisms — is as important as the mineral composition. Healthy soil is alive. It is not simply mineral particles. Compost feeds this ecosystem and the ecosystem feeds your plants.

Adding a two to three inch layer of compost to garden beds annually and working it in is the single most impactful thing you can do for long-term garden productivity. More than any fertilizer, more than any amendment.

🧪 Soil pH

pH measures soil acidity or alkalinity on a scale of 1-14. Seven is neutral. Below seven is acidic. Above seven is alkaline. Most vegetables prefer slightly acidic soil between 6.0 and 7.0.

Why pH matters: soil pH determines which nutrients are chemically available to plants. Even if nutrients are present in the soil, the wrong pH makes them inaccessible. Iron, manganese, and zinc become unavailable in alkaline soil. Phosphorus becomes unavailable in very acidic soil. A plant in soil with the wrong pH starves regardless of how much you fertilize.

  • To lower pH (acidify): add sulfur or acidifying fertilizer. Used for blueberries, azaleas, and plants in alkaline soil.
  • To raise pH (make more alkaline): add garden lime. Used for soil that is overly acidic.

🛒 The Soil Improvement Kit

As an Amazon affiliate, I earn from each qualifying purchase. Thank you for supporting TangleWicket.

✨ The Short Version

Soil does four things: support, water, nutrients, oxygen. Good soil does all four well. Poor soil does at least one badly. Compost improves every type of soil. pH determines nutrient availability.

Test the pH. Add compost annually. Work it in. The plants will notice.

Tom Brownthumb gardened in clay soil for two seasons without amending it. His carrots were the shape of a philosophical argument. He started adding compost. His carrots became carrots.

📚 Related Reads


TangleWicket is part of the WhistleBump group – find the rest of the family at WhistleBump.com.

33002

©2026 John D Reinhart/Tanglewicket.com – all rights reserved