
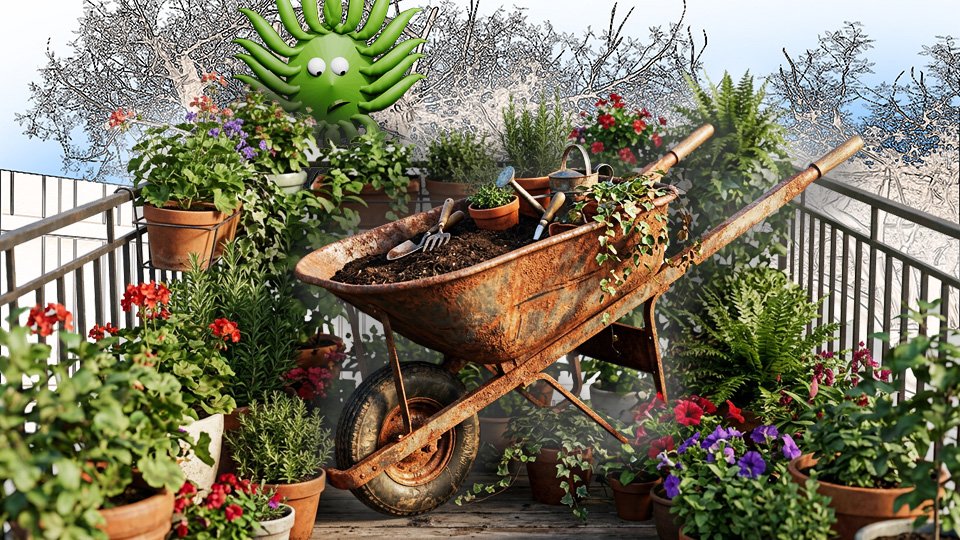
The Wheelbarrow: Do You Actually Need One?

A wheelbarrow is a significant purchase and a genuinely useful tool — for certain gardens. Here’s how to know if yours is one of them before you spend the money.

The wheelbarrow feels like essential garden equipment. It’s in every garden catalog. It appears in every garden scene in every movie. It is, visually, what “garden tool” looks like.

It is also bulky, expensive, takes up significant storage space, and is occasionally unnecessary for the garden you actually have. Tom Brownthumb bought one in his first season. It lived in the garage for two years before he had a use case large enough to justify it.

Here’s how to decide whether your garden needs a wheelbarrow — or whether a different tool does the same job at a fraction of the cost and a fraction of the storage footprint.

✅ When You Genuinely Need a Wheelbarrow

  • You’re moving bulk material. Cubic yards of compost, mulch, topsoil, or gravel. If you’re buying material by the cubic yard and moving it from the delivery pile to the beds, a wheelbarrow is the right tool. Doing this with buckets is technically possible and genuinely miserable.
  • You have a large garden. A quarter-acre or more of actively managed garden space generates enough material — weeds, prunings, harvest waste, compost inputs — that having a wheeled transport tool pays for itself in time and back strain.
  • You’re doing structural work. Building raised beds, laying paths, moving rocks, landscaping. The wheelbarrow is a construction tool as much as a garden tool, and for moving heavy material across a yard it has no peer.

❌ When You Probably Don’t

  • Small urban or suburban garden. A raised bed or two, a patio container setup, a modest plot. The material volumes are low enough that a garden trug or large bucket handles transport easily.
  • Limited storage. A wheelbarrow requires several square feet of dedicated storage space. If your shed is already full, the wheelbarrow lives outside and rusts faster than it earns its keep.

🪜 The Alternatives Worth Knowing

  • Garden trug. A flexible, lightweight tub that holds a surprising volume of material. Folds flat for storage. Handles compost, weeds, harvest, and small material transfers without effort. The right tool for most small-garden transport needs.
  • Garden cart. Four wheels instead of two, larger flat bed, more stable. Better for very heavy loads that would tip a wheelbarrow. Takes more storage space than a wheelbarrow.
  • Five-gallon buckets. Free from home improvement stores or cheap to buy. Stackable, versatile, zero storage footprint. For small-scale material moving, a pair of buckets is as efficient as a wheelbarrow for most tasks.

🔍 If You Do Buy a Wheelbarrow

  • Pneumatic tire over solid. A pneumatic (air-filled) tire rolls more easily over soft ground and uneven surfaces than a solid tire. Worth the slight maintenance tradeoff of occasional pressure checks.
  • Steel tray over plastic. More durable, handles sharp materials without cracking, longer lifespan overall.
  • Cubic capacity. A standard wheelbarrow holds about three to five cubic feet. Larger capacity means fewer trips but more weight per load. Match the size to how much you can realistically lift when full.

🛒 The Options

  • Marathon residential wheelbarrow — Pneumatic tire, steel tray, reliable residential workhorse. The solid starting point.
  • Gorilla Carts garden cart — Four-wheeled stability for heavy loads. Easier to use than a wheelbarrow for anyone with balance or strength concerns.
  • Flexible garden trug — The small-garden alternative. Holds more than it looks like it should, stores flat, handles most suburban garden transport tasks efficiently.

As an Amazon affiliate, I earn from each qualifying purchase. Thank you for supporting TangleWicket.

✨ The Short Version

Buy a wheelbarrow if you’re moving bulk material, have a large garden, or do structural landscape work. Consider a trug or cart if your garden is smaller and your storage is limited.

The wheelbarrow is a great tool. It is not a mandatory tool for every garden.

Wicket does not have strong feelings about wheelbarrows. Wicket is too small to push one.

📚 Related Reads


TangleWicket is part of the WhistleBump group – find the rest of the family at WhistleBump.com.

©2026 John D Reinhart/Tanglewicket.com – all rights reserved
Kneeling Pads and Garden Seats: Worth It or Not?

Kneeling in a garden without protection is a choice with consequences. Here’s what garden kneelers and seats actually do, which type makes sense for your situation, and why your knees will thank you.

Gardening happens close to the ground. Planting, weeding, transplanting, harvesting — most of the work requires either kneeling, squatting, or bending at a waist that does not appreciate the transaction.

For young gardeners with functional knees and flexible backs, this is a minor inconvenience. For everyone else, and for young gardeners who would like to remain comfortable well into their gardening future, the question of how you get down and back up again is worth thinking about.

The answer is not complicated. It’s a foam pad, a kneeler, or a seat — whichever matches your specific situation. Here’s how to choose.

🟫 The Foam Kneeling Pad

The simplest solution. A dense foam pad, typically half an inch to an inch thick, that sits between your knees and the ground. It cushions hard or rocky soil, provides minor insulation from cold ground, and costs almost nothing.

Best for: gardeners with healthy knees doing short-duration work in a relatively confined area. The pad moves with you, doesn’t take up storage space, and does its job without ceremony.

The limitation: it doesn’t help you get up. If your knees or back make the transition from kneeling to standing difficult, a foam pad addresses the kneeling discomfort but not the getting-up problem.

🪑 The Kneeler/Seat Combo

The folding metal-framed kneeler with padded surface that converts from a kneeling pad to a low seat by flipping it over. The side rails double as handles to assist getting up and down.

Best for: anyone for whom the transition between kneeling and standing is uncomfortable. The handles take significant load off knees and back during those transitions. The seat function provides an alternative to kneeling for tasks that can be done from a slightly higher position.

The better models hold several hundred pounds, fold flat for storage, and last for many seasons. The cheaper models bend under real use. This is one where the quality difference is meaningful.

🪑 The Garden Seat

A lightweight rolling or walking stool that keeps you off the ground entirely. You sit on the seat at a low height and move around without kneeling.

Best for: extended close work where kneeling is not practical for the duration. Row weeding, bed preparation work, seedling planting over a long stretch. Also the right tool for anyone for whom kneeling is genuinely not an option.

The limitation: only works on relatively flat, firm ground. Doesn’t function well on uneven terrain or very soft soil.

📏 The Honest Recommendation

If your knees and back are fine: a foam kneeling pad is sufficient and costs five dollars.

If getting up and down is difficult: the kneeler/seat combo with handles is the right tool and pays for itself in the first season.

If kneeling isn’t an option: a garden seat or rolling stool.

The underlying principle: gardening should be comfortable enough that you do it. Equipment that makes you more comfortable in the garden is equipment that gets you into the garden more often. That’s the whole point.

🛒 What to Buy

  • Thick foam kneeling pad — Simple, lightweight, effective for straightforward kneeling. The no-fuss starting point.
  • Abco kneeler and seat combo — Robust construction, useful handles, converts between kneeler and seat. The most versatile option for most gardeners.
  • Gardener’s rolling work seat — For extended row work or anyone for whom kneeling is not practical. Rolls smoothly on firm ground.

As an Amazon affiliate, I earn from each qualifying purchase. Thank you for supporting TangleWicket.

✨ The Short Version

Foam pad for simple situations. Kneeler/seat combo for anyone with knee or back concerns. Garden seat for extended work or when kneeling isn’t practical.

The ground is hard. Your knees are not getting younger. A twelve-dollar pad is worth it.

Tom Brownthumb gardened without knee protection for years. Tom Brownthumb’s knees have opinions about this that he now shares freely.

📚 Related Reads


TangleWicket is part of the WhistleBump group – find the rest of the family at WhistleBump.com.

31007

©2026 John D Reinhart/Tanglewicket.com – all rights reserved
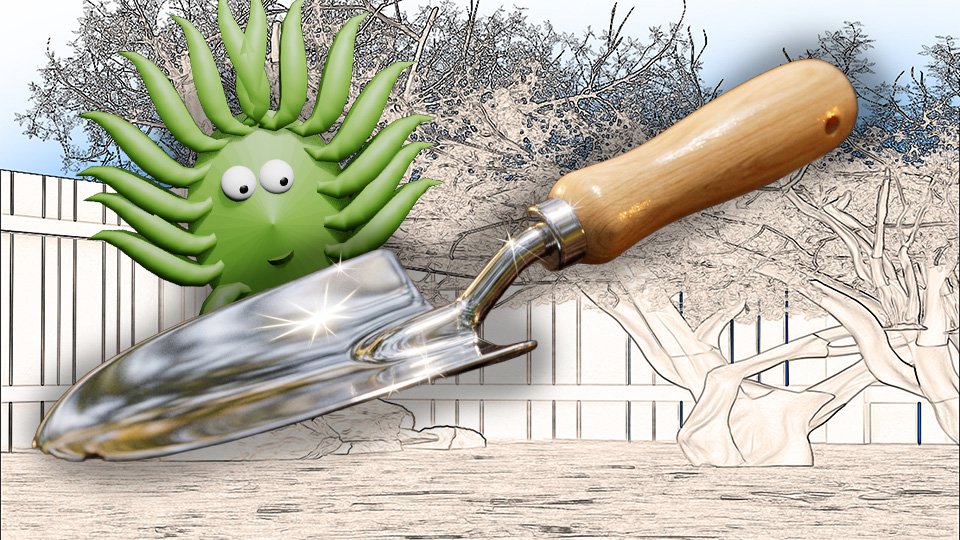
How to Keep Garden Tools From Rusting (One Easy Step)

Garden tools rust because of one thing: moisture left on metal. Here’s how to prevent it in about thirty seconds per tool — and how to reverse it when it’s already happened.

Garden tools rust. This is not a mystery. Metal plus moisture plus oxygen equals rust, and garden tools spend their lives around all three. The question is not whether it will happen but how fast, and the answer to that is largely within your control.

The good news: preventing rust requires about thirty seconds per tool after each use. The even better news: rust that has already formed can usually be reversed with a bit more effort. The bad news: most people skip the thirty seconds until the damage is done.

Here’s the system. It takes almost no time and keeps tools working for decades instead of seasons.

💧 Why Tools Rust

Rust forms when iron (in steel) reacts with oxygen in the presence of moisture. Wet soil, rain, dew, and humidity are all sufficient moisture sources. A tool left with soil on the blade, or a tool stored in a damp shed, is rusting right now.

The specific culprit in most cases: dirty tools. Soil holds moisture against the metal surface long after the visible wetness has dried. A tool cleaned after every use dries fully. A tool put away dirty stays damp.

✅ The Prevention System

After every use, do three things:

  • Clean the blade. Remove soil with a stiff brush, a rag, or a plunge into a bucket of coarse sand kept near the garden. The goal is bare metal, not decorative cleanliness.
  • Dry completely. Wipe the blade dry with a rag. If the tool is wet from rain or morning dew, let it air dry before storing rather than putting it away damp.
  • Apply a thin oil coat. A quick wipe with an oily rag — linseed oil, motor oil, WD-40 — creates a barrier between the metal and the moisture in the air. A very thin coat is all that’s needed. You’re not lubricating machinery. You’re sealing metal from air.

That’s it. Thirty seconds. Tools treated this way after every use will still be sharp and clean after twenty years.

🩶 The Sand Bucket Method

Keep a five-gallon bucket filled with coarse builder’s sand mixed with a cup of motor oil near where you store your tools. After use, plunge the metal blade into the sand several times.

The sand cleans soil off the blade. The oil coats the metal. In one motion, you’ve cleaned and oiled the tool. It’s faster than wiping and more thorough. Many experienced gardeners swear by this method.

🔧 Reversing Existing Rust

Light surface rust — a reddish discoloration without pitting — is completely reversible.

  • Steel wool or sandpaper. Rub the rust off with medium-grit sandpaper or steel wool. Work with the grain of the metal. Remove all visible rust, then apply oil immediately to the freshly exposed metal.
  • White vinegar soak. For tools with significant rust, soak in white vinegar for several hours or overnight. The acid dissolves rust. Rinse, dry thoroughly, and oil immediately.
  • Commercial rust remover. For serious cases. Follow the product directions, rinse, dry, oil.

Deep pitting is harder to reverse. A pitted blade can be cleaned and oiled but the structural damage is done. Prevention is genuinely easier than restoration once rust has penetrated the metal surface.

🛒 What to Have on Hand

As an Amazon affiliate, I earn from each qualifying purchase. Thank you for supporting TangleWicket.

✨ The Short Version

Clean after every use. Dry completely. Apply a thin oil coat. Thirty seconds. Twenty more years.

The sand bucket method does all three in one motion and is faster than any alternative.

Tom Brownthumb left a trowel outside for an entire winter. Tom Brownthumb now cleans his tools every single time.

📚 Related Reads


TangleWicket is part of the WhistleBump group – find the rest of the family at WhistleBump.com.

31005

©2026 John D Reinhart/Tanglewicket.com – all rights reserved
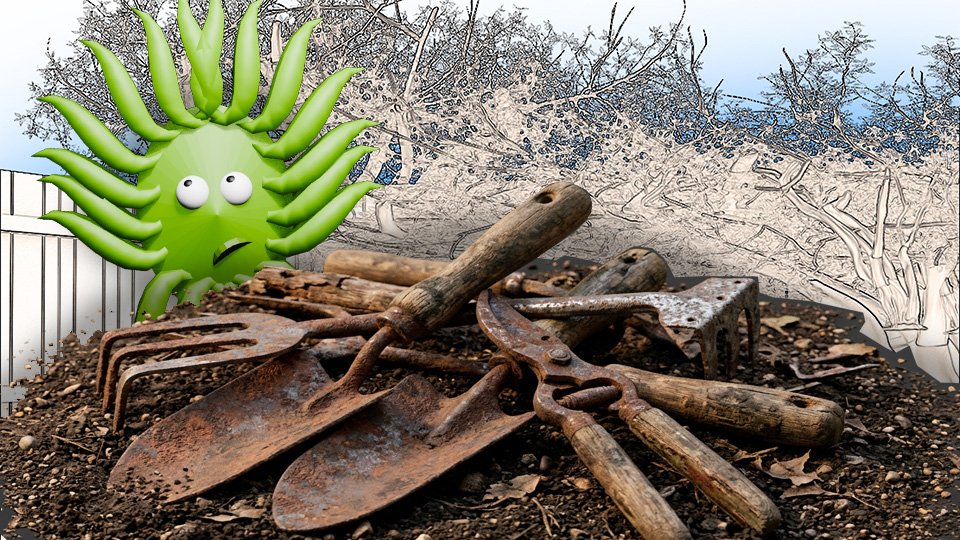
How to Store Garden Tools So They Last

Good garden tools can last decades. Most don’t, because of how they’re stored. Here’s the simple system that keeps every tool in your shed working season after season.

Garden tools are an investment. Not a dramatic investment — we’re not talking about jewelry — but a set of quality tools represents real money and represents more real money when you have to replace them every few years because they rusted, warped, or deteriorated in storage.

The good news about tool storage is that doing it correctly is almost embarrassingly simple. The bad news is that most people don’t do it, which is why most sheds contain at least one tool that has seen better decades.

Here’s the complete system — for hanging, organizing, cleaning, and maintaining tools so they’re ready when you need them and last as long as they should.

❌ What Destroys Tools

  • Moisture. The primary enemy. Metal rusts. Wood rots. Tools left on damp ground, stored in a wet shed, or put away with soil still on the blade deteriorate from the inside out. Moisture is the reason tools fail prematurely more than any other factor.
  • UV exposure. Handles left in direct sun dry out and crack. Plastic components become brittle. A tool stored in the sun or leaned against an outside wall ages faster than one stored inside.
  • Physical damage. Tools leaned against walls fall over. Falling tools bend tines, chip blades, and crack handles. Tools thrown in a pile damage each other at contact points. How tools are stored physically affects how long they last.
  • Neglect between uses. Soil left on blades. Wooden handles never oiled. Springs never lubricated. Small maintenance steps skipped indefinitely produce tools that fail at inconvenient moments.

✅ The Storage System

🪝 Step One: Hang Everything

Tools hung off the ground on hooks or a rack stay dry, stay accessible, and don’t damage each other. A wall-mounted tool rack — either a commercial product or hooks screwed into a board — is the single most impactful storage improvement.

Long-handled tools (spades, forks, hoes, rakes) hang from hooks by the handle or sit in a floor-standing rack that holds them upright. Neither method has them touching the floor or leaning against walls where they can fall.

Hand tools (trowels, shears, hand forks) hang from hooks by a hole drilled in the handle, or sit in a bucket of clean dry sand. The bucket method keeps them upright, accessible, and slightly protected against rust.

🚧 Step Two: Clean Before Storing

Every tool that comes in from the garden gets cleaned before storage. Remove soil from metal surfaces. Wipe dry. Apply a thin coat of oil to metal parts. This takes thirty seconds per tool and prevents the majority of rust formation.

Wooden handles benefit from an annual application of linseed oil, which penetrates the grain and prevents drying and cracking. Do this at the end of the season before winter storage. It takes five minutes for an entire shed’s worth of handles.

🏛️ Step Three: Environment Matters

A dry shed or garage is the right storage environment. A damp basement is not. A tool storage area with good airflow stays drier than a sealed space.

For small spaces without a shed: a lidded outdoor storage box in a sheltered location works. Look for one with ventilation to prevent condensation buildup inside. It’s not ideal but it’s better than leaning tools against the house and hoping for the best.

📋 Step Four: End of Season Deep Maintenance

Once a year — the end of the growing season is the natural moment — go through the entire tool collection.

  • Sharpen cutting edges. Spade blades, hoe blades, pruning shears, loppers. A sharp tool does better work and requires less effort. A file or sharpening stone on each cutting edge, following the existing bevel angle.
  • Check handles. Cracks, splinters, or wobble in the handle-to-blade connection mean the handle needs replacement or reinforcement. A loose handle on a sharp-bladed tool is a safety issue.
  • Oil everything. Linseed oil on wooden handles. Light machine oil on springs and pivot points of shears and loppers. Thin protective coat on metal blades.
  • Replace what can’t be saved. A tool with a cracked blade or badly rusted metal beyond recovery is a hazard and a liability. Replace it rather than carrying it into another season.

🛒 Storage Solutions Worth Having

As an Amazon affiliate, I earn from each qualifying purchase. Thank you for supporting TangleWicket.

✨ The Short Version

Hang tools off the ground. Clean them before storing. Keep them in a dry environment. Oil the metal and the handles. Do a deep maintenance pass at the end of the season.

Five habits. Decades of useful tools.

Tom Brownthumb once found a spade in his garden that had been there since the previous owner. It had been there for seven years. He used it as a cautionary tale and a garden border.

📚 Related Reads


TangleWicket is part of the WhistleBump group – find the rest of the family at WhistleBump.com.

31010

©2026 John D Reinhart/Tanglewicket.com – all rights reserved
Why Your Cheap Garden Gloves Are Lying to You

Cheap garden gloves fall apart, slip off, and fail you at the exact moment something sharp happens. Here’s what actually separates a useful glove from one that just looks the part.

The garden center sells garden gloves for three dollars a pair. They come in cheerful colors. They have pictures of flowers on them. They suggest, visually, that gardening is a gentle and pleasant activity for which thin cotton protection is entirely sufficient.

The garden center is not wrong that gardening is pleasant. It is just wrong about the gloves.

Cheap gloves fail in three specific ways — and they always fail at the worst possible moment, which is when you’re elbow-deep in a rosebush or moving a pile of something composted.

❌ How Cheap Gloves Fail

  • They don’t protect. Thin cotton or cheap fabric is not a barrier against thorns, sharp stems, splinters, or the edge of a terracotta pot. It is approximately the same protection as bare skin with a sense of false confidence.
  • They don’t fit. One-size gloves fit no hands well. A loose glove is worse than no glove because it reduces dexterity while providing minimal protection. You end up removing it to do anything precise, which defeats the entire purpose.
  • They don’t last. Cheap fabric tears on the first thorny encounter. The fingertips go first, then the palm. Three dollars buys approximately one season of light use if you’re careful, which defeats the economics.

✅ What Good Gloves Actually Do

A properly made garden glove does three things: protects, fits, and breathes.

  • Leather palm and fingers. Leather is the material that handles thorns, rough edges, and repeated contact with abrasive surfaces. The palm takes most of the abuse in gardening — that’s where the leather should be.
  • Breathable back. Hands sweat. A glove with a fabric or mesh back allows airflow. All-leather gloves are protective but hot for extended wear. The hybrid — leather where you need protection, breathable material where you need comfort — is the right design.
  • Proper fit. Snug enough to retain dexterity, loose enough to remove easily when needed. Women’s-specific gloves exist and are worth buying over men’s gloves resized downward — the proportions are different.

🌹 Specialty Gloves Worth Knowing About

  • Rose and thorn gloves (gauntlets). Extended cuffs that protect the forearm. Essential for working around anything seriously spiky. If you grow roses, brambles, or barberries, these are not optional.
  • Nitrile-coated gloves. For fine work — transplanting, seeding, detailed pruning. The nitrile coating provides grip and light protection without sacrificing the dexterity you need for delicate tasks.
  • Waterproof gloves. For wet work — planting in rain, working with wet soil for extended periods. Regular leather gloves become uncomfortable and eventually deteriorate when soaked repeatedly.

🧹 Glove Care

Leather gloves last for years with minimal maintenance. Let them dry naturally after use — not near a heat source, which cracks the leather. A light application of leather conditioner once or twice a season keeps them supple.

Fabric and nitrile gloves can usually be rinsed clean and air-dried. Check the packaging — some are machine washable.

🛒 The Gloves Worth Having

As an Amazon affiliate, I earn from each qualifying purchase. Thank you for supporting TangleWicket.

✨ The Short Version

Cheap gloves protect nothing and last one season. Good gloves protect your hands, fit properly, and last for years. The economics favor quality from the first purchase.

Leather palm for protection. Breathable back for comfort. Proper fit for dexterity.

Tom Brownthumb gardened bare-handed for three seasons. Tom Brownthumb has some interesting scars.

📚 Related Reads


TangleWicket is part of the WhistleBump group – find the rest of the family at WhistleBump.com.

31004

©2026 John D Reinhart/Tanglewicket.com – all rights reserved
The Hoe: Wildly Underrated, Wildly Misused

The hoe is the most underrated tool in the garden. Most beginners ignore it. Most experienced gardeners rely on it. Here’s why it matters and how it actually works.

The hoe does not get the respect it deserves. It lacks the tactile satisfaction of a good trowel and the authority of a spade. It looks like a tool your grandparents used and possibly left in the barn. It is unflashy and uncelebrated.

It is also the reason experienced gardeners don’t spend half their time pulling weeds.

Here’s what a hoe actually does, why beginners almost always misuse it, and how using it correctly changes the entire weed management equation in your garden.

🤔 What the Hoe Is Actually For

The hoe’s job is to sever weed stems just below the soil surface, killing the weed without digging it out. When used regularly — every week or two, before weeds establish and develop deep root systems — it prevents the weed problem from ever becoming serious.

Why this matters: weeds pulled after they’ve established roots are harder to remove and more likely to leave root fragments that regrow. Weeds severed just after germination, when their root systems are shallow, die and decompose in place. The hoe catches them at their most vulnerable.

The key insight: hoeing is most effective on dry days when severed seedlings can desiccate quickly in the sun and air. Hoeing on a wet day leaves weed seedlings with enough moisture to re-root. Time your hoeing with the weather.

❌ How Most Beginners Misuse It

The most common hoe mistake is using it like a pickaxe — hacking at established weeds and compacted soil with aggressive downward strokes. This is hard work that accomplishes less than it should, because the target weeds are too established, the technique is wrong, and the tool is working against its design.

The hoe is a slicing tool, not a chopping tool. The motion is horizontal, not vertical. The blade moves parallel to the soil surface, just below it, cutting stems at the root line. A light touch with the right technique is faster and more effective than aggressive hacking.

🔧 The Different Hoe Types

  • Standard flat hoe. The traditional design. One flat blade perpendicular to the handle. Effective and inexpensive. Works best with a push motion along rows.
  • Stirrup hoe (hula hoe). A loop-shaped blade that cuts on both push and pull strokes. Twice as efficient as a standard hoe in the same amount of time. The upgrade worth making for any gardener who hoes regularly.
  • Collinear hoe. A long, narrow blade designed for precise weeding close to plants without disturbing them. Favored by market gardeners. More specialized, excellent for intensive gardens.
  • Warren hoe. A pointed blade designed for making furrows for seed sowing. Not primarily a weeding tool, but useful for direct sowing in rows.

For most beginners, the stirrup hoe is the one to buy. It outperforms the flat hoe at the same price point and makes the actual work of weeding noticeably faster.

📏 Handle Length

A hoe with a handle the right length lets you work in an upright or near-upright position without constant bending. The right length is roughly the distance from the ground to your chin.

Most standard hoes come with a 54-inch or 60-inch handle. Taller gardeners benefit from the longer option. Working hunched over a handle that’s too short negates the efficiency advantage of hoeing over hand weeding.

🛒 The Hoes Worth Having

  • Flexrake stirrup hoe — Cuts on push and pull. The most efficient standard hoe design for regular garden use.
  • CobraHead long-handled weeder — A curved blade that combines hoeing and cultivating in one tool. Excellent for working close to plants.
  • Draw flat hoe — Premium Dutch-made flat hoe. Forged steel, long handle, excellent quality for serious gardeners.

As an Amazon affiliate, I earn from each qualifying purchase. Thank you for supporting TangleWicket.

✨ The Short Version

The hoe prevents the weed problem. Pulling weeds treats the weed problem. Prevention is faster, easier, and more effective.

Use the stirrup hoe. Hoe on dry days. Hoe regularly before weeds establish. Work with a slicing motion, not a chopping one.

Tom Brownthumb spent four seasons pulling weeds by hand. The season he bought a stirrup hoe, he spent four hours total on weeds. The math is not subtle.

📚 Related Reads


TangleWicket is part of the WhistleBump group – find the rest of the family at WhistleBump.com.

31009

©2026 John D Reinhart/Tanglewicket.com – all rights reserved

What a Trowel Is For (And What It Isn’t)

The trowel is the most used tool in any garden. It is also the most abused. Here’s what it’s actually designed to do — and the one thing that destroys a good trowel fastest.

The trowel looks simple. Small hand shovel, pointed blade, handle. You dig with it. What else is there to know?

Quite a bit, it turns out. The trowel is the most versatile hand tool in the garden and also the one most often used as a general-purpose digging implement in situations where a different tool would do the job better and preserve the trowel’s life considerably longer.

Here’s the trowel’s actual job description — and the job that will bend it in half if you keep trying.

✅ What the Trowel Is For

  • Planting seedlings and transplants. The trowel’s primary job. Make a hole the right size, place the plant, backfill around the roots. The depth markings on a good trowel blade tell you exactly how deep you’re going.
  • Direct sowing seeds. Making small furrows or individual holes at the correct planting depth. The trowel gives you control a full-size spade never could.
  • Digging out individual weeds. Particularly tap-rooted weeds like dandelions. Angle the trowel beside the root, lever up and out, remove the whole root. Leaving a bit of root behind means the weed will grow back.
  • Mixing amendments into small areas. Working compost or fertilizer into the soil around a specific plant without disturbing the whole bed.
  • Transplanting small divisions. Moving a section of an established plant to a new location. The trowel lifts a precise amount of root ball.

❌ What the Trowel Is Not For

Prying rocks out of the ground. This is how trowels bend. The blade is designed for soil, not for leverage against solid objects. Use a larger tool or your hands for rocks.

Digging large holes. A trowel digging a twelve-inch hole is working harder than it needs to and wearing faster than it should. Use a spade for anything larger than a seedling hole.

Chopping through root-heavy soil. Forcing a trowel through dense, root-tangled soil bends or chips the blade. Loosen the soil first with a fork, then use the trowel.

🔍 How to Choose a Good One

The quality difference between a good trowel and a cheap one is dramatic and immediately apparent in use.

  • One-piece forged construction. The blade and handle are one piece of steel or the blade is solidly welded to a solid handle. Two-piece trowels where a blade socket meets a separate handle will fail at that junction under any real force.
  • Stainless steel blade. Resists rust and cleans easily. Carbon steel is stronger but requires more maintenance.
  • Depth markings. Measurements on the blade for accurate planting depth. Worth having every single time you plant.
  • Comfortable handle. You’ll use this tool more than any other. An ergonomic handle that fits your hand reduces fatigue significantly over a full gardening session.

🧹 Trowel Care

Clean the blade after every use. Soil left on a blade accelerates rust and dulls the edge. A quick wipe with a rag or a plunge into a bucket of sand keeps a trowel sharp and clean.

Store it dry. A trowel left in the rain will rust. A trowel in a dry shed or garage lasts for decades.

Oil the blade occasionally. A thin coat of linseed oil or WD-40 after cleaning protects the metal and keeps wooden handles from drying out.

🛒 The Trowels Worth Buying

As an Amazon affiliate, I earn from qualifying purchases. Thank you for supporting TangleWicket.

✨ The Short Version

The trowel is for planting, sowing, weeding, and small-scale soil work. It is not for prying, for large holes, or for anything that requires leverage against solid objects.

Buy a one-piece forged trowel with depth markings. Clean it after every use. Store it dry. It will be in your garden long after the cheap ones have bent themselves into retirement.

Tom Brownthumb has bent three trowels. All three were cheap. He’s headed over to the garden center to buy another one.

📚 Related Reads


TangleWicket is part of the WhistleBump group – find the rest of the family at WhistleBump.com.

31002

©2026 John D Reinhart/Tanglewicket.com – all rights reserved

The Five Tools Every Gardener Actually Needs

You don’t need a shed full of tools to start a garden. You need five. Here’s exactly what they are, what each one does, and why everything else can wait until you actually need it.

The garden tool aisle is a wonderland of things you don’t need yet. Cultivators, edgers, bulb planters, aerators, soil knives, long-handled weeders, short-handled weeders, weeders that somehow split the difference. Each one exists for a reason. None of them is your problem today.

The problem with buying tools before you garden is that you don’t know which ones you’ll actually use. The problem with not buying any tools is that you’re out there using your hands and a kitchen spoon, which is what Tom Brownthumb did in his first season. The spoon did not survive and his garden looked like it was managed with a spoon.

Five tools. That’s the complete list for a functioning first garden. Everything else is infrastructure that earns its place after you know what you’re doing.

🪚 Tool One: The Trowel

The trowel is a small hand shovel with a pointed or rounded blade. It is the most-used tool in any garden. Planting seedlings, transplanting, digging out weeds, mixing amendments into small areas — the trowel is there for all of it.

What to buy: a one-piece forged trowel, not a two-piece one where the blade and handle are separate pieces joined together. The joint is where cheap trowels fail, usually when you’re doing something forceful. Stainless steel blade, comfortable handle, depth markings on the blade for planting accuracy.

Get one good trowel. It will outlast a dozen cheap ones and is more pleasant to use every single time.

🔱 Tool Two: The Garden Fork

The garden fork – like a pitchfork’s stockier cousin — four short, square tines on a four-foot handle, built for driving into soil rather than tossing hay. It does what a spade does but without slicing through soil — it lifts and breaks instead. For most soil preparation tasks, a fork is more useful than a shovel.

Why it matters: roots need loose soil to penetrate. Compacted soil produces stunted plants regardless of water and fertilizer. The fork is how you fix compaction and how you incorporate compost into existing beds. It’s also how you harvest root vegetables without slicing them in half.

✂️ Tool Three: Pruning Shears

Pruning shears, also called secateurs, are spring-loaded cutting tools designed for cutting stems, branches, and dead material from plants. They belong in every gardener’s pocket from the first week.

Why not scissors: garden shears are designed to cut through live plant material cleanly without crushing the tissue. Crushed stems invite disease. A clean cut closes properly. Use the right tool for the job.

The bypass style (two curved blades that pass each other, like scissors) produces cleaner cuts than the anvil style (one blade strikes a flat surface). Bypass for living plants, always.

🪣 Tool Four: The Garden Hoe

The hoe is possibly the most underrated tool in gardening and the one most beginners overlook. It is not glamorous. It is profoundly useful.

What it does: the hoe cuts weeds just below the soil surface, severing the stem from the root. Used regularly — every week or two, before weeds establish — it prevents the weed problem from ever becoming serious. Used after weeds have taken over, it reduces a half-day of pulling to twenty minutes of pushing.

There are many hoe styles. The standard flat hoe works fine. The stirrup hoe (also called a hula hoe) cuts on both the push and pull stroke and is worth the slight upgrade.

🫴 Tool Five: Gloves

Real gloves. Not the thin cotton ones that shred on the first thorny stem. Not the cheap plastic ones that turn your hands into a greenhouse.

What to look for: leather palm and fingers for protection against thorns and rough handling, breathable back for comfort, snug enough fit that you retain dexterity. Gauntlet-style gloves that extend up the forearm are worth it if you’re working near roses or anything with serious thorns.

Gloves protect your hands from cuts, blisters, and soil-borne organisms. Wear them. Tom Brownthumb did not wear gloves for his first three seasons. Tom Brownthumb had interesting hands.

🛒 The Five, Linked

  • Forged one-piece trowel — The foundational hand tool. Buy quality once.
  • Garden fork — For soil preparation, compost incorporation, and root vegetable harvest.
  • Bypass pruning shears — Clean cuts on living plants. The bypass style protects plant tissue.
  • Stirrup hoe — Cuts weeds on both strokes. The upgrade worth making over a standard flat hoe.
  • Leather garden gloves — Protection and dexterity. Leather palms, breathable back, proper fit.

As an Amazon affiliate, I earn from each qualifying purchase. Thank you for supporting TangleWicket.

✨ The Short Version

Trowel for planting. Fork for soil. Shears for cutting. Hoe for weeding. Gloves for hands. Five tools. One complete garden kit.

Everything else in the tool aisle is earned through experience. Buy these five first. Buy them well. They’ll still be working in your garden a decade from now.

Wicket endorses all five. Wicket draws the line at the tool aisle impulse buy. You know the one – seven tools in one!.

📚 Related Reads

TangleWicket is part of the WhistleBump group – find the rest of the family at WhistleBump.com.

31001

©2026 John D Reinhart/Tanglewicket.com – all rights reserved