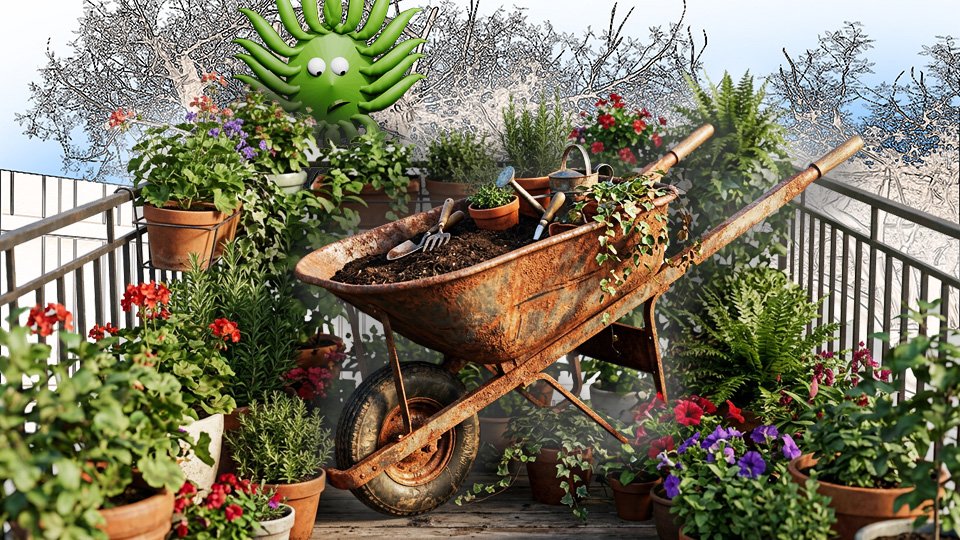
The Flowers That Come Back Every Year Without Help

Some perennials are so reliable they border on rude about it. You plant them once, ignore them completely, and they come back bigger every spring. These are the ones.

There is a category of perennial that does not require your attention, your anxiety, or your apology. You plant it, it establishes, and it returns every spring with more confidence than it had the year before. It does not ask for fertilizer. It does not require winter protection. It simply persists.

These are the plants that build a garden’s backbone while the gardener is doing something else.

🌸 Black-Eyed Susan (Rudbeckia)

The most cheerful and least demanding perennial in common cultivation. Yellow petals, dark center, blooms from midsummer to frost. It spreads slowly by self-seeding, which means a small planting becomes a larger one over a few years without any effort. It tolerates poor soil, drought, and neglect with something approaching good humor.

Plant it once and it will be there longer than you expected.

🌺 Purple Coneflower (Echinacea)

Drought tolerant, native to North America, beloved by pollinators, and increasingly available in colors beyond purple — pink, white, orange, yellow. Coneflowers establish slowly but once settled they are effectively permanent. They also self-seed, and the seedlings, once they appear, can be transplanted wherever you’d like them.

Leave the seed heads standing through winter. Birds eat them. It is the plant doing double duty.

☀️ Daylily (Hemerocallis)

Technically not a true lily, but that distinction can be seen as entirely academic. Daylilies bloom heavily, spread by root division (meaning the clump gets larger each year and you can eventually divide it and plant the divisions elsewhere), and ask almost nothing of the gardener. They tolerate clay soil, periodic drought, and general inattention.

The one quirk: each individual bloom lasts one day. This is not a problem because the plant produces dozens of buds in sequence, and the effect is continuous bloom for several weeks.

🍃 Catmint (Nepeta)

Soft gray-green foliage, clouds of small lavender-blue flowers, drought-tolerant, and pollinators absolutely mob it. Cut it back by half after the first flush of bloom and it will rebloom in fall. Deer don’t eat it. Rabbits don’t eat it. The bees, however, are completely devoted to it.

It also smells pleasant, which is more than can be said for most things that are this easy to grow.

🌼 Shasta Daisy

The classic white daisy with the yellow center, taller and longer-lived than an annual daisy, blooms in early summer and can be coaxed into a second flush with deadheading. It spreads slowly, tolerates average soil, and looks exactly like what people think of when they imagine a garden.

Tom Brownthumb planted three in his first summer. He now has nine, without having planted any of the additional six. This is the entire argument for perennials in one data point.

🛒 Gear Worth Having

Eden Brothers All Perennial Wildflower Seed Mix — 19 perennial varieties including coneflower, black-eyed Susan, and shasta daisy. The economical way to establish a permanent backbone.

Organo Republic 16 Perennial Wildflower Seeds Mix — 100,000+ seeds, 16 perennial varieties. Covers large areas and returns year after year.

Survival Garden Seeds 36-Pack Annual & Perennial Flower Kit — A broad starter collection with both annuals and perennials. Plant the annuals for immediate color while the perennials establish.

As an Amazon affiliate, I earn from qualifying purchases. Thank you for supporting TangleWicket.

📖 Related Reads


TangleWicket is part of the John D Reinhart content family. Writer, illustrator, videographer, and accidental filmmaker — find the whole story at JohnDReinhart.com.

36009

©2026 John D Reinharttanglewicket.com/ – all rights reserved

The Hoe: Wildly Underrated, Wildly Misused

The hoe is the most underrated tool in the garden. Most beginners ignore it. Most experienced gardeners rely on it. Here’s why it matters and how it actually works.

The hoe does not get the respect it deserves. It lacks the tactile satisfaction of a good trowel and the authority of a spade. It looks like a tool your grandparents used and possibly left in the barn. It is unflashy and uncelebrated.

It is also the reason experienced gardeners don’t spend half their time pulling weeds.

Here’s what a hoe actually does, why beginners almost always misuse it, and how using it correctly changes the entire weed management equation in your garden.

🤔 What the Hoe Is Actually For

The hoe’s job is to sever weed stems just below the soil surface, killing the weed without digging it out. When used regularly — every week or two, before weeds establish and develop deep root systems — it prevents the weed problem from ever becoming serious.

Why this matters: weeds pulled after they’ve established roots are harder to remove and more likely to leave root fragments that regrow. Weeds severed just after germination, when their root systems are shallow, die and decompose in place. The hoe catches them at their most vulnerable.

The key insight: hoeing is most effective on dry days when severed seedlings can desiccate quickly in the sun and air. Hoeing on a wet day leaves weed seedlings with enough moisture to re-root. Time your hoeing with the weather.

❌ How Most Beginners Misuse It

The most common hoe mistake is using it like a pickaxe — hacking at established weeds and compacted soil with aggressive downward strokes. This is hard work that accomplishes less than it should, because the target weeds are too established, the technique is wrong, and the tool is working against its design.

The hoe is a slicing tool, not a chopping tool. The motion is horizontal, not vertical. The blade moves parallel to the soil surface, just below it, cutting stems at the root line. A light touch with the right technique is faster and more effective than aggressive hacking.

🔧 The Different Hoe Types

  • Standard flat hoe. The traditional design. One flat blade perpendicular to the handle. Effective and inexpensive. Works best with a push motion along rows.
  • Stirrup hoe (hula hoe). A loop-shaped blade that cuts on both push and pull strokes. Twice as efficient as a standard hoe in the same amount of time. The upgrade worth making for any gardener who hoes regularly.
  • Collinear hoe. A long, narrow blade designed for precise weeding close to plants without disturbing them. Favored by market gardeners. More specialized, excellent for intensive gardens.
  • Warren hoe. A pointed blade designed for making furrows for seed sowing. Not primarily a weeding tool, but useful for direct sowing in rows.

For most beginners, the stirrup hoe is the one to buy. It outperforms the flat hoe at the same price point and makes the actual work of weeding noticeably faster.

📏 Handle Length

A hoe with a handle the right length lets you work in an upright or near-upright position without constant bending. The right length is roughly the distance from the ground to your chin.

Most standard hoes come with a 54-inch or 60-inch handle. Taller gardeners benefit from the longer option. Working hunched over a handle that’s too short negates the efficiency advantage of hoeing over hand weeding.

🛒 The Hoes Worth Having

  • Flexrake stirrup hoe — Cuts on push and pull. The most efficient standard hoe design for regular garden use.
  • CobraHead long-handled weeder — A curved blade that combines hoeing and cultivating in one tool. Excellent for working close to plants.
  • Draw flat hoe — Premium Dutch-made flat hoe. Forged steel, long handle, excellent quality for serious gardeners.

As an Amazon affiliate, I earn from each qualifying purchase. Thank you for supporting TangleWicket.

✨ The Short Version

The hoe prevents the weed problem. Pulling weeds treats the weed problem. Prevention is faster, easier, and more effective.

Use the stirrup hoe. Hoe on dry days. Hoe regularly before weeds establish. Work with a slicing motion, not a chopping one.

Tom Brownthumb spent four seasons pulling weeds by hand. The season he bought a stirrup hoe, he spent four hours total on weeds. The math is not subtle.

📚 Related Reads


Tanglewicket is part of the John D Reinhart content family. Writer, illustrator, videographer, and accidental filmmaker — find the whole story at JohnDReinhart.com.

31009

©2026 John D Reinhart / tanglewicket.com/. All rights reserved.

Seeds vs. Seedlings: Which One Should a Beginner Actually Buy?

Seeds are cheaper. Seedlings are faster. Neither one is obviously better. Here’s how to choose — and why picking the wrong one for the wrong plant is how gardens get off to a rocky start.

The garden center is a wonderful and dangerous place. There are seeds in little packets for seventy-nine cents, and there are seedlings in little pots for four dollars each, and nobody is explaining why one costs five times more than the other or which one Tom Brownthumb should be reaching for.

Here’s the honest answer: both are right, depending on what you’re growing, when you’re growing it, and how much patience you have on any given Tuesday in April.

The fundamental difference: seeds are the beginning of the story. Seedlings are the story already several chapters in. You’re either starting from scratch or buying yourself some time.

🌰 The Case for Seeds

Seeds are cheap. Absurdly cheap compared to seedlings. A packet of tomato seeds costs less than a single tomato plant and contains enough seeds to start a small operation. For anyone growing multiples of the same thing — sunflowers, beans, zucchini, lettuce — seeds are the obvious economic choice.

When seeds make sense: plants that don’t like being transplanted are always better started from seed directly in the ground. Carrots, beans, peas, radishes, and most root vegetables develop tap roots that object strenuously to being moved. Plant these kind of plants in the space where they’re going to live.

Seeds also give you access to varieties the garden center never carries. The garden center stocks twelve tomato varieties. Seed catalogs stock hundreds. If you have opinions about tomatoes — and eventually you will — seeds are where those opinions get expressed.

The tradeoff: time. Seeds need weeks to become plants. Some need to be started indoors before the last frost date. There is a calendar involved and it has opinions.

🌿 The Case for Seedlings

Seedlings are time already purchased. Someone else did the germination work, the thinning, the early watering, the careful temperature management. You are paying for those weeks, and sometimes those weeks are worth the money.

When seedlings make sense: plants with long growing seasons — tomatoes, peppers, eggplant — need so many weeks to mature that starting from seed outdoors isn’t practical in most climates. Unless you’re starting seeds indoors in February, you’re buying seedlings.

Seedlings are also the right choice when you only want one or two plants. Buying a packet of twenty-five pepper seeds to grow two peppers is wasteful. Buy two pepper seedlings and call it done.

The tradeoff: cost, and transplant shock. Every seedling goes through a period of adjustment after it moves from the garden center to your soil. It will look terrible for a week. This is normal. See our post on transplant shock.

🗓️ The Quick Reference

  • Start from seed: beans, peas, carrots, radishes, beets, sunflowers, zucchini, cucumbers, lettuce, spinach.
  • Buy as seedlings: tomatoes, peppers, eggplant, broccoli, cauliflower, celery — anything with a long season that needs a head start.
  • Either works: basil, kale, chard, most herbs, marigolds, nasturtiums. Pick whichever makes more sense for your budget and timeline.

🛒 Worth Having

  • Seed starting tray with dome — For starting seeds indoors. The dome holds humidity while seeds germinate. Remove it once seedlings appear.
  • Seed starting mix — Not the same as potting soil. Seed starting mix is finer, lighter, and designed for germination. Seeds started in regular soil struggle.
  • Plant markers — Label everything immediately. All seedlings look identical at two inches tall and you will not remember what you planted where. This is a promise.
  • Seed storage organizer — For the seeds you don’t use this season. Stored cool and dry, most seeds remain viable for two to three years.

As an Amazon affiliate, I earn from each qualifying purchase. Thank you for supporting TangleWicket.

✨ The Short Version

Seeds for direct-sow plants and budget-conscious gardeners with patience. Seedlings for long-season plants and anyone who would like something to actually happen this year.

Neither choice is wrong. Both choices involve some dirt under the fingernails eventually.

Wicket doesn’t care which one you pick. Wicket just wants you to put something in the ground.

📚 Related Reads

Tanglewicket is part of the John D. Reinhart content family. Writer, illustrator, videographer, and accidental filmmaker — find the whole story at JohnDReinhart.com.

30001

©2026 John D. Reinhart / tanglewicket.com/. All rights reserved.s! This is your first post. Edit or delete it to take the first step in your blogging journey.