
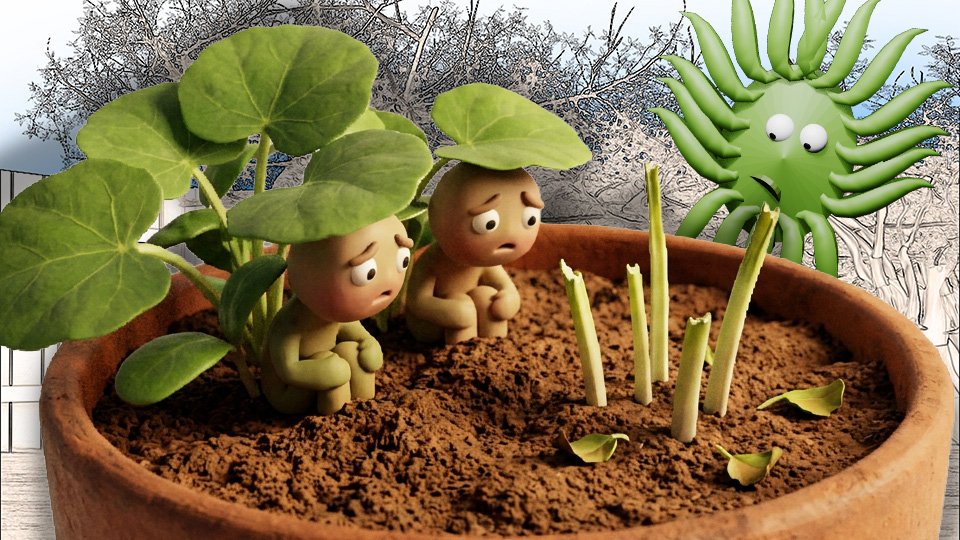
Thinning Seedlings: Why You Have to Kill Some to Save the Rest

Thinning seedlings means deliberately removing plants you just grew. It feels wrong. It is actually correct. Here’s why you have to do it and how to make peace with the process.

You planted seeds. They germinated. Several of them germinated. In fact, too many of them germinated, and now you have a dense thicket of tiny seedlings where the packet said you’d have nicely spaced plants.

The instructions say to thin them. This means removing seedlings so the survivors have enough space to grow properly. You are being asked to pull out and discard plants that you successfully grew from seed, which feels like a betrayal of everything you worked for.

It is not a betrayal. It is the thing that makes the remaining plants actually work. Thinning is as important as planting, and skipping it produces worse results than if you’d planted fewer seeds to begin with.

🤔 Why Crowding Hurts Plants

Plants need space for reasons that are physical, not emotional. Crowded plants compete for three things:

  • Light. Each plant needs direct access to sunlight. Crowded plants shade each other. Shaded plants reach and stretch trying to find light, producing weak, leggy growth. The competition is happening below the soil too.
  • Water and nutrients. Roots compete in the same soil. Crowded roots mean each plant gets less of both. Nutrient-deficient plants are smaller, less productive, and more susceptible to disease and pests.
  • Air circulation. Crowded plants don’t get adequate airflow. Poor airflow leads to fungal problems — mildew, botrytis, damping off. Spacing prevents disease.

The packet’s spacing recommendation exists because someone grew that plant at various densities and determined the minimum space each one needs to perform well. It is not arbitrary.

✂️ How to Thin Without Agony

Wait until seedlings have their first true leaves — the second set of leaves, which look like the plant’s actual leaves rather than the rounded seed leaves (cotyledons) that appear first. True leaves mean the plant is established enough to assess.

Choose the strongest, healthiest seedling in each spacing zone to keep. Remove the others. Use scissors to snip them at soil level rather than pulling them out — pulling can disturb the roots of neighboring seedlings you’re keeping.

The emotional compromise: many thinned seedlings can be eaten. Carrot thinnings are edible. Lettuce thinnings are essentially microgreens. Beet thinnings are delicious sautéed with butter. You’re not wasting them — you’re harvesting early.

📏 Spacing Reference

  • Carrots: thin to 2-3 inches apart.
  • Beets: thin to 3-4 inches apart.
  • Lettuce: thin to 6-8 inches for full heads, 4 inches for leaf lettuce.
  • Radishes: thin to 2 inches apart.
  • Kale and chard: thin to 12-18 inches apart.
  • Beans: thin to 4-6 inches apart.

The seed packet spacing applies here. When in doubt, check the packet.

🛒 Tools That Help

  • Micro-tip scissors — For snipping thinned seedlings cleanly at soil level without disturbing neighbors. More precise than fingers, less disruptive than pulling.
  • Ruler or spacing tool — For checking actual spacing against the recommended distance. Easier than estimating by eye.

As an Amazon affiliate, I earn from each qualifying purchase. Thank you for supporting TangleWicket.

✨ The Short Version

Thinning is not failure. It is the step that turns a crowded mess into a productive garden. Plants need space for light, water, nutrients, and airflow. Crowded plants get none of those things adequately.

Snip at soil level. Keep the strongest seedling. Eat the ones you remove if they’re edible.

Tom Brownthumb once refused to thin his carrots. He grew a very enthusiastic ball of orange confusion.

📚 Related Reads


TangleWicket is part of the WhistleBump group – find the rest of the family at WhistleBump.com.

30009

©2026 John D Reinhart/Tanglewicket.com – all rights reserved

How Deep Is Deep Enough? Planting Depth Explained

Plant too shallow and the roots wash out. Plant too deep and the seed runs out of energy before it surfaces. Planting depth is a small thing with large consequences. Here’s the guide.

Planting depth is one of those things that seems like it shouldn’t matter much and turns out to matter quite a bit. Too shallow and seeds wash away or dry out before they can establish. Too deep and the seedling exhausts its stored energy before it reaches light. Just right produces a plant.

The good news: there is a simple rule that covers most situations, and the seed packet covers the rest.

🌰 The General Rule

Plant seeds at a depth of two to three times their diameter. Not their length — their diameter. A bean seed is about half an inch wide, so it goes about an inch deep. A carrot seed is tiny, so it goes barely under the surface. A sunflower seed goes an inch and a half down.

This rule works because it’s based on how much energy a seed contains. A larger seed has more stored energy and can push up from greater depth. A tiny seed has minimal reserves and needs to reach light quickly.

When in doubt, plant shallower. A seed planted too shallow can often manage. A seed planted too deep rarely does.

🌱 Seeds That Need Special Attention

  • Light-dependent seeds — lettuce, celery, snapdragons, petunias. These need light to germinate and should be pressed onto the soil surface rather than covered. The seed packet says “do not cover” or “needs light.” Believe it.
  • Cold stratification seeds — some perennials and wildflowers need a period of cold before they will germinate. They’re mimicking winter. If you’re planting in fall this happens naturally. In spring you can simulate it by refrigerating seeds for several weeks before planting.
  • Soaking seeds — large, hard-coated seeds like beans, peas, and nasturtiums germinate faster if soaked overnight before planting. The water softens the seed coat. Not required, but genuinely helpful.

🌿 Depth for Seedlings (Not Just Seeds)

Transplanting seedlings has its own depth question and it’s different from seeds.

Most seedlings go in at the same depth they were growing in their container — the soil line on the stem matches the new soil level. Planting too deep buries the stem, which can cause rot. Too shallow exposes roots.

The tomato exception: tomatoes can be planted deeply — quite deeply. They develop roots all along their buried stem. A leggy tomato seedling can be buried up to its top few sets of leaves, and it will develop a stronger root system for it. This is one of gardening’s genuinely useful tricks.

🛒 Tools That Make Depth Easier

  • Dibber or dibble tool — Makes planting holes at consistent depths. Marks on the tool correspond to specific depths. Faster and more consistent than guessing with a finger.
  • Garden trowel with depth markings — Measurements marked on the blade eliminate guesswork for transplanting seedlings.
  • Seed spacing and depth guide — A quick-reference chart for common vegetables. Worth laminating and keeping in the garden.

As an Amazon affiliate, I earn from each qualifying purchase. Thank you for supporting TangleWicket.

✨ The Short Version

Two to three times the seed’s diameter. Shallow for tiny seeds. Deeper for large ones. Check the packet for anything unusual. Plant seedlings at the same depth they were growing, except tomatoes, which want to go deep.

Depth is one of the easiest variables to get right and one of the most commonly overlooked.

Wicket has strong opinions about depth. We don’t ask.

📚 Related Reads


TangleWicket is part of the WhistleBump group – find the rest of the family at WhistleBump.com.

30006

©2026 John D Reinhart/Tanglewicket.com – all rights reserved
Reading a Seed Packet Without Glazing Over

A seed packet contains more useful information per square inch than almost anything else in the garden center. Here’s how to read it without the glazed expression.

Seed packets are small. They contain an impressive amount of information in an impressive amount of jargon, printed in a font size that tests the patience of anyone without reading glasses. And then they end, and you’re expected to proceed with confidence.

Most people glance at the picture on the front, flip to the back, decide it’s too much, and plant things based on instinct and optimism. This is fine until it isn’t.

Here’s what every field actually means — so the next time you’re standing in the garden center you can read the packet like someone who’s done this before.

🌱 The Front

  • The variety name. Not just “tomato” but “Sun Gold” or “Cherokee Purple” or “Roma.” Variety matters enormously for flavor, size, disease resistance, and days to maturity. This is where the interesting decisions live.
  • Days to maturity. Often printed on the front, sometimes the back. This tells you how many days from transplanting (or from direct sowing for direct-sow crops) until the plant produces. A 90-day tomato needs 90 days of frost-free weather after transplanting. Know your growing season.
  • Annual/Perennial/Biennial. Annual completes its life cycle in one season and dies. Perennial comes back every year. Biennial takes two years — it grows in the first season and flowers, seeds, and dies in the second. If you want biennials blooming every year, plant new ones each spring so you always have both first-year and second-year plants going at once

📋 The Back

  • Planting depth. How deep the seed goes. See our post on planting depth for the full explanation, but the packet number is the authoritative one for that specific variety.
  • Spacing. How far apart to plant seeds or seedlings. This is not a suggestion. Plants that are too close compete for light, water, and nutrients. Crowded plants produce less and get sick more. The spacing exists because the plant grows to a specific size and needs that room.
  • Sow indoors / direct sow. Whether to start inside first or plant straight in the ground. If it says “sow indoors 6-8 weeks before last frost,” that’s your timeline.
  • Sun requirements. “Full sun” means six or more hours of direct sun. “Part shade” means three to six hours. “Full shade” means less than three. Planting a full-sun vegetable in part shade produces a disappointed, underperforming plant.
  • Days to germination. How long before you see anything happening. Useful for not declaring failure prematurely.
  • Seed count. How many seeds are in the packet. Relevant for planning how many rows you can plant and how much backup you have.

🌟 The Useful Phrases

  • “Do not cover” or “Light required” — press the seed onto the surface. Covering it prevents germination.
  • “Scarify before planting” — scratch or nick the seed coat with sandpaper to help water penetrate. For hard-coated seeds like morning glory.
  • “Soak overnight” — soften the seed coat before planting. Speeds germination for large-seeded plants like beans and peas.
  • “Thin to X inches” — after seeds germinate, remove some seedlings to achieve the proper spacing. Painful but necessary. See our post on thinning.

🛒 Tools Worth Having

  • Seed packet organizer — Organize by planting month so you know exactly when each packet needs attention. Prevents the “I forgot to start those in February” situation.
  • Garden journal — Record what you planted, when, and how it performed. Next year’s decisions are made from this year’s notes.
  • Magnifying glass — For reading the instructions in the font size seed packets apparently prefer. Not a joke.

As an Amazon affiliate, I earn from each qualifying purchase. Thank you for supporting TangleWicket.

✨ The Short Version

The seed packet contains almost everything you need to know to succeed with that plant. Days to maturity, depth, spacing, sun, timing — it’s all there.

Read the whole thing before you plant – before you even buy it. The front, the back, the fine print. It takes ninety seconds and answers most questions before they become problems.

Tom Brownthumb once ignored the spacing instructions. His zucchini required a map.

📚 Related Reads


TangleWicket is part of the WhistleBump group – find the rest of the family at WhistleBump.com.

30007

©2026 John D Reinhart/Tanglewicket.com – all rights reserved
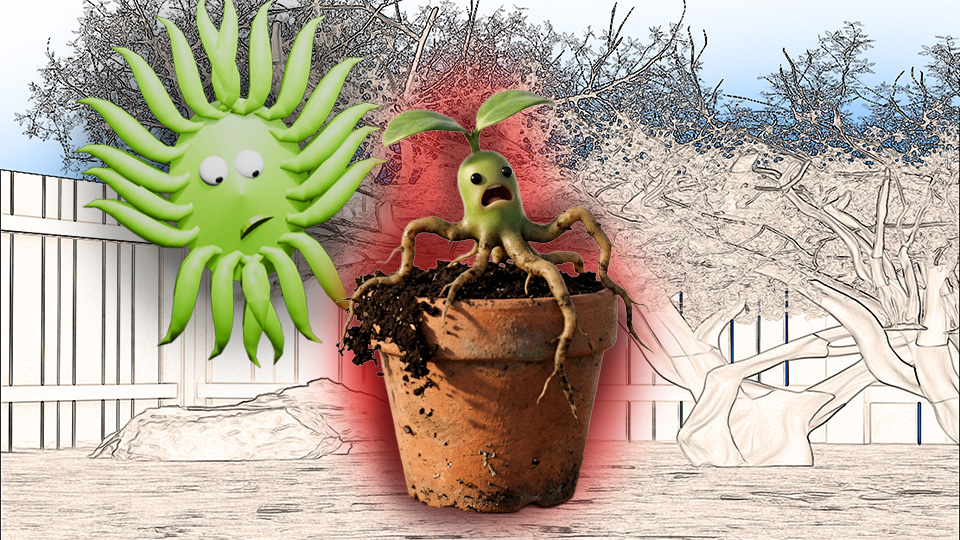
Transplant Shock: Why Your Seedling Looks Terrible and What to Do

You brought the seedling home. It looked fine. Now it looks terrible. Nothing is wrong with you or the plant — this is transplant shock, it’s normal, and here’s exactly what to do.

You went to the garden center. You selected a perfectly healthy seedling — green, perky, clearly thriving. You brought it home. You planted it carefully. You watered it. You checked on it the next morning and it looked like it was reconsidering all of its decisions.

Wilted. Droopy. Possibly yellowing at the edges. Showing every sign of a plant that has just been through something traumatic.

It has. It’s called transplant shock, and it’s not a sign that you did anything wrong. It’s a sign that you did the completely normal thing of moving a plant from one environment to another, and plants have feelings about that.

🤔 What’s Actually Happening

When a plant is moved, its root system is disrupted. Roots that were comfortably established in their original container or soil suddenly find themselves in a new environment with different moisture levels, different soil composition, and different temperatures. The plant’s ability to take up water is temporarily compromised even if water is plentiful.

Meanwhile, the leaves are still transpiring — releasing moisture into the air — at their usual rate. The roots can’t keep up. The plant wilts. It looks terrible. It is, in fact, fine.

The recovery timeline: most transplants look rough for three to seven days. After that, new root growth establishes in the new soil and the plant perks back up. Some take two weeks. A very stressed transplant can take longer. Patience is the primary treatment.

🛡️ How to Minimize It

  • Transplant in the evening or on a cloudy day. This reduces the immediate heat and sun stress on a plant that is already struggling with its root system. A seedling moved on a hot sunny afternoon has a harder first day than one moved at dusk.
  • Water well before and after. The original container should be thoroughly watered an hour before transplanting — a hydrated plant handles stress better. Water immediately after planting to settle the soil around the roots and eliminate air pockets.
  • Don’t disturb the roots more than necessary. Slide the plant out of its container rather than pulling. Keep as much of the original root ball intact as possible. Roots that aren’t broken establish faster.
  • Harden off before transplanting. If the plant has been indoors or in a greenhouse, it needs gradual introduction to outdoor conditions. Set it outside in a sheltered spot for a few hours each day for a week before planting. Skipping this step guarantees shock.

💧 What to Do After

Water consistently for the first two weeks. Not excessively — soggy roots don’t recover faster — but consistently. The soil should stay evenly moist.

Provide shade if the plant is in direct sun and the weather is hot. A piece of shade cloth, an overturned basket, even a paper bag with holes punched in it for a few days gives the plant time to establish without the additional stress of full sun.

Do not fertilize immediately. A stressed plant cannot use fertilizer efficiently and high-nitrogen fertilizer on a struggling transplant can burn roots. Wait until the plant shows new growth — that’s the sign that establishment has happened and it’s ready to eat.

🛒 Tools Worth Having

  • Transplanting trowel — Narrow blade for making precise holes and lifting root balls without disturbing surrounding plants or roots.
  • Shade cloth — For protecting newly transplanted seedlings from intense sun during establishment. Reusable across multiple seasons.
  • Rooting hormone powder — Dusting cut stems or damaged roots before transplanting can encourage faster root establishment. Particularly useful for cuttings and bare-root transplants.
  • Watering can with gentle rose — For consistent gentle watering around new transplants without disturbing the soil or flooding the root zone.

As an Amazon affiliate, I earn from each qualifying purchase. Thank you for supporting TangleWicket.

✨ The Short Version

Transplant shock is normal. The plant is not dying — it is adjusting. It looks terrible for a week and then, almost always, it doesn’t.

Transplant in the evening. Water before and after. Don’t fertilize yet. Give it time.

Tom Brownthumb has experienced this approximately every spring. The plants have all recovered.

📚 Related Reads


TangleWicket is part of the WhistleBump group – find the rest of the family at WhistleBump.com.

30005

©2026 John D Reinhart/Tanglewicket.com – all rights reserved
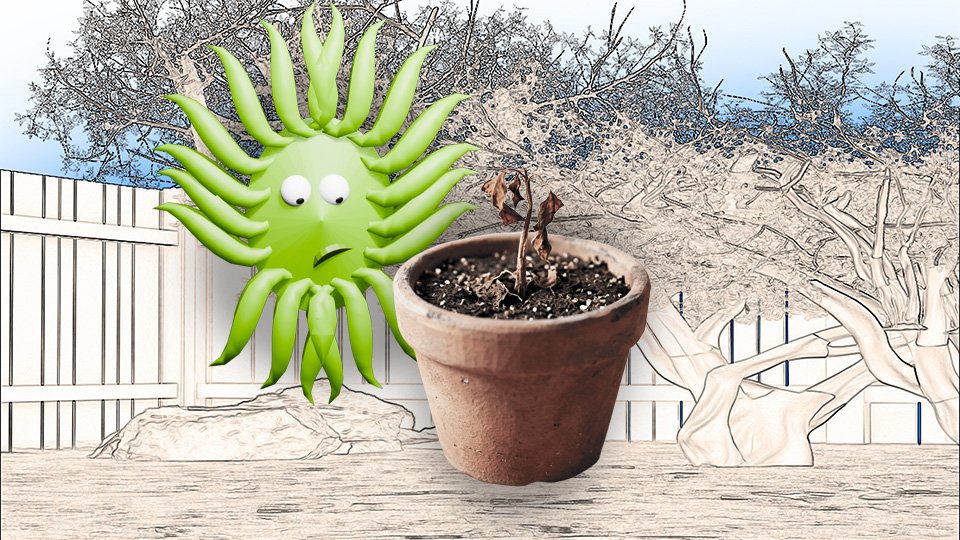
Why Your Seeds Aren’t Germinating (And How to Fix It)

You planted the seeds. Nothing happened. Here’s why — and it’s almost certainly one of five completely fixable problems that have nothing to do with your ability as a gardener.

You did everything right. You read the packet. You planted the seeds at the specified depth. You watered them. You waited. And then you waited some more. And then you went out and stared at the dirt, which continued to be dirt with no visible improvement.

Seed germination failure is one of the most discouraging things in gardening because you can’t see what’s happening. The problem is underground, invisible, and apparently indifferent to your concern.

The good news: it’s almost always one of five fixable things. None of them mean you have a talent deficiency. They mean something in the conditions wasn’t quite right.

🌡️ Problem One: Temperature

Seeds germinate within specific temperature ranges. Outside those ranges they either sit dormant or rot. Most vegetable seeds want soil temperatures between 60°F and 75°F. Plant them in cold spring soil and they wait. Plant them in hot summer soil and some of them cook.

Why soil temperature matters more than air temperature: the air can be 70°F on a sunny afternoon while the soil is still 48°F two inches down. Seeds live in the soil. The air temperature is irrelevant to them.

A soil thermometer costs almost nothing and removes all guesswork. Check the soil temperature before planting. Warm soil produces germination. Cold soil produces patience and disappointment.

💧 Problem Two: Moisture

Seeds need consistent moisture to germinate. Not soggy — soggy causes rot. Not dry — dry causes dormancy. Consistently damp, like a wrung-out sponge that still has some moisture left.

The common mistake: watering once, assuming it’s handled, and then letting the soil surface dry out completely. The seed starts to germinate, the process requires water, the water disappears, and the seed gives up.

The fix: check the soil surface daily. It should feel slightly damp to the touch. A light misting is better than heavy watering, which can wash seeds deeper than intended or compact the soil over them.

🕛 Problem Three: Depth

Planting too deep is the most common depth mistake. A seed contains only so much energy. If it’s buried three inches down when it should be half an inch, it runs out of energy before it reaches light. It germinates perfectly and then dies before you ever see it.

The general rule: plant seeds at a depth of two to three times their diameter. Tiny seeds — lettuce, carrots, basil — go barely under the surface. Large seeds — beans, squash, sunflowers — go about an inch down.

When in doubt, plant shallower. A seed planted too shallow can often push through. A seed planted too deep rarely makes it.

☀️ Problem Four: Light (or Lack of It)

Some seeds need light to germinate and should be pressed onto the soil surface rather than covered. Lettuce is the most common example. Bury lettuce seeds and nothing happens. Leave them on the surface and they sprout reliably.

The seed packet specifies this, usually with the phrase “do not cover” or “light required for germination.” Read the packet. It knows things.

📅 Problem Five: Time and Patience

Different seeds germinate at wildly different speeds. Radishes: five to seven days. Peppers: fourteen to twenty-one days. Parsley: up to four weeks. Parsley will make you question everything.

Look up the expected germination time for whatever you planted before declaring failure. Some seeds are simply slow and your concern, however sincere, is not going to hurry them.

🛒 Tools That Help

  • Soil thermometer — Ten dollars of certainty about soil temperature. The single most useful tool for understanding why seeds aren’t doing what they should.
  • Spray bottle for misting — For gentle, consistent moisture without disturbing seeds or compacting the soil above them.
  • Seed starting heat mat — Warms soil from below. Dramatically improves germination rates for warm-season crops started indoors. Peppers and tomatoes love this.
  • Seed starting mix — Fine, light, and designed for germination. Heavy garden soil compacts over seeds and blocks emergence.

As an Amazon affiliate, I earn from each qualifying purchase. Thank you for supporting TangleWicket.

✨ The Short Version

Seeds don’t fail because you’re bad at gardening. They fail because one variable — temperature, moisture, depth, light, or time — wasn’t quite right.

Fix the variable. Try again. Gardening is largely a series of small experiments conducted in the dirt.

Wicket has failed to germinate several times. Wicket kept going anyway.

📚 Related Reads


TangleWicket is part of the WhistleBump group – find the rest of the family at WhistleBump.com.

30002

©2026 John D Reinhart/Tanglewicket.com – all rights reserved
Starting Seeds Indoors: What You Actually Need (And What You Don’t)

Starting seeds indoors sounds complicated. It isn’t — you need a container, some seed starting mix, some light, and the ability to remember to water things. Here’s the whole picture.

Every February, gardening content fills up with elaborate indoor seed-starting setups. Grow lights on adjustable chains. Heat mats in precise configurations. Humidity domes. Fertilizer schedules. It looks like a small-scale agricultural operation and it makes the whole enterprise feel impossible before you’ve bought a single packet of seeds.

Here’s what’s actually required: a small container, seed starting mix, light, water, and warmth. That’s the list. Everything else is optional infrastructure that experienced gardeners have accumulated over years.

Why bother at all? Some plants — tomatoes, peppers, eggplant, broccoli — need so many weeks to mature that they can’t be direct sown outdoors in most climates. Starting them indoors gives them a head start. By the time the last frost passes, you’re transplanting established plants instead of waiting for seeds to sprout.

🗓️ When to Start

Count backward from your last frost date. Most seed packets specify “start indoors X weeks before last frost.” Tomatoes and peppers typically want six to eight weeks. Broccoli and cauliflower want four to six.

Start too early and your seedlings outgrow their containers and become rootbound and stressed before they can go outside. Start too late and you’ve defeated the purpose. The seed packet knows the timing. Trust it.

☀️ The Light Situation

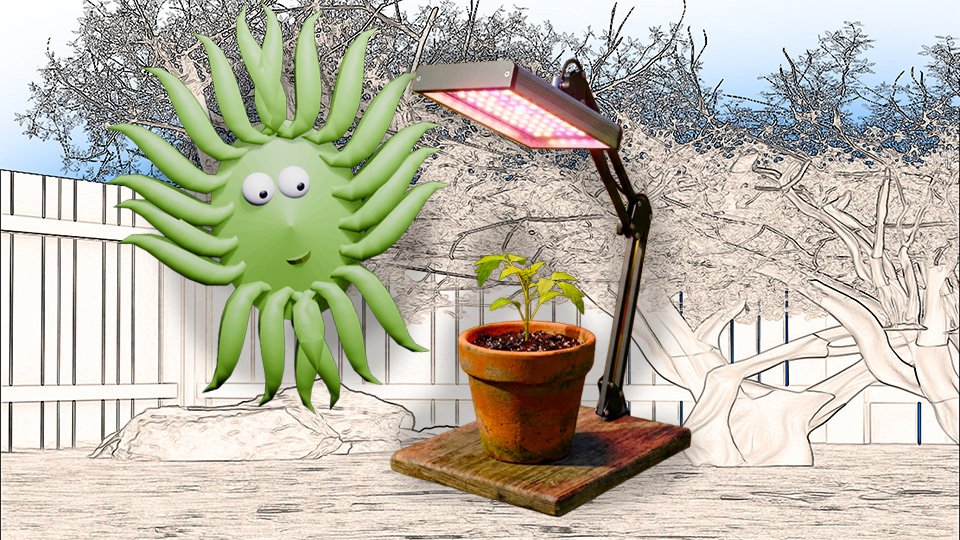
This is where most indoor seed starting fails. A sunny windowsill sounds adequate and usually isn’t. Winter light through glass, even south-facing, is rarely intense enough for seedlings. The result is “legginess” — seedlings that stretch toward the light, growing tall and thin and weak instead of short and stocky and ready for outdoor life.

The fix: a grow light positioned two to four inches above the seedlings, on for fourteen to sixteen hours a day. A basic shop light with daylight-spectrum bulbs works. A dedicated seedling grow light works better. Neither requires a significant investment.

Lower is better than higher for the light. Seedlings reaching for a distant light source get leggy. Seedlings with light practically touching them stay compact and strong.

🌡️ The Warmth Situation

Seeds germinate faster in warm soil. Most warm-season crops want soil temperatures of 70°F-80°F for reliable germination. The top of a refrigerator, which generates warmth, is a classic improvised solution. A seedling heat mat is the proper solution.

Once seeds have sprouted and you can see green, the heat mat becomes less critical. Room temperature is fine for growing on. The heat mat is specifically for the germination phase.

💧 The Watering Situation

Water from below when possible — set the tray in water and let the soil absorb moisture upward. This keeps the soil surface drier, which discourages damping off, a fungal problem that kills seedlings at the soil line.

Damping off looks like seedlings that were fine yesterday and are lying flat today, pinched off at the base. It’s caused by a combination of overwatering, poor air circulation, and wet soil surfaces. Bottom watering, a small fan for air movement, and not overwatering prevents it.

🛒 What to Buy

  • Seedling grow light — The single most important indoor seed starting purchase. Legginess is the most common indoor seedling problem and adequate light is the only solution.
  • Seed starting heat mat — Speeds germination reliably. Particularly important for peppers, which are slow and sulky in cold soil.
  • Seed starting tray with dome and cells — The dome holds humidity during germination. The cells keep seedlings separated for easy transplanting.
  • Seed starting mix — Lighter and finer than potting soil, designed for germination. Seedlings started in potting mix or garden soil struggle to emerge.

As an Amazon affiliate, I earn from each qualifying purchase. Thank you for supporting TangleWicket.

🌱 The Finish Line: When Do They Go Outside?

All of this indoor effort has one destination: the garden. Here’s how to know when your seedlings are ready to make the trip.

Watch the last frost date. That’s the anchor. Most warm-season seedlings — tomatoes, peppers, eggplant — go outside after the last frost date has passed, with a buffer of a week or two for safety. Cool-season seedlings like broccoli can go out earlier, since they tolerate light frost.

Watch the seedling. A ready seedling has its first set of true leaves — the second set that appears, which looks like the plant’s actual adult leaves rather than the rounded seed leaves it started with. It’s stocky, not leggy. It looks like something that could handle the world.

Harden off first. Don’t go straight from the grow light to full sun — that’s a shock the seedling doesn’t need. Spend a week introducing it to outdoor conditions gradually. A few hours outside in a sheltered spot, increasing each day. By the end of the week it’s ready for planting.

Skip the hardening off and the seedling will tell you about it immediately. Wilting, sunscald, a generally betrayed expression. Take the week.

✨ The Short Version

Start seeds indoors when the plant needs more weeks than your growing season provides. Provide adequate light — this is the critical variable most beginners underestimate. Keep the soil warm for germination. Water from below. Don’t start too early.

The setup does not need to be elaborate. It needs to be consistent.

Wicket started indoors once. Found it claustrophobic. You’ll do fine.

📚 Related Reads


TangleWicket is part of the WhistleBump group – find the rest of the family at WhistleBump.com.

30004

©2026 John D Reinhart/Tanglewicket.com – all rights reserved
What “Direct Sow” Actually Means

“Direct sow” is two words that appear on almost every seed packet and almost never get explained. Here’s what they mean, when to do it, and why some plants demand it.

You’re reading a seed packet. Somewhere in the instructions, usually in small print that assumes you already know things, are the words “direct sow.” The packet moves on without explanation, apparently confident that this phrase requires none.

It’s not complicated. It just sounds like it might be.

Direct sow means: plant the seeds directly in the ground where they will grow, rather than starting them in pots or trays first and transplanting later. That’s it. No indoor nursery operation required.

🤔 Why Some Plants Prefer It

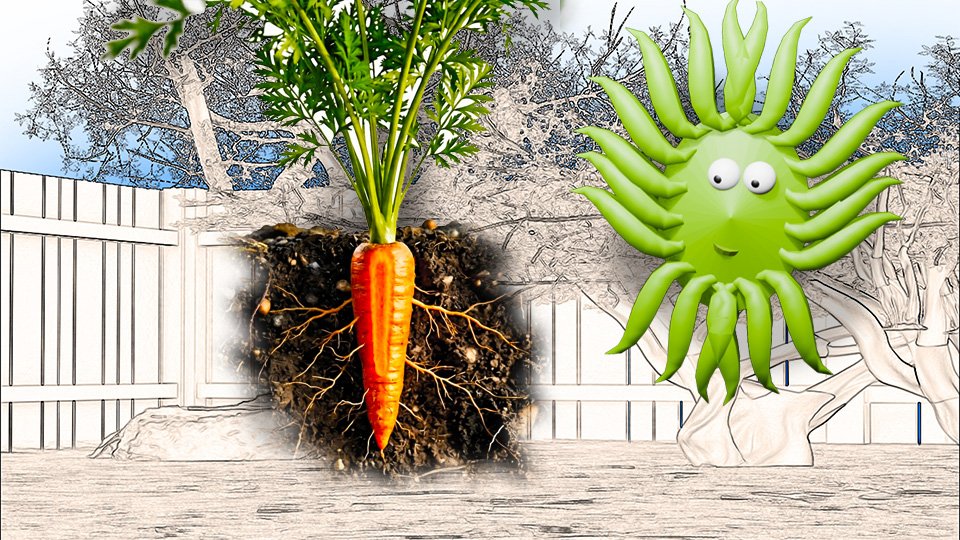
The reason some seeds are labeled for direct sowing is that they don’t transplant well. These plants develop root systems — often a tap root — that object to being disturbed. Try to move them after they’ve started growing and they sulk, struggle, or simply die.

Carrots are the clearest example. A carrot is its own tap root. Disturb it once it’s growing and you get a forked, stunted, or dead carrot. Direct sow is not a suggestion for carrots. It’s a requirement.

  • Direct sow plants: carrots, beets, radishes, turnips, parsnips, beans, peas, corn, sunflowers, zucchini, cucumbers, melons, nasturtiums, poppies, bachelor’s button.
  • Start indoors first: tomatoes, peppers, eggplant, broccoli, cauliflower, celery, most herbs, marigolds.

🗓️ When to Direct Sow

The timing depends on what you’re planting and what it can tolerate:

  • Cool-season crops (lettuce, spinach, peas, carrots, radishes) — direct sow in early spring as soon as the soil can be worked. These plants can handle light frost. They actually prefer cool temperatures and bolt — go to seed prematurely — in summer heat.
  • Warm-season crops (beans, squash, cucumbers, corn, sunflowers) — direct sow after the last frost date when soil has warmed. These plants are killed by frost and stunted by cold soil.

The last frost date is your calendar anchor for all of this. It’s covered in its own post because it deserves the space.

🚜 How to Actually Do It

Preparing the soil is the whole job. Loose, workable soil lets seeds make contact with moisture and allows roots to grow without fighting compacted earth.

Remove weeds, rocks, and debris. Break up any clods. Rake smooth. The bed doesn’t need to be perfect — it needs to be loose enough that a seed can do its job.

Plant at the depth the packet specifies. Water gently so you’re moistening the soil without washing seeds sideways. Mark what you planted and where. This sounds obvious and is consistently skipped with consequences.

🛒 Tools Worth Having

  • Garden trowel — For making planting furrows and holes at the right depth. The foundational direct-sow tool.
  • Garden rake — For smoothing the seedbed before planting. Level soil means even germination.
  • Plant markers — Mark rows immediately. Unmarked rows become mysteries within two weeks.
  • Watering can with rose head — The rose attachment breaks the water into a gentle spray that moistens without washing seeds away. Direct sowing’s best friend.

As an Amazon affiliate, I earn from each qualifying purchase. Thank you for supporting TangleWicket.

✨ The Short Version

Direct sow means skip the indoor nursery and put the seeds straight in the ground. It’s not a technique so much as an instruction: this plant does not want to be transplanted, so don’t.

Prepare loose soil, plant at the right depth, water gently, mark the row, and wait.

The ground is ready. Tom Brownthumb is ready. The seeds are ready. This is the moment.

📚 Related Reads


TangleWicket is part of the WhistleBump group – find the rest of the family at WhistleBump.com.

30003

©2026 John D Reinhart/Tanglewicket.com – all rights reserved

The Last Frost Date: What It Is and Why It Runs Your Life in Spring

The last frost date is the single most important date in your gardening year. Here’s what it means, how to find yours, and why everything in the spring garden revolves around it.

Every seed packet, every planting guide, every gardening calendar eventually refers to the last frost date. “Plant after last frost.” “Sow indoors six weeks before last frost.” “Transplant two weeks after last frost.” The last frost date is the fixed point that the entire spring planting calendar orbits around.

If you don’t know yours, you’re gardening on optimism alone. Which is fine, frankly, but knowing it is better.

🤔 What It Actually Is

The last frost date is the average date of the final frost of winter in your location. Average, not guaranteed. The last frost date for central New Jersey, for example, is approximately April 15th. That doesn’t mean it won’t frost on April 20th. It means that historically, the last frost usually falls around that date.

Think of it as a probability, not a promise. Planting tender seedlings outdoors two weeks after the last frost date gives you a reasonable buffer. Planting the day after last frost date is gambling.

There is also a first frost date in fall, which marks the end of the growing season for frost-sensitive plants. The window between last frost in spring and first frost in fall is your growing season.

📍 How to Find Yours

The Old Farmer’s Almanac website has a frost date lookup by zip code that is accurate and free. The USDA Plant Hardiness Zone Map tells you your zone, which governs what perennials survive your winters. Both are worth knowing.

Your county’s agricultural extension service — every county has one — is also an excellent local resource. They know your microclimate in ways a national database doesn’t.

🗓️ How to Use It

Count backward for indoor seed starting. If your last frost date is April 15 and the tomato packet says “sow indoors 6-8 weeks before last frost,” you’re starting tomatoes in late February or early March.

Count forward for outdoor planting. Frost-tender plants — tomatoes, peppers, basil, squash — go outside after the last frost date, with a buffer for safety. Cool-season plants — peas, lettuce, spinach, carrots — go in before the last frost date because they tolerate or actually prefer cool weather.

  • Before last frost: peas, lettuce, spinach, kale, broccoli, carrots, radishes, potatoes.
  • After last frost: tomatoes, peppers, beans, squash, cucumbers, basil, corn, melons.

🌡️ What Frost Actually Does to Plants

Frost forms when air temperature drops to 32°F and water vapor freezes onto surfaces. Inside plant cells, the same freezing happens. Ice crystals form inside the cells and rupture them. The plant tissue dies. This is why frost-tender plants blacken and collapse after a frost event.

Hardy plants have adaptations that prevent or tolerate ice crystal formation. Frost-tender plants don’t. Knowing the difference saves plants.

A light frost (29°F-32°F) is less damaging than a hard frost (below 28°F). Covering plants with frost cloth or even a bedsheet on cold nights can protect against light frosts. A hard freeze requires more serious protection or acceptance.

🛒 Tools Worth Having

  • Frost cloth / garden fleece — Lightweight fabric that provides several degrees of frost protection. Drape over plants on cold nights, remove in the morning. Reusable for years.
  • Min-max thermometer for the garden — Records overnight lows so you know exactly what temperature your garden reached. More useful than the weather app which measures air temperature, not ground-level garden temperature.
  • Cold frame or row cover hoops — For extending the season in both directions. Start earlier in spring, keep going later in fall.

As an Amazon affiliate, I earn from each qualifying purchase. Thank you for supporting TangleWicket.

✨ The Short Version

The last frost date is your spring planting calendar’s anchor. Count backward from it to know when to start seeds indoors. Count forward from it to know when tender plants can safely go outside.

Look yours up. Write it on the calendar. Build everything around it.

Tom Brownthumb once planted tomatoes a week before last frost date. Spring disagreed with him. The tomatoes did not survive the disagreement.

📚 Related Reads


TangleWicket is part of the WhistleBump group – find the rest of the family at WhistleBump.com.

30008

©2026 John D Reinhart/Tanglewicket.com – all rights reserved
Starting a Garden From Scratch: What Goes in the Ground First

Starting a garden from scratch is less complicated than it looks and more rewarding than you’d expect. Here’s everything that goes in the ground first — and why, in that order.

Somewhere between the idea of a garden and the actual garden is a gap that stops most people cold. The gap is full of questions. Where do you put it? What do you plant? What do you do first? What if you kill everything?

These are all reasonable questions. Here’s the thing about all of them: they have answers. Not complicated answers. Just answers nobody hands you when you buy your first packet of seeds.

This is that handout. The full picture, from blank ground to first harvest, with every step explained and in the right order.

📍 Step One: Pick the Location

The location is the most important decision in the whole process and it is made before a single seed is purchased. Get this right and everything is easier. Get it wrong and you’re fighting the site for everything.

  • Sun is the non-negotiable. Most vegetables need six or more hours of direct sunlight daily. Find the sunniest spot in your yard. This is your garden. It doesn’t need to be pretty. It needs to be sunny.
  • Water access matters. A garden you can’t conveniently water is a garden you will stop watering during the busiest parts of the season, which is when it needs water most. Pick a spot within reach of a hose.
  • Start small. The most common beginner mistake is starting too big. A 4×8 raised bed or a 10×10 plot is more than enough for a first garden. You can always expand. You cannot un-expand once you’ve committed to maintaining more space than you have energy for.

🪣 Step Two: Prepare the Ground

The most important thing in any garden is the soil. Not the seeds. Not the tools. The soil. Plants grow in it, drink from it, and eat from it. Poor soil produces poor plants. Good soil produces good plants. This is not complicated but it surprisingly easy to underestimate.

Two approaches, both valid:

  • Raised beds. Build or buy a frame, fill it with a mix of quality topsoil and compost, and you’re done. You control the soil entirely. No existing soil problems, no compaction, excellent drainage. The most reliable approach for beginners and experienced gardeners alike.
  • In-ground beds. Remove grass and weeds from the area. Loosen the soil with a fork or tiller to a depth of 12 inches. Add several inches of compost and work it in. Test the soil if you can — your county’s agricultural extension office usually offers cheap or free soil testing and tells you exactly what amendments your soil needs.

Either way, the soil should be loose, dark, and smell like earth rather than clay or nothing. Soil that smells good grows things.

🗓️ Step Three: Know Your Calendar

Before anything goes in the ground, know your last frost date. It’s the anchor for your entire planting calendar. Everything else — when to start seeds indoors, when to direct sow, when to transplant — is measured from that date.

Look it up by zip code. Write it on the calendar. Build your plan around it. See our full post on the last frost date for everything you need to know.

🌱 Step Four: Choose What to Plant

Start with things that are hard to kill, fast to produce, and satisfying to eat. Beginners who start with difficult plants get discouraged. Beginners who start with forgiving plants get hooked.

  • The forgiving vegetables: zucchini (almost aggressively productive), beans (fast, reliable, satisfying), lettuce (quick, cool-season, easy), radishes (twenty-five days from seed to table), cherry tomatoes (more forgiving than large varieties), herbs (basil, parsley, chives — useful and difficult to fail).
  • Leave for later: large tomatoes (require more attention), corn (needs space and specific planting patterns), melons (need a long hot season), anything described as “delicate” or “challenging” in any guide.

Three to five crops for a first garden. Not fifteen. Success with three things is far more motivating than partial failure with fifteen.

🌰 Step Five: Seeds or Seedlings?

Both, almost certainly. Direct sow beans, zucchini, radishes, and lettuce. Buy tomato and pepper seedlings from the garden center — they need a long growing season that makes direct sowing impractical in most climates.

See our full post on seeds vs. seedlings for the complete breakdown of which plants go which route.

💧 Step Six: Water, Mulch, and Wait

Water: most vegetables need about an inch of water per week, either from rain or irrigation. Check soil moisture by sticking a finger two inches into the soil — if it’s dry, water. If it’s damp, wait. Overwatering kills more plants than underwatering in gardens with decent drainage.

Mulch: a two to three inch layer of mulch around plants conserves moisture, suppresses weeds, and regulates soil temperature. Straw, wood chips, shredded leaves — any organic material works. Mulching is one of the highest-value things you can do for a new garden and one of the most overlooked.

Wait and watch: gardening involves long stretches of doing almost nothing while things grow. This is not failure. This is the job. Visit the garden daily, not to intervene, but to observe. You’ll notice problems early enough to address them, and you’ll notice progress that would otherwise go unseen.

🛒 The Starting Kit

  • Raised bed garden kit — The fastest path to good soil. Cedar resists rot, assembly is straightforward, and a 4×8 bed is the ideal beginner size.
  • Garden fork or tiller — For loosening and preparing in-ground beds. Loose soil at twelve inches deep gives roots room to develop.
  • Quality compost — The soil amendment that fixes almost every soil problem. Added generously to any bed, it improves drainage in clay soils and water retention in sandy soils.
  • Straw mulch — For mulching around new plants. Suppresses weeds, holds moisture, and breaks down over time to improve soil.
  • Garden sprayer with adjustable nozzle — Adjustable from gentle mist for seedlings to stronger flow for established plants. The tool you’ll use every single day.

As an Amazon affiliate, I earn from each qualifying purchase. Thank you for supporting TangleWicket.

✨ The Big Picture

A first garden does not need to be ambitious. It needs to be somewhere sunny, planted in decent soil, with a handful of forgiving crops, watered consistently, and visited often enough to notice what’s happening.

The first season teaches you more than any guide can. You’ll learn what your soil does, what the light looks like at different times of year, what your local pests are, and which plants you actually want to eat. Every subsequent season is built on those lessons.

Tom Brownthumb started with four crops. Three of them worked. He planted seven the following year. That’s the whole story of every gardener who stuck with it.

The ground is ready. Wicket is watching. Let’s put something in it.

📚 Related Reads


TangleWicket is part of the WhistleBump group – find the rest of the family at WhistleBump.com.

30010

©2026 John D Reinhart/Tanglewicket.com – all rights reserved
Seeds vs. Seedlings: Which One Should a Beginner Actually Buy?

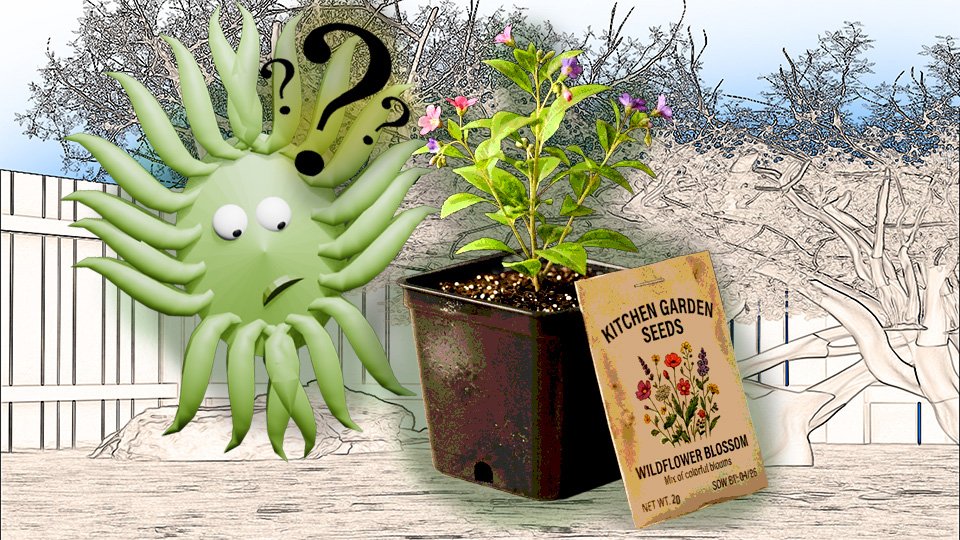
Seeds are cheaper. Seedlings are faster. Neither one is obviously better. Here’s how to choose — and why picking the wrong one for the wrong plant is how gardens get off to a rocky start.

The garden center is a wonderful and dangerous place. There are seeds in little packets for seventy-nine cents, and there are seedlings in little pots for four dollars each, and nobody is explaining why one costs five times more than the other or which one Tom Brownthumb should be reaching for.

Here’s the honest answer: both are right, depending on what you’re growing, when you’re growing it, and how much patience you have on any given Tuesday in April.

The fundamental difference: seeds are the beginning of the story. Seedlings are the story already several chapters in. You’re either starting from scratch or buying yourself some time.

🌰 The Case for Seeds

Seeds are cheap. Absurdly cheap compared to seedlings. A packet of tomato seeds costs less than a single tomato plant and contains enough seeds to start a small operation. For anyone growing multiples of the same thing — sunflowers, beans, zucchini, lettuce — seeds are the obvious economic choice.

When seeds make sense: plants that don’t like being transplanted are always better started from seed directly in the ground. Carrots, beans, peas, radishes, and most root vegetables develop tap roots that object strenuously to being moved. Plant these kind of plants in the space where they’re going to live.

Seeds also give you access to varieties the garden center never carries. The garden center stocks twelve tomato varieties. Seed catalogs stock hundreds. If you have opinions about tomatoes — and eventually you will — seeds are where those opinions get expressed.

The tradeoff: time. Seeds need weeks to become plants. Some need to be started indoors before the last frost date. There is a calendar involved and it has opinions.

🌿 The Case for Seedlings

Seedlings are time already purchased. Someone else did the germination work, the thinning, the early watering, the careful temperature management. You are paying for those weeks, and sometimes those weeks are worth the money.

When seedlings make sense: plants with long growing seasons — tomatoes, peppers, eggplant — need so many weeks to mature that starting from seed outdoors isn’t practical in most climates. Unless you’re starting seeds indoors in February, you’re buying seedlings.

Seedlings are also the right choice when you only want one or two plants. Buying a packet of twenty-five pepper seeds to grow two peppers is wasteful. Buy two pepper seedlings and call it done.

The tradeoff: cost, and transplant shock. Every seedling goes through a period of adjustment after it moves from the garden center to your soil. It will look terrible for a week. This is normal. See our post on transplant shock.

🗓️ The Quick Reference

  • Start from seed: beans, peas, carrots, radishes, beets, sunflowers, zucchini, cucumbers, lettuce, spinach.
  • Buy as seedlings: tomatoes, peppers, eggplant, broccoli, cauliflower, celery — anything with a long season that needs a head start.
  • Either works: basil, kale, chard, most herbs, marigolds, nasturtiums. Pick whichever makes more sense for your budget and timeline.

🛒 Worth Having

  • Seed starting tray with dome — For starting seeds indoors. The dome holds humidity while seeds germinate. Remove it once seedlings appear.
  • Seed starting mix — Not the same as potting soil. Seed starting mix is finer, lighter, and designed for germination. Seeds started in regular soil struggle.
  • Plant markers — Label everything immediately. All seedlings look identical at two inches tall and you will not remember what you planted where. This is a promise.
  • Seed storage organizer — For the seeds you don’t use this season. Stored cool and dry, most seeds remain viable for two to three years.

As an Amazon affiliate, I earn from each qualifying purchase. Thank you for supporting TangleWicket.

✨ The Short Version

Seeds for direct-sow plants and budget-conscious gardeners with patience. Seedlings for long-season plants and anyone who would like something to actually happen this year.

Neither choice is wrong. Both choices involve some dirt under the fingernails eventually.

Wicket doesn’t care which one you pick. Wicket just wants you to put something in the ground.

📚 Related Reads


TangleWicket is part of the WhistleBump group – find the rest of the family at WhistleBump.com.

30001

©2026 John D Reinhart/Tanglewicket.com – all rights reserved