
Aphids: The Tiny Menace and How to Evict Them

Aphids are the most common pest in most gardens and the most controllable. Here’s how to identify them, understand their population dynamics, and deal with them without overreacting.

Aphids are small. They are very small. They come in green, black, yellow, brown, and pink depending on species, and they cluster on new growth, stem tips, and the undersides of leaves where they insert a needle-like mouthpart and extract plant sap.

They also reproduce at a rate that makes other fast-reproducing animals look like they’re taking their time. Under ideal conditions, a single aphid can produce dozens of live young per week, all female, all capable of reproducing without mating. A colony can go from ten to ten thousand in approximately no time at all.

Here’s the full picture on aphids — what they do, what they don’t do, and the range of responses from “do nothing” to “actually intervene.”

🔍 How to Know You Have Them

  • Clusters on new growth. Aphids prefer soft, young tissue. Check stem tips, new leaf buds, and the undersides of young leaves.
  • Curling or distorted new leaves. Aphid feeding causes new leaves to curl around the colony, protecting it. This is why aphid infestations can be hard to spot — the leaf has curled around them.
  • Sticky honeydew residue. Aphids excrete a sugary liquid called honeydew as they feed. Sticky, shiny leaves are a sign of aphid activity even before you see the insects themselves.
  • Black sooty mold. Grows on honeydew deposits. If you see black sooty patches on leaves, aphids were or are present above them.
  • Ants tending the plant. Ants actively farm aphids for their honeydew, protecting them from predators and moving them to new growth. Ants on your plants often indicate aphids somewhere on the plant.

📊 The Population Dynamics

Aphid populations are boom and bust by nature. They build rapidly when conditions are favorable — warm temperatures, soft new growth, absence of predators — and crash just as rapidly when conditions change or predator populations respond.

The practical implication: a small to moderate aphid infestation observed on Monday may be declining by Friday as lacewing larvae, ladybugs, parasitic wasps, and other predators arrive to exploit the food source. Waiting and watching for a week before intervening is often the correct strategy.

Intervention is appropriate when: the population is clearly growing rapidly, plants are showing significant wilting or distortion, or predators are not appearing to control the situation.

✅ The Control Options (Least to Most Aggressive)

  • Do nothing and wait. For small, stable populations. Let predators handle it. Check back in a week.
  • Water blast. A strong spray of water from the hose knocks aphids off the plant. They cannot climb back up. Effective for accessible plants and moderate infestations. Repeat every few days.
  • Insecticidal soap. A spray of diluted liquid soap (not detergent) or commercial insecticidal soap solution directly on aphids. Kills on contact by disrupting the cell membrane. Does not leave residue. Safe for beneficial insects that aren’t sprayed directly.
  • Neem oil. A plant-based oil that disrupts aphid feeding, reproduction, and development. More persistent than insecticidal soap. Apply in the evening to avoid harming pollinators.
  • Systemic insecticide. Absorbed into plant tissue and kills insects that feed on it. Effective but also kills any insect that feeds on the plant, including pollinators. Reserve for severe infestations that have not responded to other methods. Do not use on flowering plants that bees visit.

🛒 The Aphid Control Kit

As an Amazon affiliate, I earn from qualifying purchases. Thank you for supporting TangleWicket.

✨ The Short Version

Aphids are common, fast-reproducing, and highly controllable. Small stable populations may be handled by predators without intervention. Growing populations respond well to water blasting, insecticidal soap, or neem oil. Systemic insecticides are the last resort.

Identify, wait and observe, then escalate only as needed.

Tom Brownthumb once sprayed a large aphid colony with soap spray and a garden hose simultaneously. The plants were very clean. The aphids were gone. So, temporarily, was his composure.

📚 Related Reads

TangleWicket is part of the WhistleBump group – find the rest of the family at WhistleBump.com.

35003

©2026 John D Reinhart/Tanglewicket.com – all rights reserved
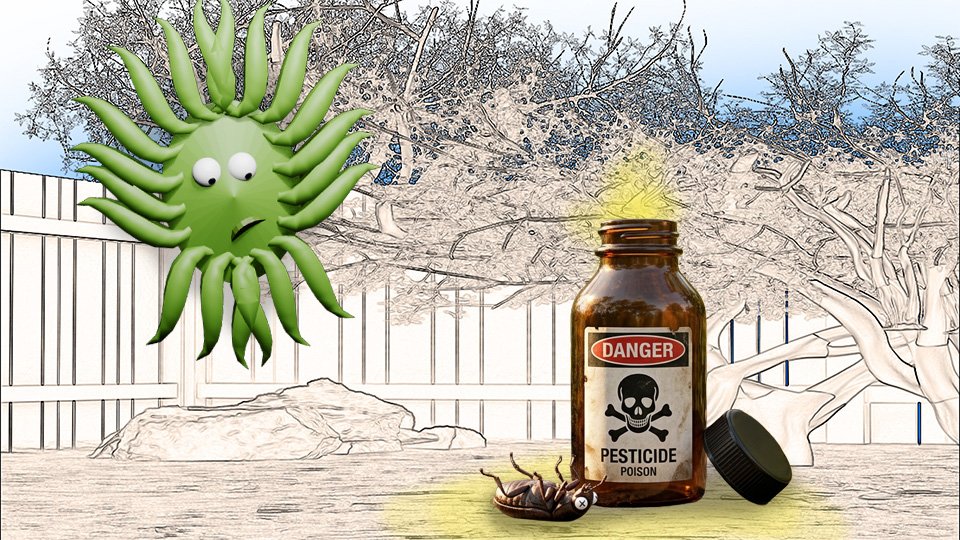
When to Use Pesticide and When to Leave It Alone

Pesticides are a tool, not a first response. Here’s how to decide when intervention is actually warranted, which products do the least collateral damage, and when to leave it alone.

The question is not “What pesticide should I use?” The question is “Should I use a pesticide at all?”

Most garden pest situations do not require pesticide application. Most are handled by the garden’s natural predator population, by mechanical means, or by doing nothing and waiting. Pesticide is the appropriate response in a specific subset of situations, and using it outside that subset creates problems it was supposed to solve.

Here’s the framework for making that decision correctly.

🚫 When to Leave It Alone

  • Small, stable populations with predators present. A few aphids with ladybugs nearby. A caterpillar with parasitic wasp cocoons on its back. The ecosystem is working. Adding pesticide disrupts it.
  • Cosmetic damage without productivity loss. Holes in leaves, minor discoloration, a few chewed edges. Plants can sustain substantial leaf damage without reduced yields. Cosmetic damage is not a pest crisis.
  • Late in the season. A pest infestation in late August on a plant that has already produced its main crop has limited opportunity to cause meaningful harm. The cost-benefit of treatment is low.
  • When you haven’t identified the pest. Treating an unknown insect with a broad-spectrum pesticide is guesswork with collateral damage. Identify first.

✅ When Pesticide Is Appropriate

  • Rapidly growing populations threatening plant productivity. An aphid infestation that has tripled in a week on a young seedling. A slug population destroying the seedling bed. A cutworm taking plants overnight.
  • High-value plants with no natural control in sight. A fruit tree with a scale infestation building with no predators present. A late-season tomato crop with spider mites in damaging numbers.
  • Pests that don’t respond to mechanical methods. Spider mites that have returned after repeated water blasting. Slugs in populations too large for trapping and handpicking alone.

🌿 The Pesticide Spectrum: Least to Most Harmful

  • Physical barriers (not pesticides). Row covers, copper tape, cutworm collars. Zero chemical impact. First response.
  • Insecticidal soap. Kills soft-bodied insects on contact. Breaks down quickly. Minimal impact on beneficials if applied carefully (avoid open flowers and known beneficial habitats). The correct escalation step after physical methods.
  • Neem oil. Disrupts insect feeding and reproduction. Organic, OMRI-listed. Apply at dusk to minimize pollinator contact. More persistent than soap, still relatively low-impact.
  • Pyrethrin (organic) or permethrin (synthetic). Broad-spectrum. Effective on a wide range of insects including beneficials. Reserve for significant infestations. Do not apply when pollinators are active.
  • Systemic insecticides (imidacloprid, etc.). Absorbed into plant tissue. Kills any insect feeding on the plant, including pollinators on flowers. Last resort. Never on flowering plants.

🛒 The Minimal-Impact Pest Kit

  • Insecticidal soap ready-to-use — The first chemical escalation step. Contact kill, low residue, minimal collateral damage.
  • Neem oil concentrate — Organic, persistent, effective on a range of soft-bodied pests. Apply at dusk.
  • Garden sprayer — For targeted application to affected plants rather than broadcast spraying. Precision application reduces collateral damage.

As an Amazon affiliate, I earn from each qualifying purchase. Thank you for supporting TangleWicket.

✨ The Short Version

Leave it alone when populations are stable, predators are present, or damage is cosmetic. Intervene when populations are building rapidly and threatening plant productivity.

Start with the least aggressive method. Escalate only if needed. Never spray broad-spectrum products on flowering plants.

Tom Brownthumb once broadcast-sprayed his entire garden at the first sign of aphids. He eliminated the aphids, the ladybugs, the lacewings, and the parasitic wasps. The aphids returned alone. He now starts with soap spray on the affected plant only.

📚 Related Reads


TangleWicket is part of the WhistleBump group – find the rest of the family at WhistleBump.com.

35008

©2026 John D Reinhart/Tanglewicket.com – all rights reserved
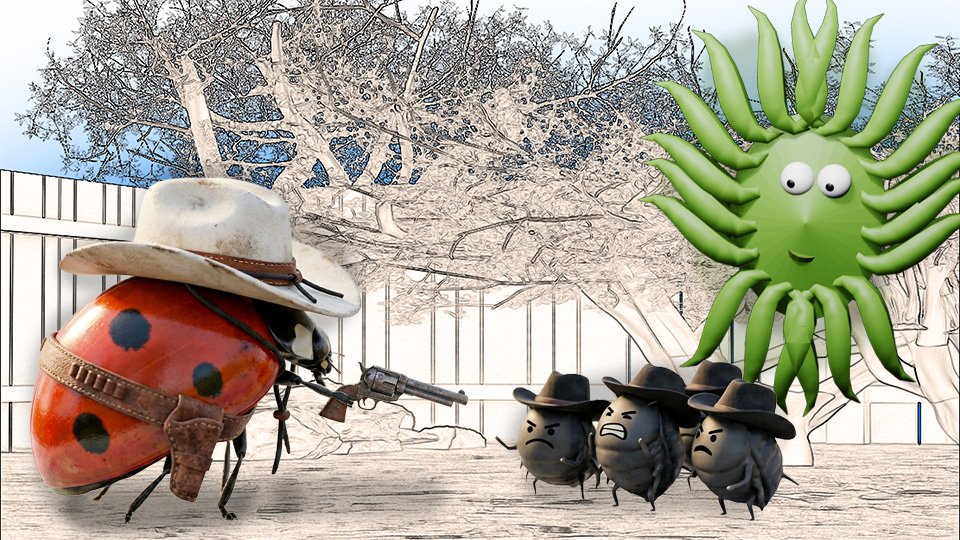
Why Ladybugs Are the Best Thing in Your Garden

Ladybugs eat aphids at a rate that no spray can match and they do it for free. Here’s the full case for ladybugs, their larvae, and how to keep them in your garden once they arrive.

The ladybug has excellent public relations. It is the insect that children collect, that songs are written about, that nobody has strong negative feelings toward. This goodwill is, unusually for an insect, completely justified.

A single adult ladybug eats approximately 5,000 aphids over its lifetime. A ladybug larva — the creature that will become the adult — is even more voracious per day. A healthy ladybug population in a garden is the most effective aphid control available, it costs nothing, and it arrives on its own if you create the conditions it needs.

Here’s the case for ladybugs — including the part about the larvae that most people get completely wrong.

🐞 The Adult Ladybug

The familiar red-and-black spotted beetle. Most species in North America are beneficial predators of aphids, mites, and small insect eggs. They are voracious despite looking polite.

What they eat: primarily aphids, but also spider mites, scale insects, mealybugs, and insect eggs. A single adult can consume fifty or more aphids per day.

When they’re present: ladybugs are most active in spring and summer when aphid populations peak. They overwinter as adults in sheltered locations — leaf litter, bark crevices, the corners of structures. They emerge in spring when temperatures warm.

🐛 The Ladybug Larva: The One You Probably Keep Killing

A 3D render of a ladybug larva in the TangleWicket garden, by John D Reinhart

This is the important part. Ladybug larvae look nothing like ladybugs. They are small — a few millimeters when young, up to half an inch when mature. They are dark, often with orange or yellow markings. They have a segmented, somewhat spiky or bumpy appearance. They look, to most people, like something that should be removed immediately.

They should not be removed. A ladybug larva eats more aphids per day than an adult. A single larva can consume 400 aphids per day during its larval stage. Finding ladybug larvae on your aphid-infested plant means the situation is being handled by something better equipped than you are.

How to recognize them: small, dark, elongated, somewhat alligator-shaped, with orange or yellow spots or markings. Often found on the underside of leaves in areas where aphids are present. A photograph in iNaturalist will confirm identification.

🌿 How to Keep Ladybugs in Your Garden

  • Provide habitat. Ladybugs overwinter in leaf litter and sheltered spots. Leaving some garden debris in fall — a pile of leaves in a corner, hollow stems of perennials — gives them a place to survive winter.
  • Plant nectar sources. Adult ladybugs supplement their diet with pollen and nectar. Dill, fennel, cilantro allowed to flower, yarrow, and marigolds attract and support ladybug populations.
  • Avoid broad-spectrum pesticides. Insecticides do not distinguish between pest and predator. Spraying for aphids kills the ladybugs eating the aphids. The aphids recover faster than the ladybug population. The problem becomes worse.
  • Tolerate small aphid populations. A small aphid population is a food source that keeps ladybugs in the garden. A garden with no aphids whatsoever has nothing to keep predator insects around. A small, stable aphid population that is clearly being managed by predators does not need intervention.

🚧 About Buying Ladybugs

Purchased ladybugs are available from garden suppliers and have an appealing logic: buy predators, release predators, problem solved. In practice, released ladybugs disperse from the release site within days and mostly leave your garden. They did not evolve a territorial instinct and have no reason to stay.

The better investment: create habitat that encourages wild ladybug populations to establish and remain through the season. Habitat is permanent. Released insects are temporary.

🛒 Supporting Ladybugs

As an Amazon affiliate, I earn from each qualifying purchase. Thank you for supporting TangleWicket.

✨ The Short Version

Ladybugs are the most effective aphid control in any garden. Their larvae are even more effective and look alarming — do not kill them. Create habitat, plant nectar sources, and avoid broad-spectrum pesticides to keep them in your garden.

The best pest management is a garden full of things that eat pests. Ladybugs are the foundation of that system.

Tom Brownthumb once removed what he thought were mysterious pest larvae from his tomatoes. They were ladybug larvae. The aphids celebrated. Tom does not make this mistake anymore.

📚 Related Reads


TangleWicket is part of the WhistleBump group – find the rest of the family at WhistleBump.com.

35002

©2026 John D Reinhart/Tanglewicket.com – all rights reserved
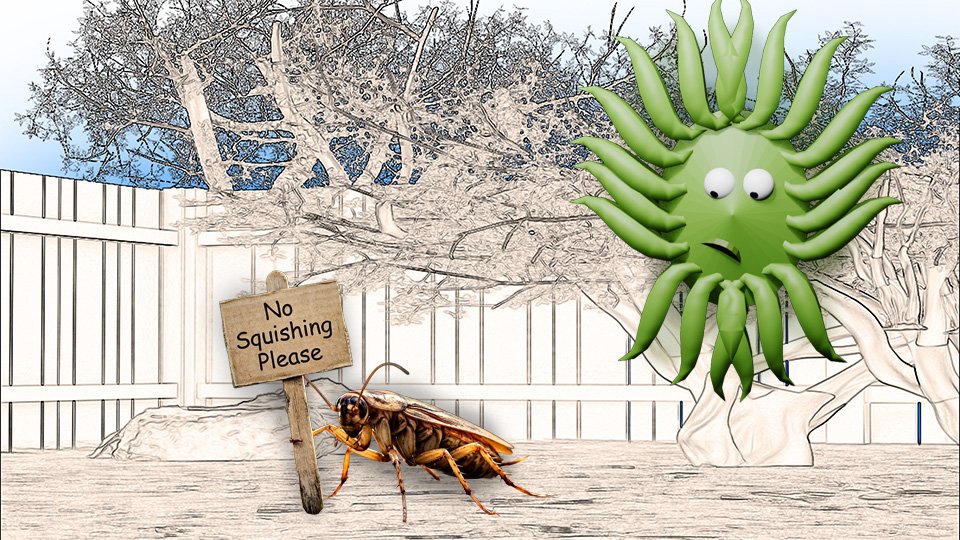
Why You Shouldn’t Kill Every Bug You See

The instinct to remove every unfamiliar insect from your garden is well-intentioned and frequently counterproductive. Here’s why restraint is usually the correct pest response.

There is an insect on your plant. Your instinct is to remove it. This is understandable. It is also, the majority of the time, the wrong call.

The garden is not a sterile environment and should not be treated like one. It is an ecosystem with predators, prey, decomposers, pollinators, and opportunists all occupying roles in a system that, when functioning, manages most pest problems without your intervention.

Here’s why the remove-everything reflex undermines the very system you’re trying to protect — and the framework for deciding when action is actually warranted.

🤔 The Ecosystem Argument

A garden with predatory insects — ladybugs, ground beetles, lacewings, parasitic wasps — manages aphid, caterpillar, and mite populations continuously and for free. These predators are present because there is something to eat. Remove the prey entirely and the predators leave. Remove the predators by spraying and the prey, which recovers population faster, surges.

The spray treadmill: spray pesticide, kill pests and predators, pest population rebounds before predator population recovers, spray again, repeat indefinitely. The garden becomes dependent on intervention because the natural control system has been dismantled.

The alternative: tolerate small pest populations. They support predator populations. Predator populations keep pest populations in check. The system self-regulates if you let it.

📊 The Three-Question Framework

Before taking any action on an insect, three questions:

  • Is it causing visible damage to plants I care about? Cosmetic damage — a few holes in a leaf, minor discoloration — is not a crisis. Plants tolerate substantial insect activity without significant productivity loss.
  • Is the population growing rapidly or stable? A stable small population is the ecosystem working correctly. A rapidly growing population may require intervention.
  • Have I correctly identified it? Many beneficial insects are killed in cases of mistaken identity. Ladybug larvae. Ground beetles. Parasitic wasps. Hoverflies. Identify before acting.

Only if the answer to all three is clearly yes is action likely to be warranted. Two out of three — or uncertainty on any of them — suggests waiting and watching.

🌿 What Tolerance Looks Like in Practice

  • A few aphids on a plant with ladybug larvae nearby. Leave it. The larvae are working.
  • A caterpillar on a cabbage plant, one or two, no others visible. Hand-pick and dispose. Not a spray situation.
  • Holes in leaves with no visible insect. Investigate before treating. The culprit may be a night feeder already gone, or a beneficial insect doing something unrelated to the holes.
  • Twenty percent leaf loss on an otherwise healthy plant. Plants can sustain significant leaf damage without production loss. Twenty percent is often within the tolerance range.

🛒 Tools for Observation Rather Than Reaction

  • Hand lens / magnifying glass — For close examination before any decision. Ten seconds of looking correctly is worth more than ten minutes of spraying incorrectly.
  • Garden journal — Note what you see, when, and on what plant. Patterns emerge over time that make pest management decisions clearer.
  • Field guide to garden insects — For offline reference. A regional guide with good photographs of both pest and beneficial insects at multiple life stages.

As an Amazon affiliate, I earn from each qualifying purchase. Thank you for supporting TangleWicket.

✨ The Short Version

Most insects are neutral or beneficial. Small pest populations are normal and support predator populations that control them. Intervention is warranted when damage is significant, the population is building, and identification is certain.

The garden manages itself better than you might, if you let it.

Tom Brownthumb once declared war on every insect in his garden. He won the war. The garden, relieved of all natural pest control, immediately lost several subsequent battles he had to fight alone. He now observes before acting.

📚 Related Reads


TangleWicket is part of the WhistleBump group – find the rest of the family at WhistleBump.com.

35005

©2026 John D Reinhart/Tanglewicket.com – all rights reserved
Good Bugs vs. Bad Bugs: How to Tell the Difference

Not every bug in your garden is your enemy. Some are essential. Some are neutral. A small number are genuinely problematic. Here’s how to tell them apart before you reach for anything.

The reflex is understandable. You see a bug on your plant. You remove the bug. You feel like you’ve done something useful. You may have done the opposite.

The majority of insects in a garden are either beneficial or neutral. Fewer than one percent of insect species are agricultural pests. The rest are pollinators, predators of actual pests, decomposers, or bystanders doing something unrelated to your vegetables.

Here’s the guide to the garden’s insect population — who the allies are, who the enemies are, and how to tell the difference before making a decision you’ll regret on the tomatoes.

✅ The Beneficial Insects

  • Ladybugs (and their larvae). A single adult ladybug eats up to 5,000 aphids in its lifetime. The larvae are even more voracious. They look nothing like the adult — they are small, dark, spiky, and alarming in appearance. Many gardeners kill ladybug larvae by mistake. They are among your best allies. Learn what they look like.
  • Ground beetles. Large, dark, fast-moving beetles that live in soil and under debris. They eat slugs, soil-dwelling pest larvae, and other ground-level pests. They are also the beetles most frequently stomped on by startled gardeners. They are your friends. Leave them alone.
  • Lacewings. Delicate, pale green insects with large transparent wings. Adults eat pollen and nectar. The larvae — called aphid lions — eat aphids, mites, and small insect eggs voraciously. If you see something small and hungry-looking destroying your aphid population, it might be a lacewing larva.
  • Parasitic wasps. Small, non-stinging wasps that lay eggs in caterpillars, aphids, and other pest larvae. If you see a caterpillar covered in tiny white cocoons on its back, parasitic wasps have already handled the situation. Do not remove the caterpillar. The wasps are working.
  • Hoverflies. Look like small bees or wasps but have only two wings (flies) rather than four (bees). Adults pollinate flowers. Larvae eat aphids. A dual-purpose beneficial insect that gets killed regularly by people who think it’s a stinging insect.
  • Bees and other pollinators. Without pollinators, fruiting vegetables produce nothing. Tomatoes, squash, cucumbers, peppers, beans — all require pollination. Bees are not optional infrastructure.

❌ The Actual Pest Insects

  • Aphids. Small, soft-bodied insects that cluster on new growth and suck plant sap. They reproduce rapidly and can overwhelm a plant in a short time. Sticky honeydew residue and curling new leaves are the signs. Highly controllable with multiple methods.
  • Japanese beetles. Metallic green and copper beetles that skeletonize leaves and eat flowers. Highly visible, highly destructive, and frustratingly difficult to control at population scale.
  • Slugs and snails. Not insects but behave like pests. Ragged holes in leaves, silver slime trails, overnight destruction. Most active in wet conditions.
  • Caterpillars of certain moths and butterflies. Cabbage loopers, tomato hornworms, cutworms. The caterpillar stage of some otherwise harmless or beneficial adult insects. Identified by chewed leaves, frass (droppings), and the caterpillar itself.
  • Spider mites. Tiny, barely visible mites that create stippled, bronzed foliage and fine webbing. Thrive in hot, dry conditions. Serious infestations can defoliate plants quickly.

🔍 The Identification Rule

Before treating anything, identify it. This means getting close enough to actually see the insect, not just noticing that something is in the garden. A phone camera with the macro setting or a simple magnifying glass resolves most identification questions. An app like iNaturalist can identify insects from a photograph.

The decision tree: Is it causing visible damage to plants you care about? Is the damage significant rather than cosmetic? Is the population building rather than stable? If yes to all three, you have a pest situation worth addressing. If no to any of them, leave it alone and let the garden’s own predator population handle it.

🛒 The Identification and Management Kit

  • Hand lens / magnifying loupe — For actual close examination of insects before making any decision. Ten times magnification resolves most identification questions.
  • Field guide to garden insects — For offline reference. A regional guide with good photographs of both pest and beneficial insects at multiple life stages.
  • iNaturalist or similar ID app — Photograph the insect, get an identification. The technology that makes correct insect ID accessible to everyone.

As an Amazon affiliate, I earn from each qualifying purchase. Thank you for supporting TangleWicket.

✨ The Short Version

Most insects in your garden are allies or bystanders. A small number are pests. Identify before acting. The bugs eating your pests are more valuable than the treatment you’d use to kill both.

Get close. Look carefully. Ask what it’s actually doing before doing something about it.

Tom Brownthumb once sprayed an aphid infestation and killed the ladybug larvae eating it. The aphids, having no remaining predators, returned in force the following week. He now identifies first.

📚 Related Reads


TangleWicket is part of the WhistleBump group – find the rest of the family at WhistleBump.com.

35001

©2026 John D Reinhart/Tanglewicket.com – all rights reserved
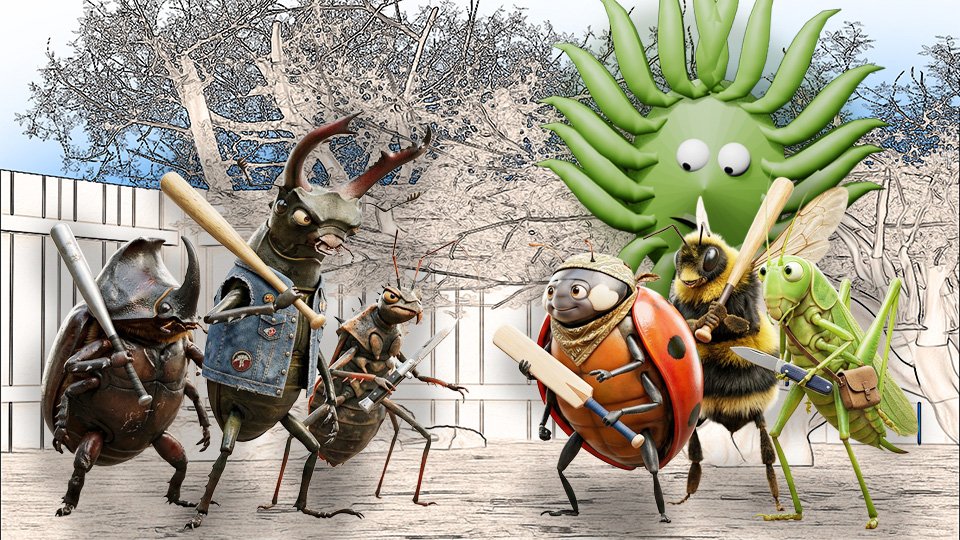
Japanese Beetles: The Worst Houseguests in the Garden

Japanese beetles are beautiful, destructive, and frustratingly difficult to control at scale. Here’s what works, what doesn’t, and why the traps are making your problem worse.

Japanese beetles are among the most infuriating garden pests in the northeastern United States, and they have the nerve to be quite attractive. Metallic green thorax, copper wing covers, iridescent in direct sun. They look like something you’d find in a natural history museum display. They eat like they haven’t had a meal in weeks.

They skeletonize leaves by eating the tissue between the veins, leaving behind a brown lacework that eventually dies. They eat flowers. They eat fruit. A large population can defoliate a susceptible plant in days.

Here’s the honest guide to Japanese beetle management — what works, what doesn’t, and why the yellow trap you bought is almost certainly making things worse.

🤔 The Biology

Japanese beetles spend most of their life underground. Adults emerge in early summer — typically late June through August in the Northeast — feed voraciously for six to eight weeks, mate, and lay eggs in the soil. Those eggs hatch into grubs that spend the rest of the year underground eating grass roots before pupating and emerging as next year’s beetles.

Why they’re hard to control: the adult population in your garden is not just your beetles. Japanese beetles fly up to five miles and are attracted by the pheromones and plant volatiles released by beetles already feeding. A heavily infested plant is actively attracting more beetles from the surrounding area. Population management at the individual property scale is genuinely difficult.

❌ The Japanese Beetle Trap Problem

Japanese beetle traps — the yellow bag-style traps that use pheromone and floral lure — are effective at capturing Japanese beetles. They are so effective that they attract far more beetles to your property than would otherwise be there, and the traps do not capture all of them.

The research consistently shows: properties with Japanese beetle traps have more beetle damage than properties without them. The traps attract beetles from a wide area. Beetles land on nearby plants before reaching the trap. You have spent money to increase your beetle problem.

If you use traps, place them at the far edge of your property — as far from any plants you care about as possible. Do not place them near the garden.

✅ What Actually Works

  • Hand picking. In the morning when beetles are sluggish from the cool, drop them into a bucket of soapy water. Tedious, effective, and free. A daily morning round during peak season removes a significant portion of the feeding population.
  • Neem oil. Applied to plant foliage, neem oil deters feeding and disrupts the beetle’s life cycle. It does not kill on contact but reduces feeding damage meaningfully when applied consistently.
  • Row covers. Lightweight fabric covers that exclude beetles physically. Highly effective for protecting specific plants during the six to eight week adult season. Must be removed for pollination on flowering vegetables.
  • Milky spore. A biological control containing Bacillus popilliae, a bacterium that infects and kills Japanese beetle grubs in the soil. Applied to lawns, it reduces the grub population that produces next year’s adults. Takes two to three years to establish but provides long-term population reduction.
  • Nematodes. Beneficial nematodes applied to soil target Japanese beetle grubs. More immediate than milky spore, less persistent. Applied in late summer when young grubs are near the surface.

🌿 Plant Selection as Long-Term Strategy

Japanese beetles have preferred plants and plants they largely ignore. Roses, raspberries, grapes, and linden trees are heavily targeted. Boxwood, forsythia, holly, and most conifers are largely left alone.

For gardeners in heavily infested areas, plant selection is the long-term strategy. Replacing heavily targeted ornamentals with less-preferred species reduces feeding pressure without ongoing control effort.

🛒 The Control Kit

  • Neem oil concentrate — For foliar deterrent application. Reduces feeding damage on affected plants.
  • Row cover fabric — Physical exclusion during the adult season. The most reliable protection for high-value plants.
  • Milky spore powder — Long-term grub management applied to turf. Two to three year establishment, then persistent population reduction.
  • Beneficial nematodes — For grub control in the soil. Apply in late summer when grubs are young and near the surface.

As an Amazon affiliate, I earn from each qualifying purchase. Thank you for supporting TangleWicket.

✨ The Short Version

Japanese beetles are hard to control at population scale. The traps make the problem worse. Hand pick in the morning. Use neem oil and row covers to protect specific plants. Apply milky spore or nematodes for long-term grub reduction. Consider plant selection as the genuine long-term strategy.

They will always be there. The goal is keeping the damage at a tolerable level.

Tom Brownthumb bought a Japanese beetle trap and placed it next to his rose bushes. This was not his finest garden decision. The trap has been relocated to the far edge of the property. The rose bushes have not recovered their dignity.

📚 Related Reads


TangleWicket is part of the WhistleBump group – find the rest of the family at WhistleBump.com.

35010

©2026 John D Reinhart/Tanglewicket.com – all rights reserved
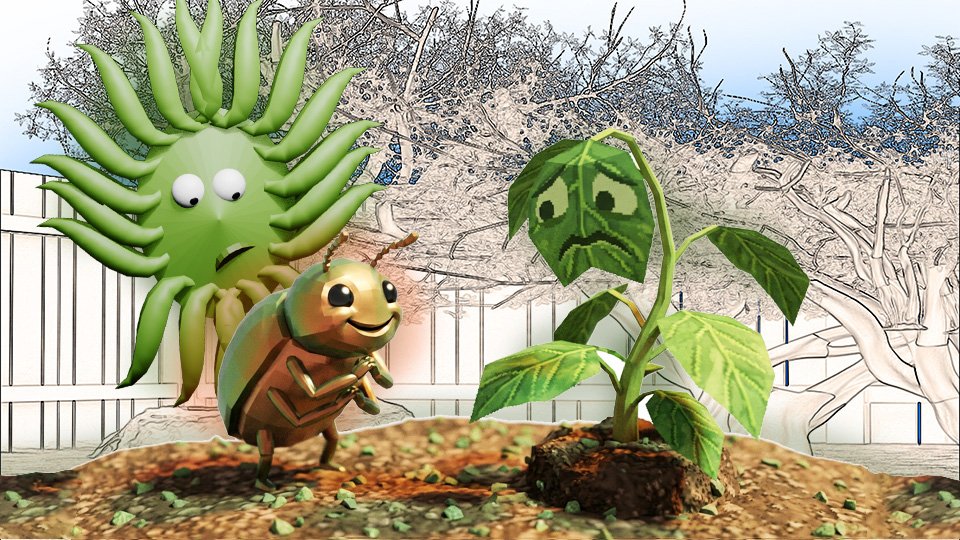
Drip Irrigation: What It Is and Why It’s Worth Considering

Drip irrigation sounds complicated and expensive. It isn’t either of those things. Here’s what it does, why it works better than other methods, and how to set up a basic system.

Drip irrigation sounds like something a large commercial farm has. Tubes and emitters and pressure regulators and backflow preventers and a diagram that takes three readings to understand.

A basic home garden drip system is considerably less intimidating. It’s a tube, some emitters, a timer, and a faucet connection. It delivers water directly to the root zone of each plant, at a rate the soil can absorb, without wetting the foliage or wasting water to evaporation.

Here’s the logic behind why drip irrigation works better than most alternatives — and what a simple beginner-appropriate system looks like.

💧 Why Drip Works Better

  • Water goes where roots are. A drip emitter delivers water at soil level, directly into the root zone of the plant it serves. Overhead sprinklers wet the entire bed surface, including the paths between plants and the foliage above. Drip is precise.
  • No evaporation from leaves. Water that goes directly to soil doesn’t evaporate from leaf surfaces or wet foliage that invites disease. Drip systems reduce fungal problems compared to overhead watering.
  • Water delivered slowly. A drip emitter releases water at a rate the soil can absorb — typically one to two gallons per hour. Slow delivery means deep penetration rather than surface runoff. Deep penetration means roots follow water downward, producing stronger plants.
  • Works with a timer. A hose timer attached to the faucet and connected to a drip system waters the garden automatically at the right time and for the right duration. Your morning garden watering happens whether you’re there or not.

🔧 The Basic Components

  • Main supply line. A half-inch poly tube that runs from the faucet connection along the length of the bed.
  • Emitters. Small devices inserted into the main line or attached via smaller tubing that release water at a controlled rate. Most home garden emitters release one or two gallons per hour.
  • Faucet timer. Connects between the faucet and the supply line. Programs watering duration and frequency. The component that makes the whole system automatic.
  • Pressure regulator. Reduces water pressure to the range drip systems require. Many kits include one. Without it, excessive pressure can blow emitters out of the line.
  • Filter. Prevents sediment from clogging emitters. Small and inexpensive. Usually included in starter kits.

🗓️ How to Size the System

For a beginner, a starter kit designed for a specific bed size is the right approach. Kits include all necessary components and instructions for a particular square footage. Installing a kit for a 4×8 raised bed takes about an hour and no plumbing knowledge.

For larger gardens: zone the system. Each raised bed or garden section gets its own supply line from a manifold at the faucet. Zones can be set to water at different times and for different durations based on the needs of what’s planted there.

🪞 Soaker Hoses vs. Drip Emitters

Both deliver water to the root zone without overhead watering. The difference is distribution:

Soaker hoses seep water along their entire length. Good for rows and dense plantings where you want even distribution across a bed.

Drip emitters deliver water to specific points. Good for widely spaced plants like tomatoes or peppers where you want water at each plant’s root zone rather than distributed across the path between them.

Many gardeners use both: drip emitters for larger, spaced plants and soaker hoses for densely planted beds.

🛒 Getting Started

  • Drip irrigation starter kit — Everything needed for a single raised bed. Includes supply line, emitters, connectors, and instructions. The lowest-friction entry point.
  • Digital hose timer — Programs watering schedule and duration. The component that makes the system genuinely automatic.
  • Drip emitters assortment — For customizing emitter flow rates at individual plants. Different plants have different water requirements.
  • Pressure regulator for drip systems — Protects emitters from high household water pressure. A small component worth having.

As an Amazon affiliate, I earn from qualifying purchases. Thank you for supporting TangleWicket.

✨ The Short Version

Drip irrigation delivers water directly to roots, reduces evaporation and disease, works on a timer, and requires no attention once installed. It is not complicated to set up and pays for itself quickly in water savings and healthier plants.

Start with a kit for one bed. Learn the system. Expand from there.

Tom Brownthumb installed drip irrigation after his fourth consecutive summer of forgetting to water. His garden has not been thirsty since.

📚 Related Reads


TangleWicket is part of the WhistleBump group – find the rest of the family at WhistleBump.com.

32004

©2026 John D Reinhart/Tanglewicket.com – all rights reserved
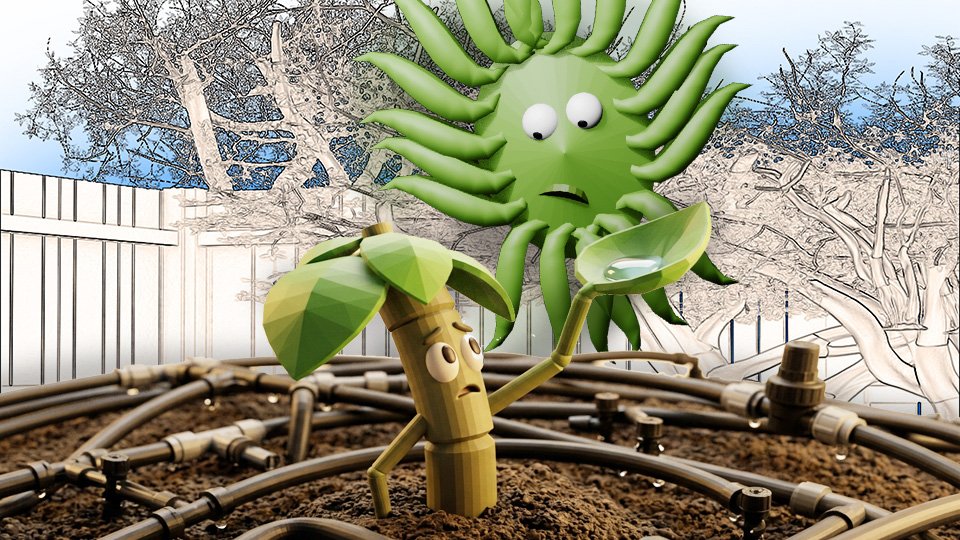
How to Water Raised Beds vs. Ground Gardens

Raised beds and ground gardens water differently, drain differently, and dry out at completely different rates. Here’s how to adjust your watering for whichever you have.

Raised beds and in-ground gardens are both gardens. They are not the same garden when it comes to watering. The differences are significant enough that treating them identically produces either overwatered ground beds or parched raised beds.

Here’s what’s actually different between them — and how to adjust your watering accordingly.

🚜 Raised Beds: Why They Dry Out Faster

A raised bed is elevated above the surrounding ground, which means drainage happens on all sides as well as the bottom. Water moves outward through the walls as well as downward. The soil in a raised bed also warms faster than ground soil, which increases evaporation.

The result: raised beds typically need watering more frequently than in-ground gardens in comparable conditions. In hot weather, a raised bed may need water every day or two. An in-ground garden in the same conditions might go three to four days.

The finger test is especially important for raised beds. Their faster drying rate means they can go from adequate moisture to dangerously dry faster than in-ground beds, particularly for shallow-rooted crops.

🌿 In-Ground Gardens: Why They Hold Moisture Longer

In-ground soil connects to the broader soil moisture system of your yard and the water table below. It has more thermal mass and warms more slowly. It doesn’t drain from the sides.

The result: in-ground gardens retain moisture longer and are more buffered against short dry spells. The deeper soil profile also allows plant roots to follow moisture downward, accessing water that raised bed plants cannot.

The risk: in-ground gardens in heavy clay soil can become waterlogged after significant rain. Standing water in garden beds suffocates roots. Beds in low spots that collect water need drainage improvement or elevated planting solutions.

💧 Adjusting Your Watering

  • Raised beds: water more frequently. Check daily in hot weather. Consider drip irrigation or soaker hoses on a timer to maintain consistent moisture without constant monitoring. Mulching the surface of raised beds is especially valuable — it dramatically slows moisture loss from the elevated, fast-drying soil.
  • In-ground: water less frequently but more deeply when you do. One thorough watering that penetrates 8-12 inches is better than daily light applications. Allow the surface to dry between waterings — the moisture deeper in the profile is still available to established roots.

🪜 Soil Mix Matters for Raised Beds

The soil mix in a raised bed affects its water retention significantly. A standard raised bed mix of topsoil, compost, and some coarse material drains well but dries faster than garden soil. Adding additional compost increases water retention.

Coconut coir is sometimes added to raised bed mixes specifically for water retention. It holds moisture well without becoming waterlogged and releases it slowly to roots. Worth considering for raised beds in hot, dry climates or for gardeners who can’t water frequently.

🛒 Watering Tools for Each

As an Amazon affiliate, I earn from each qualifying purchase. Thank you for supporting TangleWicket.

✨ The Short Version

Raised beds dry faster. Check them more often and water more frequently. Mulch them to slow moisture loss. Consider drip irrigation or soaker hoses on a timer.

In-ground gardens hold moisture longer. Water deeply and infrequently. Watch for drainage problems in low spots.

Tom Brownthumb treated his raised bed and in-ground bed identically. One was always thirsty and one was always soggy. Now he checks both separately.

📚 Related Reads


TangleWicket is part of the WhistleBump group – find the rest of the family at WhistleBump.com.

32006

©2026 John D Reinhart/Tanglewicket.com – all rights reserved
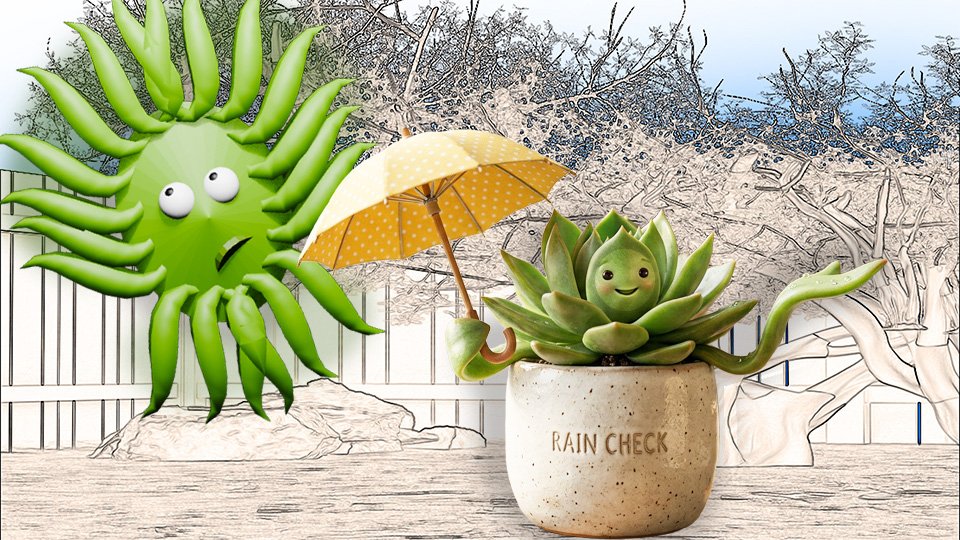
Why Your Potted Plants Need More Water Than You Think

Container plants dry out faster, drain differently, and need more water than anything else in your garden. Here’s why — and how to keep them from suffering for it.

Container gardening is convenient, flexible, and excellent for small spaces. It is also, from a watering perspective, the most demanding situation in the garden.

A potted plant lives in a finite volume of soil with no connection to the broader moisture reserves of the earth below it. When that soil dries out, there is no deeper reservoir for roots to reach toward. The plant is entirely dependent on what you provide, and what you need to provide is more than you’d think.

🤔 Why Containers Dry Out Faster

  • Exposure on all sides. A container has soil exposed to air on every surface — top, sides, and (through drainage holes) bottom. In-ground soil is insulated by the surrounding earth. Container soil is surrounded by air, which dries it from every direction simultaneously.
  • Smaller thermal mass. A container heats up faster than ground soil in sunlight and cools faster at night. Temperature fluctuation increases evaporation rate and stresses roots.
  • Limited soil volume. A twelve-inch pot holds a finite amount of water. A tomato plant in a twelve-inch pot has the same water demands as a tomato plant in the ground but a fraction of the soil reservoir. The plant can exhaust the available moisture in a day in hot weather.
  • Required drainage. Drainage holes — essential for preventing root rot — also allow water to exit the container when you water. This is correct behavior. But it means watering until water flows freely from the drainage holes, not stopping when the surface looks wet.

💧 How to Water Containers Correctly

Water until it drains. Apply water slowly until it flows from the drainage holes. This ensures the entire soil volume is moistened, not just the top few inches. Shallow watering that stops at the surface leaves the lower root zone dry, where it matters most.

Check daily in hot weather. In summer heat, small containers may need watering twice a day. Larger containers typically need daily water. The finger test applies: two inches into the soil, if dry, water.

Elevate containers off the ground. Containers sitting flat on a surface can’t drain properly. Pot feet or a saucer lifted slightly allows drainage and prevents the roots from sitting in standing water.

🪜 Choosing the Right Container Size

Container size directly affects watering frequency. A small pot dries out fast. A large pot holds more moisture and requires less frequent watering for the same plant.

For tomatoes and peppers: five gallon minimum, ten or fifteen gallon is better. These are large plants with large water demands. Undersized containers are a common reason container tomatoes fail.

For herbs: six to eight inch pots work for individual herbs. A mixed herb container needs twelve inches or larger.

For most vegetables: bigger is better. The extra soil volume means more moisture reserve, more nutrients, and more root space. A larger container is almost always more forgiving than a smaller one.

🛡️ Self-Watering Containers

Self-watering containers have a reservoir in the base that wicks water up into the soil from below as the plant needs it. The plant draws what it needs, when it needs it. The reservoir needs refilling every few days rather than daily watering.

For container gardeners who travel, have inconsistent schedules, or grow plants that are particularly sensitive to moisture fluctuations, self-watering containers are the single most effective upgrade available.

🛒 Container Watering Essentials

  • Watering can with long spout — For directing water to the base of container plants without wetting foliage. The long spout reaches into dense plantings.
  • Self-watering planter — Reservoir base supplies consistent moisture. The solution for container plants that dry out faster than you can keep up with.
  • Moisture meter — Measures soil moisture at root depth without disturbing the soil. Particularly useful for containers where the surface dries faster than the interior.
  • Pot feet or risers — Elevate containers for proper drainage. Prevents root rot from standing water and marks you as someone who has done this before.

As an Amazon affiliate, I earn from qualifying purchases. Thank you for supporting TangleWicket.

✨ The Short Version

Container plants have no moisture reserve beyond their pot. They dry faster, drain differently, and need more water than in-ground plants. Check daily in hot weather. Water until it drains from the bottom. Use larger containers when possible.

Self-watering containers solve the problem almost entirely for anyone who can’t maintain daily checking.

Tom Brownthumb once went away for a weekend and came back to a container tomato that had strong opinions about the experience. He now has a self-watering planter.

📚 Related Reads


TangleWicket is part of the WhistleBump group – find the rest of the family at WhistleBump.com.

32009

©2026 John D Reinhart/Tanglewicket.com – all rights reserved

Soaker Hoses: The Lazy Gardener’s Best Friend

A soaker hose does the right thing automatically: slow, deep, root-level watering with no evaporation and no wet foliage. Here’s why it’s the most efficient watering tool you can buy.

The soaker hose is a porous rubber or recycled material hose that seeps water slowly along its entire length when connected to a faucet. It lies on or just below the soil surface, in the bed, near the plants.

It does not require monitoring. It does not produce runoff. It does not wet foliage. It delivers water at a rate the soil can absorb, directly into the root zone, for as long as you leave it running.

It is, in other words, exactly what someone would design if they sat down and thought carefully about the ideal way to water a garden. The fact that it’s also inexpensive is a bonus.

✅ Why Soaker Hoses Work So Well

  • Root-level delivery. Water seeps from the hose directly into the soil. None of it goes on the foliage or into the air between the hose and the plant.
  • Slow application rate. A soaker hose delivers approximately one inch of water per hour to the surrounding soil when the faucet is open at about a quarter turn. The soil absorbs this rate without runoff, ensuring that water penetrates deeply rather than pooling and evaporating.
  • No evaporation from spray. Overhead sprinklers lose a significant portion of their water to evaporation before it reaches the soil. A soaker hose loses almost none.
  • Dry foliage. Plants watered by soaker hose have consistently drier foliage than those watered overhead. Dry foliage means less fungal disease. This is particularly significant for tomatoes, cucumbers, squash, and other disease-prone vegetables.

🗓️ How to Set One Up

Lay the soaker hose through the bed, weaving between plants so it runs near the base of each one. Connect the end to a regular garden hose or directly to a faucet. Cap the far end with the plug that comes with the hose.

Test at low pressure — a quarter turn of the faucet is usually sufficient. You should see moisture seeping from the hose surface along its length. Too much pressure and it sprays; too little and only sections work. Adjust until you see even seeping.

For best results, cover with mulch. A layer of mulch over the soaker hose prevents the hose itself from drying out in the sun (which degrades it faster) and reduces the evaporation from the soil surface near the hose. The combination of soaker hose plus mulch is the most efficient watering setup available to a home gardener.

🕰️ Add a Timer

A soaker hose connected to a hose timer is as close to a hands-off automatic watering system as you can get without installing full drip irrigation. Set the timer to run for 30-45 minutes in the morning. The garden waters itself. You do other things.

The math: 30-45 minutes of soaker hose time at appropriate pressure delivers approximately half to three-quarters of an inch of water to the surrounding soil. Three to four sessions per week covers the one-inch-per-week requirement without any further thought.

🔍 Soaker Hose vs. Drip Irrigation

  • Soaker hoses distribute water evenly along their entire length. Better for closely spaced plants and dense plantings where you want moisture across the bed.
  • Drip emitters deliver water to specific points. Better for widely spaced plants like tomatoes where you want concentrated delivery at each root zone.

Both are effective. Many gardeners use soaker hoses for densely planted beds and drip emitters for larger, spaced plants. Neither is wrong.

🛒 What to Buy

As an Amazon affiliate, I earn from each qualifying purchase. Thank you for supporting TangleWicket.

✨ The Short Version

A soaker hose delivers water slowly, deeply, and at root level, with no foliage wetting, minimal evaporation, and consistent coverage. Add a timer and the watering problem is largely solved.

It is unglamorous, inexpensive, and extremely effective. The lazy gardener’s best friend in the most complimentary possible sense.

Wicket was once accidentally watered by a soaker hose. Wicket found it acceptable.

📚 Related Reads


TangleWicket is part of the WhistleBump group – find the rest of the family at WhistleBump.com.

32008

©2026 John D Reinhart/Tanglewicket.com – all rights reserved