
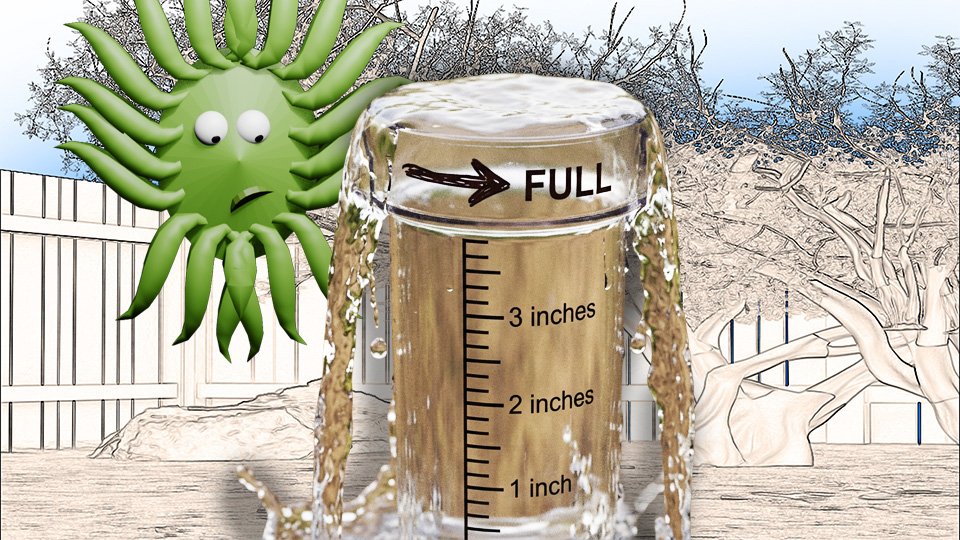
Rain Gauges: The Cheapest Tool That Tells You the Most

A rain gauge costs fifteen dollars and tells you the one thing every watering decision in your garden depends on. Here’s why it’s the most underrated tool in the garden.

The rain gauge is not exciting. It does not have a motor or a blade or a telescoping handle. It is a tube with measurements on the side that you stick in the ground and check after it rains.

It is also the tool that answers the question every garden watering decision depends on: did it rain enough this week, or do I need to supplement?

Without a rain gauge, this question gets answered by weather app, by memory, by looking at the ground, and by a general sense of whether it felt like it rained. None of these are accurate. The rain gauge is.

🤔 Why You Can’t Estimate Rainfall

The amount of rain that falls during a storm is highly variable and counterintuitive. A storm that sounds impressive, that keeps you inside, that you would describe as “good rain,” may have delivered a quarter inch. A steady drizzle that barely seemed worth a coat may have delivered three-quarters of an inch over several hours.

The weather app is not your garden. It reports precipitation at the nearest weather station, which may be several miles away in a different microclimate. Localized storm patterns mean your garden and the weather station can receive meaningfully different amounts.

Garden plants need approximately one inch per week. Knowing whether this week’s rain delivered that inch, or half of it, or twice it, is the difference between watering correctly and either over or under supplementing.

📏 How to Use One

Place the gauge in an open area of the garden — away from trees, overhangs, or anything that would block or funnel rain into it artificially. After each rain event, read the measurement. Reset it to zero.

Track weekly totals. If the week’s rainfall reaches one inch, you don’t need to irrigate. If it reaches half an inch, supplement with half an inch from the hose. If it reaches nothing, your plants have been depending on stored soil moisture and need attention.

The math is simple and the information is completely reliable. It’s a tube with numbers on it that has been solving this problem since the seventeenth century.

🔧 Types of Rain Gauges

  • Standard tube gauge. A cylinder mounted on a stake, open at the top, with measurement markings. Read it manually after rain. Costs upwards of fifteen dollars. Completely accurate.
  • Digital gauge with wireless display. Collects data at the garden location and transmits to an indoor display. Some record totals and provide weekly summaries. More convenient for those who don’t want to walk to the garden to check.
  • Tipping bucket gauge. An automated gauge that counts incremental rainfall amounts electronically. More sophisticated than most home gardeners need, but accurate and low-maintenance.

For most home gardeners, the fifteen-dollar tube gauge is all that’s needed. Its simplicity is its advantage. Nothing to charge, nothing to calibrate, nothing to go wrong.

🛒 Worth Buying

As an Amazon affiliate, I earn with each qualifying purchase. Thank you for support TangleWicket.

✨ The Short Version

A rain gauge costs ten dollars and answers the one question every watering decision depends on. It is the most underrated tool in the garden by a significant margin.

Put it in an open spot. Check it after rain. Add up the week. Water only what nature didn’t provide.

Tom Brownthumb estimated rainfall by feel for three seasons. His estimates were wrong approximately seventy percent of the time. The fifteen-dollar tube fixed this.

📚 Related Reads


TangleWicket is part of the WhistleBump group – find the rest of the family at WhistleBump.com.

32007

©2026 John D Reinhart/Tanglewicket.com – all rights reserved
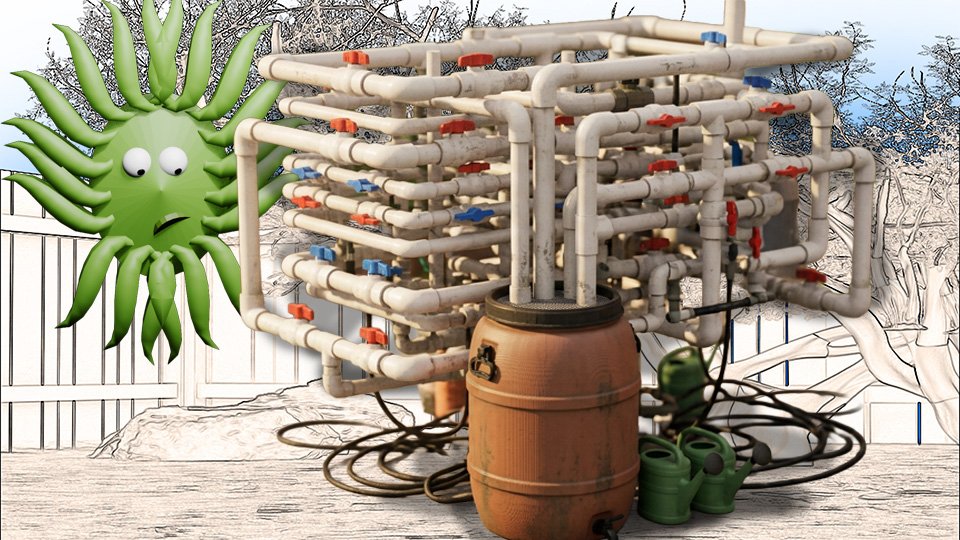
Building a Simple Rain Barrel System

A rain barrel collects free water from your roof and makes it available for your garden. Here’s how to build a simple system, what it saves, and what it can’t do.

Every time it rains, your roof collects an impressive volume of free water and sends it down the downspout, through the storm drain, and away. A rain barrel intercepts that water, stores it, and makes it available for your garden.

A basic rain barrel system is not complicated. It is one barrel, one downspout diverter, and one spigot. It takes an afternoon to set up, costs fifty to a hundred dollars in materials, and produces free garden water for the life of the barrel.

Here’s how to build a simple system — what you need, how it works, how much water you can realistically collect, and the few limitations worth knowing about.

💧 How Much Water You Can Collect

The math is more impressive than you’d expect. One inch of rainfall on a thousand square feet of roof produces approximately 600 gallons of water. A typical house with 1500 square feet of roof area and several downspouts generates thousands of gallons of collectable water per year.

A standard 55-gallon rain barrel fills quickly. A moderate rainstorm can fill a single barrel in minutes. This is why more serious rain harvesting systems use multiple barrels linked together or larger cisterns.

For the beginner, a single 55-gallon barrel is the starting point. It won’t water your entire garden through a drought, but it handles routine supplemental watering and reduces your water bill meaningfully over a season.

🔧 The Basic System Components

  • The barrel. A 55-gallon food-grade drum is the standard. Used barrels that previously held food products (olive oil, juice, food-grade chemicals) are safe for garden water collection. Dedicated rain barrel products are also available and include all necessary hardware.
  • Downspout diverter. Installs in the downspout and redirects water into the barrel when it’s collecting, bypasses to the downspout when the barrel is full. Keeps the system from overflowing onto your foundation when the barrel capacity is reached.
  • Overflow hose. Directs overflow away from the house foundation. Even with a diverter, excess water needs a place to go that isn’t the side of your house.
  • Spigot at the base. Allows you to connect a hose or fill a watering can. Positioned at the bottom of the barrel for gravity flow.
  • Screen or mesh over the inlet. Keeps mosquitoes from breeding in the standing water and debris from entering the barrel.

🚧 Installation

Elevate the barrel on cinder blocks or a dedicated stand. Elevation increases water pressure from the spigot — a barrel sitting on the ground produces almost no pressure. Twelve to eighteen inches of elevation produces enough flow to fill a watering can easily.

Cut the downspout at the right height for your diverter. Install the diverter per its instructions. Connect the inlet hose to the barrel. Install the overflow hose. Fill the barrel’s inlet hole with mesh screen. Done.

The whole installation takes two to three hours with basic tools. No plumbing knowledge required.

🚧 What Rain Barrels Can’t Do

  • Supply adequate pressure for drip systems. Gravity-fed rain barrel pressure is low — typically less than one PSI. This is enough for a watering can or gentle hose flow but not enough to run a drip irrigation system at the pressure it requires. Drip systems need household water pressure.
  • Cover drought-level demand. One barrel is supplemental, not a complete replacement for municipal water during extended dry periods. For more significant water independence, multiple linked barrels or a larger cistern is needed.
  • Collect potable water. Rain barrel water is appropriate for gardens and lawns, not for drinking. Roof runoff collects contaminants from shingles, gutters, and atmospheric pollutants. Fine for plants, not for people.

💰 The Economics

A fifty-dollar rain barrel setup that collects 200 gallons of rain per month during the growing season saves roughly 600 gallons per season. At typical municipal water rates, that’s a modest but real saving. In areas with water restrictions or high water costs, the savings are more significant.

The real value is less the water bill and more the availability. Rain barrel water is available during hose restrictions and dry spells, from a source that replenishes itself without billing you.

🛒 What to Buy

  • Complete rain barrel kit — Includes barrel, diverter, overflow, spigot, and instructions. The lowest-friction way to start a rain collection system.
  • Downspout diverter (standalone) — For adding to an existing barrel setup or replacing a failed diverter.
  • Rain barrel stand — Elevates the barrel for improved pressure. More stable than cinder blocks and purpose-built for the load.
  • Linking kit for multiple barrels — For connecting two or more barrels to increase storage capacity. The natural next step once the single-barrel system is working.

As an Amazon affiliate, I earn from each qualifying purchase. Thank you for supporting TangleWicket.

✨ The Short Version

A rain barrel collects free water from your roof and stores it for garden use. It takes an afternoon to install, costs fifty to a hundred dollars, and produces supplemental water for the life of the barrel.

One barrel is the starting point. Elevation improves pressure. Overflow management protects the foundation. Screen keeps mosquitoes out.

Tom Brownthumb installed a rain barrel and then watched it fill during the first storm with unreasonable satisfaction. Free water. Every rainstorm. It remains one of his better afternoons.

📚 Related Reads


TangleWicket is part of the WhistleBump group – find the rest of the family at WhistleBump.com.

32010

©2026 John D Reinhart/Tanglewicket.com – all rights reserved
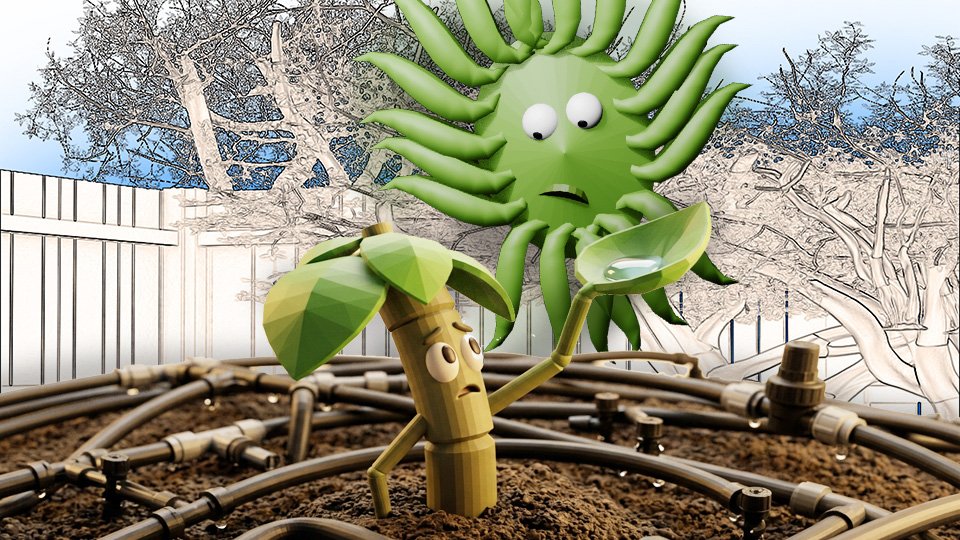
Drip Irrigation: What It Is and Why It’s Worth Considering

Drip irrigation sounds complicated and expensive. It isn’t either of those things. Here’s what it does, why it works better than other methods, and how to set up a basic system.

Drip irrigation sounds like something a large commercial farm has. Tubes and emitters and pressure regulators and backflow preventers and a diagram that takes three readings to understand.

A basic home garden drip system is considerably less intimidating. It’s a tube, some emitters, a timer, and a faucet connection. It delivers water directly to the root zone of each plant, at a rate the soil can absorb, without wetting the foliage or wasting water to evaporation.

Here’s the logic behind why drip irrigation works better than most alternatives — and what a simple beginner-appropriate system looks like.

💧 Why Drip Works Better

  • Water goes where roots are. A drip emitter delivers water at soil level, directly into the root zone of the plant it serves. Overhead sprinklers wet the entire bed surface, including the paths between plants and the foliage above. Drip is precise.
  • No evaporation from leaves. Water that goes directly to soil doesn’t evaporate from leaf surfaces or wet foliage that invites disease. Drip systems reduce fungal problems compared to overhead watering.
  • Water delivered slowly. A drip emitter releases water at a rate the soil can absorb — typically one to two gallons per hour. Slow delivery means deep penetration rather than surface runoff. Deep penetration means roots follow water downward, producing stronger plants.
  • Works with a timer. A hose timer attached to the faucet and connected to a drip system waters the garden automatically at the right time and for the right duration. Your morning garden watering happens whether you’re there or not.

🔧 The Basic Components

  • Main supply line. A half-inch poly tube that runs from the faucet connection along the length of the bed.
  • Emitters. Small devices inserted into the main line or attached via smaller tubing that release water at a controlled rate. Most home garden emitters release one or two gallons per hour.
  • Faucet timer. Connects between the faucet and the supply line. Programs watering duration and frequency. The component that makes the whole system automatic.
  • Pressure regulator. Reduces water pressure to the range drip systems require. Many kits include one. Without it, excessive pressure can blow emitters out of the line.
  • Filter. Prevents sediment from clogging emitters. Small and inexpensive. Usually included in starter kits.

🗓️ How to Size the System

For a beginner, a starter kit designed for a specific bed size is the right approach. Kits include all necessary components and instructions for a particular square footage. Installing a kit for a 4×8 raised bed takes about an hour and no plumbing knowledge.

For larger gardens: zone the system. Each raised bed or garden section gets its own supply line from a manifold at the faucet. Zones can be set to water at different times and for different durations based on the needs of what’s planted there.

🪞 Soaker Hoses vs. Drip Emitters

Both deliver water to the root zone without overhead watering. The difference is distribution:

Soaker hoses seep water along their entire length. Good for rows and dense plantings where you want even distribution across a bed.

Drip emitters deliver water to specific points. Good for widely spaced plants like tomatoes or peppers where you want water at each plant’s root zone rather than distributed across the path between them.

Many gardeners use both: drip emitters for larger, spaced plants and soaker hoses for densely planted beds.

🛒 Getting Started

  • Drip irrigation starter kit — Everything needed for a single raised bed. Includes supply line, emitters, connectors, and instructions. The lowest-friction entry point.
  • Digital hose timer — Programs watering schedule and duration. The component that makes the system genuinely automatic.
  • Drip emitters assortment — For customizing emitter flow rates at individual plants. Different plants have different water requirements.
  • Pressure regulator for drip systems — Protects emitters from high household water pressure. A small component worth having.

As an Amazon affiliate, I earn from qualifying purchases. Thank you for supporting TangleWicket.

✨ The Short Version

Drip irrigation delivers water directly to roots, reduces evaporation and disease, works on a timer, and requires no attention once installed. It is not complicated to set up and pays for itself quickly in water savings and healthier plants.

Start with a kit for one bed. Learn the system. Expand from there.

Tom Brownthumb installed drip irrigation after his fourth consecutive summer of forgetting to water. His garden has not been thirsty since.

📚 Related Reads


TangleWicket is part of the WhistleBump group – find the rest of the family at WhistleBump.com.

32004

©2026 John D Reinhart/Tanglewicket.com – all rights reserved
How to Water Raised Beds vs. Ground Gardens

Raised beds and ground gardens water differently, drain differently, and dry out at completely different rates. Here’s how to adjust your watering for whichever you have.

Raised beds and in-ground gardens are both gardens. They are not the same garden when it comes to watering. The differences are significant enough that treating them identically produces either overwatered ground beds or parched raised beds.

Here’s what’s actually different between them — and how to adjust your watering accordingly.

🚜 Raised Beds: Why They Dry Out Faster

A raised bed is elevated above the surrounding ground, which means drainage happens on all sides as well as the bottom. Water moves outward through the walls as well as downward. The soil in a raised bed also warms faster than ground soil, which increases evaporation.

The result: raised beds typically need watering more frequently than in-ground gardens in comparable conditions. In hot weather, a raised bed may need water every day or two. An in-ground garden in the same conditions might go three to four days.

The finger test is especially important for raised beds. Their faster drying rate means they can go from adequate moisture to dangerously dry faster than in-ground beds, particularly for shallow-rooted crops.

🌿 In-Ground Gardens: Why They Hold Moisture Longer

In-ground soil connects to the broader soil moisture system of your yard and the water table below. It has more thermal mass and warms more slowly. It doesn’t drain from the sides.

The result: in-ground gardens retain moisture longer and are more buffered against short dry spells. The deeper soil profile also allows plant roots to follow moisture downward, accessing water that raised bed plants cannot.

The risk: in-ground gardens in heavy clay soil can become waterlogged after significant rain. Standing water in garden beds suffocates roots. Beds in low spots that collect water need drainage improvement or elevated planting solutions.

💧 Adjusting Your Watering

  • Raised beds: water more frequently. Check daily in hot weather. Consider drip irrigation or soaker hoses on a timer to maintain consistent moisture without constant monitoring. Mulching the surface of raised beds is especially valuable — it dramatically slows moisture loss from the elevated, fast-drying soil.
  • In-ground: water less frequently but more deeply when you do. One thorough watering that penetrates 8-12 inches is better than daily light applications. Allow the surface to dry between waterings — the moisture deeper in the profile is still available to established roots.

🪜 Soil Mix Matters for Raised Beds

The soil mix in a raised bed affects its water retention significantly. A standard raised bed mix of topsoil, compost, and some coarse material drains well but dries faster than garden soil. Adding additional compost increases water retention.

Coconut coir is sometimes added to raised bed mixes specifically for water retention. It holds moisture well without becoming waterlogged and releases it slowly to roots. Worth considering for raised beds in hot, dry climates or for gardeners who can’t water frequently.

🛒 Watering Tools for Each

As an Amazon affiliate, I earn from each qualifying purchase. Thank you for supporting TangleWicket.

✨ The Short Version

Raised beds dry faster. Check them more often and water more frequently. Mulch them to slow moisture loss. Consider drip irrigation or soaker hoses on a timer.

In-ground gardens hold moisture longer. Water deeply and infrequently. Watch for drainage problems in low spots.

Tom Brownthumb treated his raised bed and in-ground bed identically. One was always thirsty and one was always soggy. Now he checks both separately.

📚 Related Reads


TangleWicket is part of the WhistleBump group – find the rest of the family at WhistleBump.com.

32006

©2026 John D Reinhart/Tanglewicket.com – all rights reserved

Why Your Potted Plants Need More Water Than You Think

Container plants dry out faster, drain differently, and need more water than anything else in your garden. Here’s why — and how to keep them from suffering for it.

Container gardening is convenient, flexible, and excellent for small spaces. It is also, from a watering perspective, the most demanding situation in the garden.

A potted plant lives in a finite volume of soil with no connection to the broader moisture reserves of the earth below it. When that soil dries out, there is no deeper reservoir for roots to reach toward. The plant is entirely dependent on what you provide, and what you need to provide is more than you’d think.

🤔 Why Containers Dry Out Faster

  • Exposure on all sides. A container has soil exposed to air on every surface — top, sides, and (through drainage holes) bottom. In-ground soil is insulated by the surrounding earth. Container soil is surrounded by air, which dries it from every direction simultaneously.
  • Smaller thermal mass. A container heats up faster than ground soil in sunlight and cools faster at night. Temperature fluctuation increases evaporation rate and stresses roots.
  • Limited soil volume. A twelve-inch pot holds a finite amount of water. A tomato plant in a twelve-inch pot has the same water demands as a tomato plant in the ground but a fraction of the soil reservoir. The plant can exhaust the available moisture in a day in hot weather.
  • Required drainage. Drainage holes — essential for preventing root rot — also allow water to exit the container when you water. This is correct behavior. But it means watering until water flows freely from the drainage holes, not stopping when the surface looks wet.

💧 How to Water Containers Correctly

Water until it drains. Apply water slowly until it flows from the drainage holes. This ensures the entire soil volume is moistened, not just the top few inches. Shallow watering that stops at the surface leaves the lower root zone dry, where it matters most.

Check daily in hot weather. In summer heat, small containers may need watering twice a day. Larger containers typically need daily water. The finger test applies: two inches into the soil, if dry, water.

Elevate containers off the ground. Containers sitting flat on a surface can’t drain properly. Pot feet or a saucer lifted slightly allows drainage and prevents the roots from sitting in standing water.

🪜 Choosing the Right Container Size

Container size directly affects watering frequency. A small pot dries out fast. A large pot holds more moisture and requires less frequent watering for the same plant.

For tomatoes and peppers: five gallon minimum, ten or fifteen gallon is better. These are large plants with large water demands. Undersized containers are a common reason container tomatoes fail.

For herbs: six to eight inch pots work for individual herbs. A mixed herb container needs twelve inches or larger.

For most vegetables: bigger is better. The extra soil volume means more moisture reserve, more nutrients, and more root space. A larger container is almost always more forgiving than a smaller one.

🛡️ Self-Watering Containers

Self-watering containers have a reservoir in the base that wicks water up into the soil from below as the plant needs it. The plant draws what it needs, when it needs it. The reservoir needs refilling every few days rather than daily watering.

For container gardeners who travel, have inconsistent schedules, or grow plants that are particularly sensitive to moisture fluctuations, self-watering containers are the single most effective upgrade available.

🛒 Container Watering Essentials

  • Watering can with long spout — For directing water to the base of container plants without wetting foliage. The long spout reaches into dense plantings.
  • Self-watering planter — Reservoir base supplies consistent moisture. The solution for container plants that dry out faster than you can keep up with.
  • Moisture meter — Measures soil moisture at root depth without disturbing the soil. Particularly useful for containers where the surface dries faster than the interior.
  • Pot feet or risers — Elevate containers for proper drainage. Prevents root rot from standing water and marks you as someone who has done this before.

As an Amazon affiliate, I earn from qualifying purchases. Thank you for supporting TangleWicket.

✨ The Short Version

Container plants have no moisture reserve beyond their pot. They dry faster, drain differently, and need more water than in-ground plants. Check daily in hot weather. Water until it drains from the bottom. Use larger containers when possible.

Self-watering containers solve the problem almost entirely for anyone who can’t maintain daily checking.

Tom Brownthumb once went away for a weekend and came back to a container tomato that had strong opinions about the experience. He now has a self-watering planter.

📚 Related Reads


TangleWicket is part of the WhistleBump group – find the rest of the family at WhistleBump.com.

32009

©2026 John D Reinhart/Tanglewicket.com – all rights reserved

Soaker Hoses: The Lazy Gardener’s Best Friend

A soaker hose does the right thing automatically: slow, deep, root-level watering with no evaporation and no wet foliage. Here’s why it’s the most efficient watering tool you can buy.

The soaker hose is a porous rubber or recycled material hose that seeps water slowly along its entire length when connected to a faucet. It lies on or just below the soil surface, in the bed, near the plants.

It does not require monitoring. It does not produce runoff. It does not wet foliage. It delivers water at a rate the soil can absorb, directly into the root zone, for as long as you leave it running.

It is, in other words, exactly what someone would design if they sat down and thought carefully about the ideal way to water a garden. The fact that it’s also inexpensive is a bonus.

✅ Why Soaker Hoses Work So Well

  • Root-level delivery. Water seeps from the hose directly into the soil. None of it goes on the foliage or into the air between the hose and the plant.
  • Slow application rate. A soaker hose delivers approximately one inch of water per hour to the surrounding soil when the faucet is open at about a quarter turn. The soil absorbs this rate without runoff, ensuring that water penetrates deeply rather than pooling and evaporating.
  • No evaporation from spray. Overhead sprinklers lose a significant portion of their water to evaporation before it reaches the soil. A soaker hose loses almost none.
  • Dry foliage. Plants watered by soaker hose have consistently drier foliage than those watered overhead. Dry foliage means less fungal disease. This is particularly significant for tomatoes, cucumbers, squash, and other disease-prone vegetables.

🗓️ How to Set One Up

Lay the soaker hose through the bed, weaving between plants so it runs near the base of each one. Connect the end to a regular garden hose or directly to a faucet. Cap the far end with the plug that comes with the hose.

Test at low pressure — a quarter turn of the faucet is usually sufficient. You should see moisture seeping from the hose surface along its length. Too much pressure and it sprays; too little and only sections work. Adjust until you see even seeping.

For best results, cover with mulch. A layer of mulch over the soaker hose prevents the hose itself from drying out in the sun (which degrades it faster) and reduces the evaporation from the soil surface near the hose. The combination of soaker hose plus mulch is the most efficient watering setup available to a home gardener.

🕰️ Add a Timer

A soaker hose connected to a hose timer is as close to a hands-off automatic watering system as you can get without installing full drip irrigation. Set the timer to run for 30-45 minutes in the morning. The garden waters itself. You do other things.

The math: 30-45 minutes of soaker hose time at appropriate pressure delivers approximately half to three-quarters of an inch of water to the surrounding soil. Three to four sessions per week covers the one-inch-per-week requirement without any further thought.

🔍 Soaker Hose vs. Drip Irrigation

  • Soaker hoses distribute water evenly along their entire length. Better for closely spaced plants and dense plantings where you want moisture across the bed.
  • Drip emitters deliver water to specific points. Better for widely spaced plants like tomatoes where you want concentrated delivery at each root zone.

Both are effective. Many gardeners use soaker hoses for densely planted beds and drip emitters for larger, spaced plants. Neither is wrong.

🛒 What to Buy

As an Amazon affiliate, I earn from each qualifying purchase. Thank you for supporting TangleWicket.

✨ The Short Version

A soaker hose delivers water slowly, deeply, and at root level, with no foliage wetting, minimal evaporation, and consistent coverage. Add a timer and the watering problem is largely solved.

It is unglamorous, inexpensive, and extremely effective. The lazy gardener’s best friend in the most complimentary possible sense.

Wicket was once accidentally watered by a soaker hose. Wicket found it acceptable.

📚 Related Reads


TangleWicket is part of the WhistleBump group – find the rest of the family at WhistleBump.com.

32008

©2026 John D Reinhart/Tanglewicket.com – all rights reserved

Morning vs. Evening Watering: Does It Actually Matter?

Morning, evening, or whenever you remember: when you water your garden turns out to matter more than you’d think. Here’s the logic and the one timing mistake worth avoiding.

This sounds like the kind of gardening detail that only obsessives care about. And it would be, except that timing your watering has a real effect on plant health that is worth about thirty seconds of understanding.

The short answer: morning is best, evening is fine, midday is inefficient, and watering on wet foliage at night is the one habit genuinely worth breaking.

Here’s the reasoning behind each, so you can make an informed decision based on your schedule rather than someone’s arbitrary rule.

☀️ Why Morning is Best

  • Low evaporation. Morning temperatures are cooler and wind is typically lighter. Water applied to soil in the morning has time to soak into the root zone before midday heat increases evaporation.
  • Leaf drying time. If your watering method wets the foliage — overhead sprinkler, hose on the leaves — morning watering gives leaves the entire day to dry. Dry leaves mean reduced fungal disease risk.
  • Plant readiness. Plants take up water actively during the day for photosynthesis. Morning watering delivers moisture when the plant is ready to use it.

Morning watering is ideal. It is also, for many people with jobs and schedules and mornings that are already complicated, not always practical. This is fine.

🌙 Evening Watering

Evening watering is the second-best option and perfectly acceptable with one modification: water at the base of the plant, not overhead.

The concern with evening watering is wet foliage overnight. Water that sits on leaves in dark, cool, still conditions is an invitation for fungal problems — powdery mildew, botrytis, blight. These problems are worse in some crops (tomatoes, squash, cucumbers) than others.

Watering at soil level in the evening — with a soaker hose, drip irrigation, or a hose directed at the base of the plant — avoids the wet foliage problem entirely. The leaves stay dry. The root zone gets the water. Evening becomes a perfectly effective watering window.

🌞 Midday Watering

Midday watering loses water to evaporation at higher rates than morning or evening. It’s not damaging — the old myth that water droplets on leaves act as magnifying glasses and burn plants has been debunked. It’s simply less efficient.

If midday is when you have time to water, water at midday. An imperfectly timed watering is substantially better than no watering, and overheating from dehydration is a real problem that midday watering prevents.

🌧️ Rain Counts

Rain is watering. If it rained meaningfully — a quarter inch or more — you can skip the equivalent irrigation. A rain gauge tells you exactly how much fell so you’re not guessing.

Light sprinkles don’t count. A shower that barely wets the surface evaporates quickly and may not penetrate to the root zone at all. After light rain, check the soil with the finger test before deciding whether supplemental watering is needed.

🛒 Tools That Help With Timing

  • Hose timer — Attaches to the faucet and waters automatically at a set time. Set it for early morning and the timing problem solves itself without changing your schedule.
  • Drip irrigation timer kit — For a more complete system. Timed drip irrigation delivers morning water to the root zone automatically, efficiently, and without wetting foliage.
  • Rain gauge — Takes the guesswork out of whether last night’s rain covered the weekly inch requirement.

As an Amazon affiliate, I earn from each qualifying purchase. Thank you for supporting TangleWicket.

✨ The Short Version

Morning is best. Evening is fine if you water at the base. Midday is inefficient but not harmful.

The one thing worth avoiding: overhead watering that wets foliage late in the day, leaving leaves wet overnight. Everything else is a matter of preference and schedule.

Wicket waters whenever Wicket feels like it. Wicket is a plant. The rules are different.

📚 Related Reads


TangleWicket is part of the WhistleBump group – find the rest of the family at WhistleBump.com.

32003

©2026 John D Reinhart/Tanglewicket.com – all rights reserved

The Difference Between Wilting from Thirst and Wilting from Heat

A wilting plant is either thirsty or overheated — and the treatment for one is the opposite of the other. Here’s how to tell the difference before you make the wrong call.

A plant wilts and your first instinct is to water it. This is the correct instinct approximately half the time. The other half of the time, the plant is not thirsty. It’s hot.

Heat wilting and thirst wilting look nearly identical. Both produce drooping leaves, a generally defeated appearance, and a plant that is clearly not having its best day. Treating heat wilting with water isn’t harmful, but understanding the difference helps you make better decisions and stops you from panicking over a plant that is fine.

🌡️ Heat Wilting: What It Is

On hot days, plants lose water through their leaves faster than their roots can replace it. This is a normal physiological response, not a crisis. The plant wilts to reduce its leaf surface area exposed to sun and heat, which reduces the rate of water loss.

The key diagnostic: heat wilting typically happens in the hottest part of the day — midday and early afternoon — and reverses on its own in the evening when temperatures drop. A plant that looks terrible at 2pm and perky by 7pm is heat wilting, not thirsty.

What to do: check the soil. If it’s moist, wait. The plant is managing a temporary water deficit caused by heat, not a soil moisture deficit. It will recover without intervention.

💧 Thirst Wilting: What It Is

Thirst wilting happens when soil moisture is genuinely insufficient for the plant’s needs. The plant cannot take up enough water through its roots to maintain cell turgor pressure (turgor pressure: the internal water pressure that keeps plant cells firm and upright — like air in a balloon). Leaves droop.

The key diagnostic: check the soil. If it’s dry two inches down, the plant is thirsty. Thirst wilting doesn’t recover on its own in the evening — the plant stays wilted until it receives water, regardless of temperature.

What to do: water deeply at the base of the plant. Recovery should be visible within a few hours for most plants. If the plant has been severely stressed for an extended period, recovery may take a day.

🔍 The Diagnostic Checklist

  • Time of day. Midday wilting that recovers by evening: likely heat. Wilting that persists into cooler parts of the day: likely thirst.
  • Check the soil. Moist soil and wilting: heat or overwatering. Dry soil and wilting: thirst. This is the definitive test.
  • Check multiple plants. If all plants of the same type are wilting at the same time on a hot day: heat. If one plant is wilting while others are fine: possible root damage, disease, or a localized drainage problem.

🌟 Preventing Both

For heat wilting: mulch reduces soil temperature and soil moisture loss, which reduces the intensity of the water deficit that triggers heat wilting. Shade cloth over vulnerable plants during heat waves provides direct relief. Watering deeply in the morning gives the plant maximum soil moisture reserves going into a hot day.

For thirst wilting: consistent watering schedule based on soil moisture checks, deep watering that reaches the root zone, and mulch to reduce evaporation between watering sessions.

🛒 Tools Worth Having

  • Shade cloth for heat protection — Provides 30-50% shade reduction during heat waves. Reusable and lightweight.
  • Moisture meter — Removes all ambiguity from the soil moisture question. Insert, read, decide.
  • Garden mulch — Reduces soil temperature and moisture evaporation simultaneously. The passive prevention tool for both types of wilting.

As an Amazon affiliate, I earn from each qualifying purchase. Thank you for supporting TangleWicket.

✨ The Short Version

Heat wilting happens in hot weather and recovers in the evening without watering. Thirst wilting persists until water is delivered.

Check the soil, check the time, check whether the plant recovers on its own. These three things tell you everything you need to know.

Tom Brownthumb once watered a heat-wilted tomato plant four times in one afternoon. The plant recovered at 7pm regardless. The lesson cost several gallons of water.

📚 Related Reads


TangleWicket is part of the WhistleBump group – find the rest of the family at WhistleBump.com.

32005

©2026 John D Reinhart/Tanglewicket.com – all rights reserved
How Much Water Does a Garden Actually Need?

Water is the variable that makes or breaks a garden. Too little and things die of thirst. Too much and they drown in comfort. Here’s the whole picture on how much, how often, and why.

Water is the thing beginners worry about most and understand least. The questions are reasonable: How much is enough? How often? How do I know if I’ve done it right? Does rain count? What if I forget?

The answers are less complicated than the anxiety surrounding them, but they’re also more nuanced than “water every day” or “water when dry,” which are the two most common pieces of advice given and the two most likely to produce either a drowned garden or a parched one.

Here’s the complete picture on garden watering — the principles, the variables, the methods, and the single most reliable way to know whether your plants actually need water.

🌧️ The One-Inch Rule

Most vegetables need approximately one inch of water per week, delivered either by rain or irrigation. This is the baseline. Not a strict prescription, but the starting point for almost every garden watering conversation.

Why one inch: one inch of water applied to soil penetrates to roughly six to eight inches of depth, which is where most vegetable root systems are actively working. Shallow watering — a brief daily sprinkle — keeps only the top inch of soil moist, which trains roots to stay near the surface. Surface roots are vulnerable to heat, drought, and competition. Deep watering encourages roots to follow the moisture downward, producing more resilient plants.

One inch per week sounds precise. In practice, it’s a useful mental benchmark. More in hot weather, during fruiting and flowering, or for plants in containers. Less in cool, cloudy weather when plants are dormant or slow-growing.

🤔 The Variables That Change Everything

  • Soil type. Sandy soil drains fast and needs more frequent watering. Clay soil holds water longer but can become waterlogged. Loamy soil with good organic matter content retains moisture well without drowning roots. Adding compost improves any soil’s water management.
  • Weather. Hot and windy days increase evaporation dramatically. A garden that needs water every three days in mild weather may need it every day in a heat wave. Check the soil, not the calendar.
  • Plant stage. Seedlings need more frequent, lighter watering than established plants. Fruiting and flowering plants need more water than plants in vegetative growth. Mature plants with deep root systems tolerate dry spells better than young ones.
  • Mulch. A two to three inch layer of mulch around plants dramatically reduces evaporation from the soil surface. A mulched garden needs significantly less watering than an unmulched one. Mulch is the easiest water conservation step available.

🔍 The Finger Test

The most reliable watering guide is not a schedule or a formula. It’s your index finger.

Push it two inches into the soil near the plant. If the soil feels moist at that depth, wait. If it feels dry, water. This takes three seconds and is more accurate than any other method, because it tells you what’s actually happening in the root zone rather than what the weather app thinks should be happening.

The finger test defeats both overwatering and underwatering because it measures actual soil moisture rather than elapsed time since last watering. A plant watered two days ago may still have adequate moisture. A plant watered yesterday in hot wind may not. The finger knows.

💧 How to Water Well

Where water goes matters as much as how much. Watering at the base of the plant — at soil level, directed at the root zone — is more efficient than overhead watering that wets the leaves.

Wet leaves invite disease. Fungal problems — mildew, blight, botrytis — thrive in the damp conditions created by wet foliage. Watering at the base keeps leaves dry and reduces disease pressure significantly.

Water slowly and deeply. A slow, steady delivery allows water to penetrate rather than run off. Overhead sprinklers are fast but inefficient — a significant portion of the water evaporates before it reaches roots. Drip irrigation and soaker hoses deliver water directly to the root zone at a rate the soil can absorb.

🌡️ When to Water

Morning is the ideal time. Soil absorbs water before midday heat increases evaporation. Any water that reaches the leaves has time to dry before evening, reducing fungal risk.

Evening watering is the second choice — better than midday when evaporation is highest, but water left on leaves overnight encourages disease.

Midday watering is inefficient due to evaporation but not harmful. The myth that midday watering scorches leaves through a magnifying-glass effect has been debunked. It’s just wasteful, not dangerous.

🛒 The Watering Kit Worth Having

  • Adjustable garden hose nozzle — Multiple spray patterns from gentle mist to strong stream. The tool that handles every watering situation in one.
  • Watering can with rose head — For seedlings and containers. The rose breaks water into a gentle shower that doesn’t disturb soil or young plants.
  • Rain gauge — Measures actual rainfall so you know whether nature handled the week’s inch or whether you need to supplement. The cheapest data point in the garden.
  • Soaker hose — Delivers water directly to the root zone at a slow, steady rate. The most efficient watering method for garden beds.
  • Garden mulch — Reduces watering frequency by retaining soil moisture. The passive water conservation tool that keeps working while you’re doing other things.

As an Amazon affiliate, I earn from each qualifying purchase. Thank you for supporting TangleWicket.

✨ The Short Version

One inch per week, delivered deeply and at the base of the plant, in morning when possible. Adjust for weather, soil type, and plant stage. Check with your finger before watering rather than following a fixed schedule.

Mulch reduces how often you need to do any of this. Drip irrigation and soaker hoses make deep, efficient watering almost automatic.

Tom Brownthumb watered on a schedule for two seasons. His tomatoes were either drowning or parched depending on the week. The finger test changed everything.

📚 Related Reads


TangleWicket is part of the WhistleBump group – find the rest of the family at WhistleBump.com.

32001

©2026 John D Reinhart/Tanglewicket.com – all rights reserved

Why Overwatering Kills More Plants Than Underwatering

Overwatering is the most common way beginners kill plants — and the cruelest, because it looks like care. Here’s how it works, why it’s so easy to do, and how to stop doing it.

The instinct is kind. The plant looks a little tired, a little droopy, a little less vibrant than it did yesterday. So you water it. You’re helping. You’re being attentive. You’re doing what gardeners do.

And then you do it again the next day because it still looks a little tired. And the day after that.

Here’s the thing about a droopy plant: it might be thirsty. Or it might be drowning. The symptoms are almost identical, and watering a drowning plant is not helping it.

🤔 What Overwatering Actually Does

Plants need water. They also need oxygen. Roots absorb both from the soil — water through direct uptake, oxygen from air pockets in the soil structure. Healthy soil has both: moisture in the pore spaces and air in the gaps between soil particles.

Overwatering fills those air pockets with water. Roots that sit in saturated soil cannot access oxygen. Without oxygen, they begin to suffocate and die. Dead roots cannot take up water, which means the plant wilts even though it’s sitting in abundant moisture. More watering makes the problem worse, not better.

This is the overwatering trap: the plant wilts, you water, the roots die further, the plant wilts more, you water more. It ends with a dead plant and a confused gardener who watered faithfully every day.

🌱 Root Rot

Chronically overwatered roots develop root rot, a fungal condition that turns healthy white roots brown and mushy. Root rot is difficult to reverse once established and fatal to plants that aren’t caught early.

The signs of root rot in the plant: wilting despite moist soil, yellowing leaves that drop without going crispy, stems that look soft at the base, a plant that simply declines steadily despite apparent care.

The diagnosis: pull the plant (or a portion of it) from the soil and examine the roots. Healthy roots are firm and white or tan. Rotted roots are dark brown or black and soft, sometimes with an unpleasant smell.

🔍 How to Tell Overwatering from Underwatering

Both cause wilting. The distinction comes from the soil.

  • Wilting in dry soil: underwatering. Water deeply and the plant should recover within hours.
  • Wilting in wet or moist soil: overwatering. Stop watering, improve drainage if possible, let the soil dry out before resuming.

The finger test is the diagnostic tool. Push two fingers two inches into the soil. Dry means water. Moist means wait. Saturated means you’ve been overwatering and the plant needs the opposite of more water.

🛡️ Prevention

  • Water on a soil-moisture schedule, not a calendar schedule. Check before watering rather than watering on a fixed routine regardless of conditions.
  • Ensure good drainage. Raised beds and containers with drainage holes allow excess water to escape. Garden beds in low spots that collect water need amendment or elevated planting.
  • Choose the right soil. Heavy clay soil holds water too long and should be amended with compost and coarse material to improve drainage. Soil that drains well is harder to overwater.
  • Water deeply and infrequently. One deep watering that reaches the root zone is better than daily light watering that keeps the surface constantly moist. Deep watering between dry periods allows the soil to partially dry out, which is what roots need.

🛒 Tools That Help

  • Moisture meter — Measures actual soil moisture level without guessing. Particularly useful for containers and indoor plants where drainage and evaporation behave differently than outdoor beds.
  • Self-watering planter with reservoir — Waters from below as needed. Eliminates overwatering as a possibility for container plants.
  • Perlite for improving drainage — Mixed into potting soil or heavy garden soil, perlite increases drainage and prevents waterlogging.

As an Amazon affiliate, I earn from each qualifying purchase. Thank you for supporting TangleWicket.

✨ The Short Version

Overwatering kills plants by suffocating their roots. It looks like kindness and produces a wilted plant that needs the opposite of what you’re giving it.

Check the soil before watering. Water deeply and infrequently. Ensure drainage.

Tom Brownthumb once watered a plant so thoroughly and so often that it departed this world extremely well-hydrated. He checks the soil now.

📚 Related Reads


TangleWicket is part of the WhistleBump group – find the rest of the family at WhistleBump.com.

32002

©2026 John D Reinhart/Tanglewicket.com – all rights reserved